Building a RaspberryPi Safex Node using SafexNinja Docker
In this comprehensive guide, we explain how to build a RaspberryPi Safex Node using SafexNinja Docker.

Here we will show the building and configuring of a RaspberryPi (RPi) 4 to run as an always-on, low-power, low-cost Safex Node. This article contains instructions for both novice and advanced users.
The benefits of running your own node include:
- Support and enhance the decentralisation of the Safex network;
- A local node on your home network allows you to connect your Safex wallet:
- For faster wallet syncing; and
- Offers improved privacy/security, as you aren’t sending transactions from your wallet across the internet to a third-party node.
To give you an idea of the differences in wallet sync speed, we did a Hard Rescan of a wallet address whilst connected to various different Safex nodes around the world, and timed how long it took for the wallet to sync to the current top block. Bear in mind, each user will have a slightly different sync speed experience, depending on where they are in the world, their internet speeds, and to which node they connect their wallet. For this test, the wallet was being used in Tasmania, Australia (pretty much the most remote point to anywhere else in the world :D).
| Sync Time (minutes) | Node Location |
|---|---|
| 5 | Local Node on same PC running TWM Wallet |
| 9 | Sydney SafexNinja rpc node (node2.safex.ninja) |
| 10 | RPi4 with USB 3.0 boot node on Home LAN |
| 14 | Silicon Valley, USA (node4.safex.ninja) |
| 19 | Paris, France (node9.safex.ninja) |
| 27 | Default Safex/TWM rpc node (rpc.safex.org) |
Another factor affecting wallet sync speed is the number of wallet connections to a node. As most people leave the wallet on the default rpc.safex.org node, it has a much higher workload, which does affect the rate at which each wallet receives block data.
This project uses a RPi4 (4Gb RAM version), and it is the recommendation of the author to use a RPi4 with at least 4 Gb RAM.
It is technically possible to use a RPi3 (or 3B). For a new setup that needs to be installed, the RPi3 is NOT recommended. But, if you have an already installed Pi3 gathering dust, then using the docker + pre-loaded blockchain database would still work ok-ish. Note: it might require some troubleshooting for novice users if it does not work. Instructions for compiling and running the Safex Node software on a RPi3 have previously been given at Safex forum. (Not Recommended)
With 4Gb of RAM, USB 3.0 speeds, and Boot From USB enabled by default*, the RPi4 looks almost purpose-built to be used as a 24/7 Safex Node while costing next to nothing to run.
* for bootloader EEPROM firmware dated Sept 3, 2020, or later. See the Check Bootloader version (RPi4 only)section below for more information.
The benefits of having a USB 3.0 port are numerous:
- USB 3.0 is faster than SD card speeds
- USB drives are much cheaper ($/Gb) than SD cards, particularly as the size goes up.
- USB 3.0 gives the ability to connect a SATA-USB 3.0 adapter and use an SSD as the boot drive. (For much faster than USB Drive read/write speeds.)
Having tested all three boot-drive options, the recommended method for the average user is a USB 3.0 Drive, 64Gb+, in a nano form factor. This will give some decent level of future-proofing for additional blockchain growth whilst keeping the hardware in a compact, low-power configuration.
Prior to actually testing all three boot methods, the author was strongly in favour of the SSD via SATA-USB 3.0 adapter due to the superior data speeds that are achievable. However, in completing the builds, it was found that the RPi4 couldn’t push sufficient power to the adapter, leading to data corruption on the SSD. The addition of a powered SATA-to-USB 3.0 adapter is required in order to use the SSD, which effectively doubles the power requirements for the complete setup. The SSD boot option was subsequently abandoned due to the additional hardware costs required to implement it.
The RPi enthusiast currently has two node software options when it comes to setting up a Safex Node:
- Compile the code from scratch on the RPi
- Use one of the RPi Docker containers provided by SafexNinja
For the competent RPi enthusiast, feel free to compile code from scratch. The author found that the build struck at an error at 95%, but after the safexd file is created, the error is inconsequential, so far as getting a working node binary.
But our focus for this article - the novice user - is to provide a simple way to get a node up and running. For that reason, we will be providing instructions for using either the rpc-node or non-rpc-node Docker containers provided by SafexNinja. An explanation of both, and which one you may prefer to use, will be provided later in the article.
IMPORTANT!
Running a Node requires you staying updated with project development. Ensure you restart the SafexNinja Docker whenever a new Safex Node container gets released.
Suppose you fail to keep your node updated. In that case, you will no longer be supporting the network, and attempts to connect your wallet via your node will result in you not being able to perform transactions at the correct block height, as your node will have been banned/blacklisted by those nodes running the correct software version.
Perform updates as soon as practicable after code updates are released by the SafexNinja team (which will be very soon after any official update by the Safex Team), and after this, save and exit from the node then restart the docker command with the newer version tag.
Let's get started!
Quick links to each section:
- Equipment List
- Prepare Safex blockchain copy
- RPi hardware assembly
- Download Raspberry Pi OS with Desktop image
- Boot Drive options
- Use BalenaEtcher to flash the OS to SD/USB/SSD
- Install PuTTY on your PC/Laptop
- Boot RPi4 for the first time - Check Bootloader version / RPi4 only
- Boot the OS for the first time
- Set Static IP Address
- Additional software installation
- Install docker Software
- Start node for the first time
- Ready the RPi4 for its final operating location
- Start Node remotely using PuTTY software
Equipment List
- RPi4 + heatsinks + case + power supply
- Choice of:
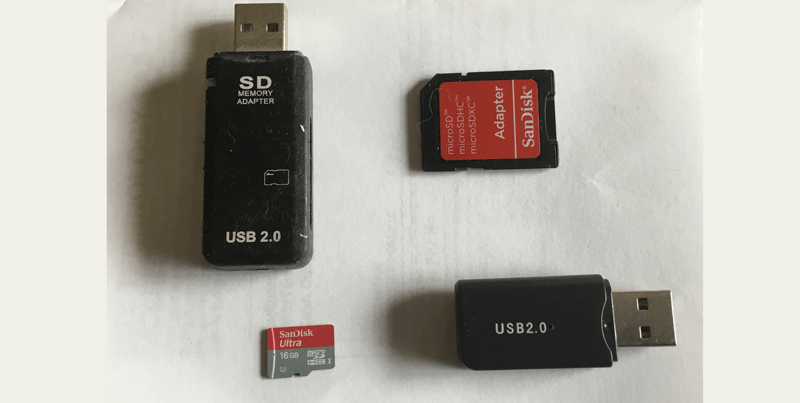
- 32Gb Micro SD Card (only using a 16Gb SD card for this article, as i don't intend to use the SD card as the boot drive - only doing it to show the process, so didn't want to splash the cash on a 32Gb card I'll never use)
- 32Gb+ USB 3.0 + Drive (preferably a nano-form factor USB, as it is less likely to be bumped loose, etc in the smaller form factor)
- 120Gb+ M.2 Sata SSD (Not an NVMe type) & a powered SATA-USB 3.0 Adapter
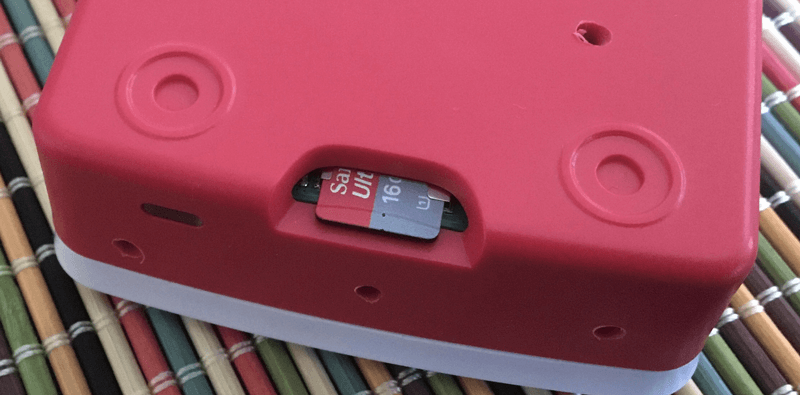
- Another USB Drive (8Gb+) containing a copy of the Safex blockchain (lmdb folder)
- HDMI Cable and micro HDMI plug adapter (the RPi4 only has micro HDMI connectors)
- Monitor with HDMI input
- Keyboard & Mouse
- Internet Connection
- Laptop/PC with:
- BalenaEtcher software (or Raspberry Pi Imager software)
- PuTTY software
Prepare Safex blockchain copy
While not absolutely essential, having a full copy of the Safex blockchain file to simply copy across to the RPi will make this project much easier. Plus, it takes the heavy workload of the actual full sync process off the RPi, which will undergo significant thermal throttling if it has to sync the entire blockchain itself.
You could simply run a PC version of the SafexNinja Docker node to get your copy of the blockchain or use one of the links below to set up a Safex node on your PC.
- Win node article link
- Mac node article link
- Linux node article link
Once your PC node is synchronised, copy the Safex lmdb folder to a USB drive in readiness for your build.
Safex blockchain folder location:
- Win - programdata/safex/lmdb
- Mac - ~/.safex/lmdb
- Linux - ~/.safex/lmdb
At the time of this article being written (October 2021), the Safex blockchain file is approximately 5.4Gb in size. It has taken approximately three years to reach that size since the blockchain launched in September 2018. With the anticipated increased use of the Safex Marketplace in the near future, the number of transactions will likely be much higher in the coming years so the blockchain could grow faster than these first three years (more data = bigger file size).
Due to the size of the blockchain file, the USB drive you plan to use to copy the blockchain across to the RPI will need to be formatted as NTFS or exFAT to accept the immense blockchain file size.
Copy the entire lmdb folder to the USB Drive.
This information is provided to ensure you select a sufficiently sized USB drive for the file transfer of the blockchain, but also to let you consider what size SD Card/USB Drive/SSD you use in the actual RPi Node for future-proofing purposes.
RPi Hardware Assembly
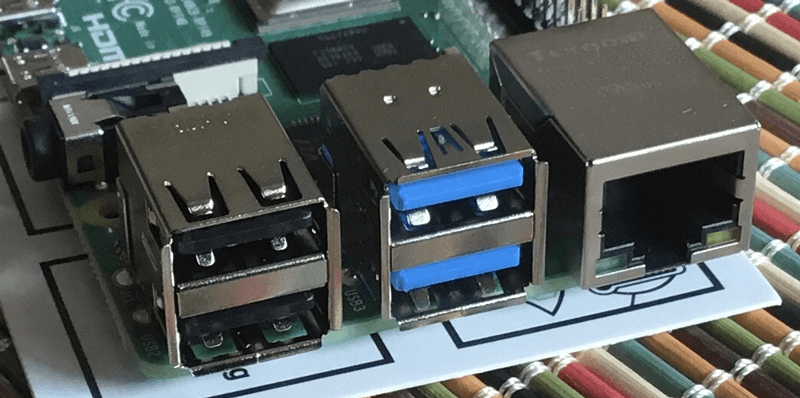
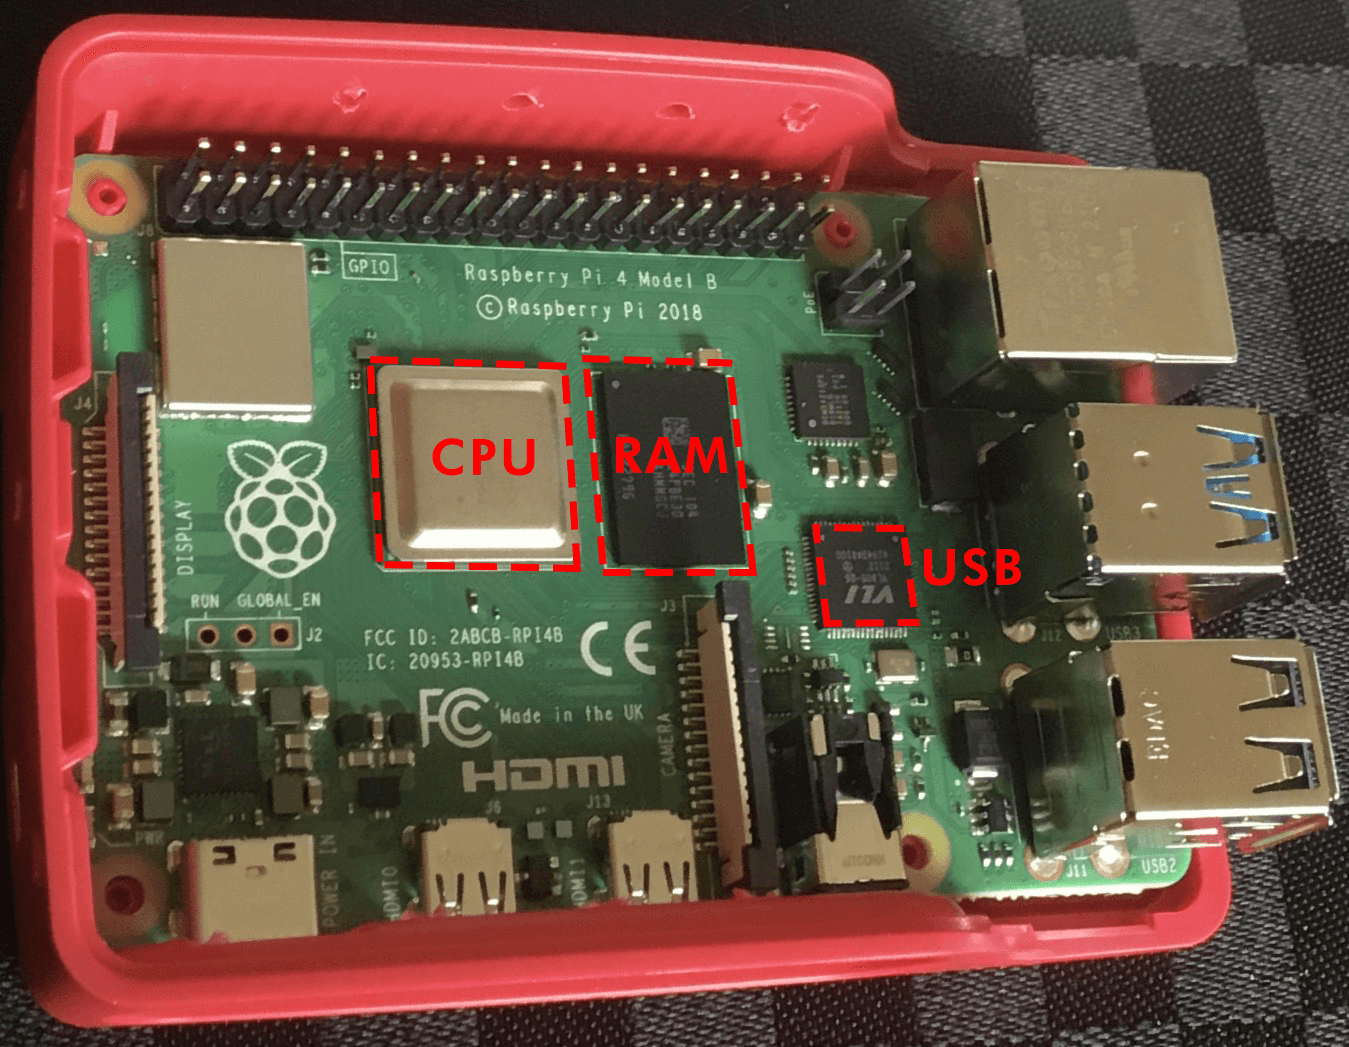
There’s not much to putting a RPi4 together. The board is all-in-one, it fits snugly into the official RPi4 case, and the power supply and other connections all plug in. The blue USB slots are the USB 3.0-speed slots; the black ones are only USB 2.0 speeds.
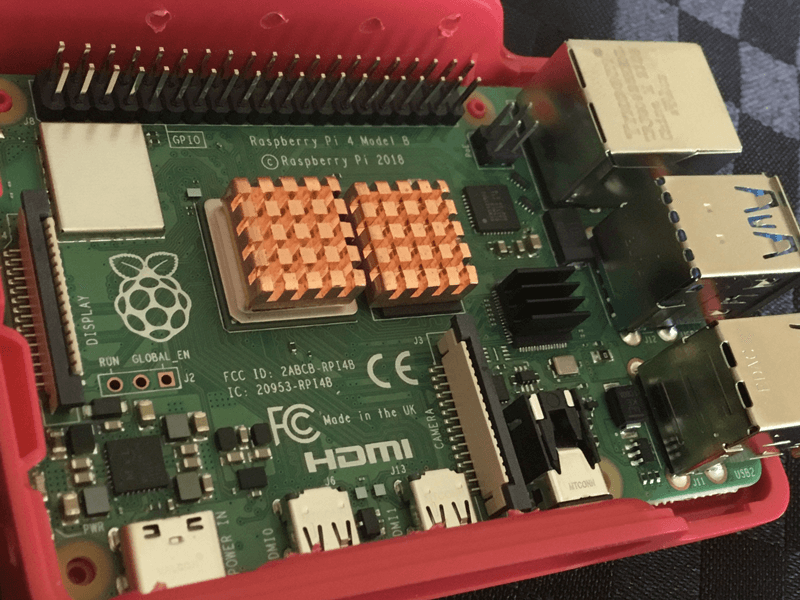
The first extra thing I recommend is adding a couple of heatsinks onto the chips on the RPi4 board. If possible, use copper heat sinks rather than aluminium (US reader = aluminium ), as the heat transfer coefficient of copper is much higher (~60%) and thus cools the chips far more efficiently. I managed to find copper heatsinks for the CPU and RAM chip, but only a leftover aluminium one for the tiny USB controller chip.
If using the USB boot/SSD via USB adapter, then a heatsink on the USB controller would be a good addition and unnecessary if using Micro SD Card.
A cautionary note on the Official RPi4 case - it traps all the heat inside, so even with heatsinks attached, the heat has no place to escape.
The next extra thing to do - add ventilation! Drill a pile of holes through the case. Remove the RPi4 from the case before adding the ventilation holes!
If you want to get really heat-conscious, add a small fan (powered off the GPIO pins), or use one of the various other RPi4 cases available, which have better ventilation options, including built-in fans.

Once you have ventilated the case and installed any heatsinks onto chips, then proceed to fit the RPi4 into the case. If using the powered SATA-USB 3.0 adapter option, you will also need to fit the SSD into the corresponding slot on the adapter (not shown).

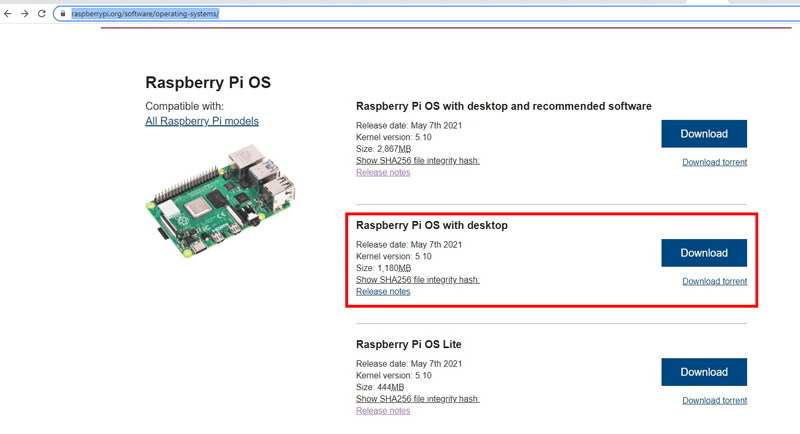
Download Raspberry Pi OS with desktop image
Open your browser on Laptop/PC and go to raspberrypi.org and download the latest release of Raspberry Pi OS with desktop.
Once the download is completed, extract the disk image from the .zip file:
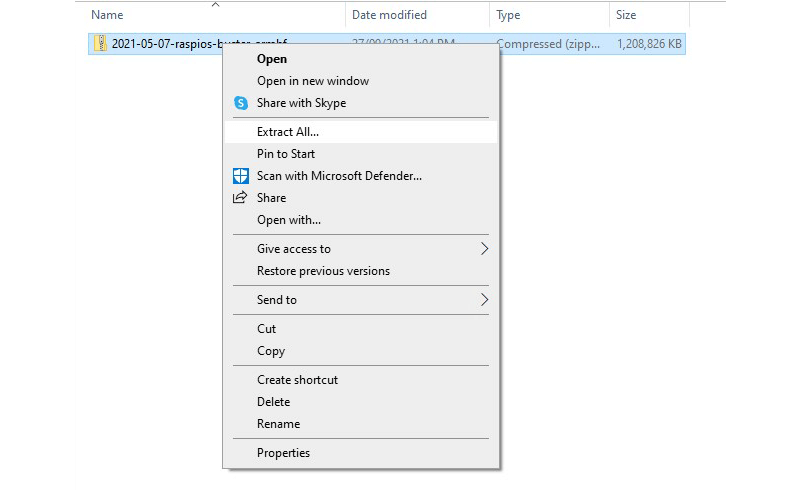
Click on the Extract All button and wait a bit:
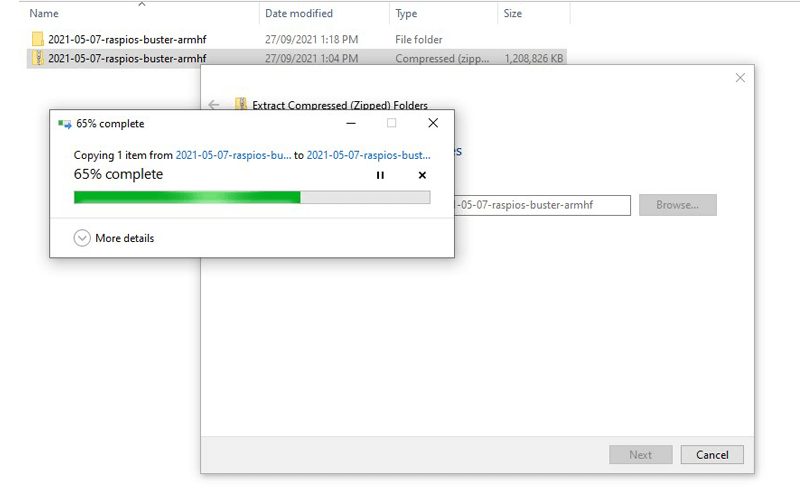
This is the result you'll see:

Boot Drive Options
Below, you will see Options A, B, and C for the various choices of boot drive for your RPi. You only need to follow the instructions for ONE of these options:
- Option A: Boot from micro SD Card (Note: bookmark link these to the instructions below)
- Option B (Recommended): Boot from USB 3.0 Drive
- Option C: Boot from SSD via powered SATA-USB 3.0 adapter
For all three options, you will be flashing your preferred boot device with the Raspberry Pi OS image, which you downloaded and then extracted in the previous step. While the instruction references BalenaEtcher software, you could also use Raspberry Pi Imager or any other image flashing software you may prefer.
Option A: Boot from micro SD Card
You are choosing to run your RPi4 from a micro SD Card.
In the next section, you will select your SD Card in BalenaEtcher when you flash the OS image.
Option B: Boot from USB 3.0 Drive
You are choosing to run your RPi4 from a USB 3.0 Drive.
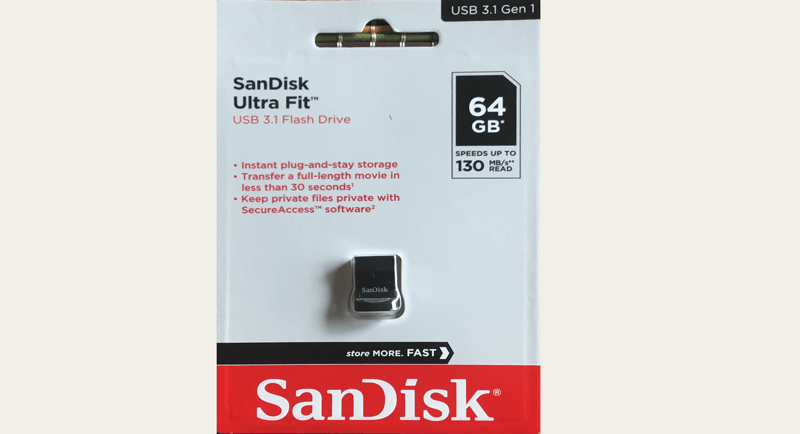
In the next section, you will select your USB Drive in BalenaEtcher when you flash the OS image.
Option C: Boot from SSD via powered SATA-USB 3.0 adapter
You are choosing to run your RPi4 from an SSD connected via a powered SATA-USB 3.0 Adapter. You will plug your SSD into the powered SATA-USB adapter, which is connected to a blue USB 3.0 port of the RPi4.
In the next section, you will select your SSD in BalenaEtcher when you flash the OS image.
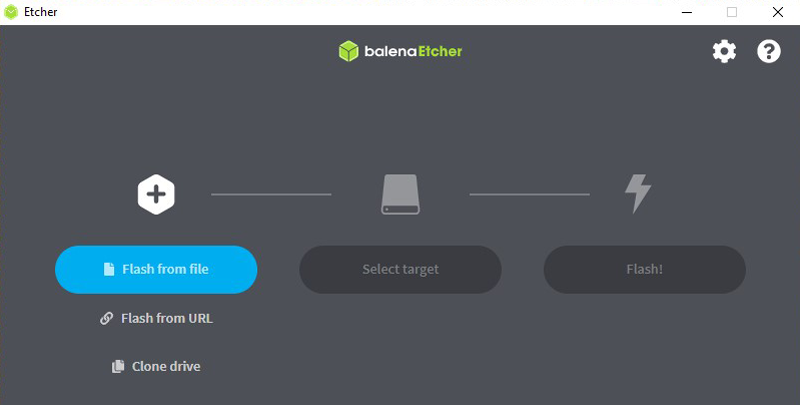
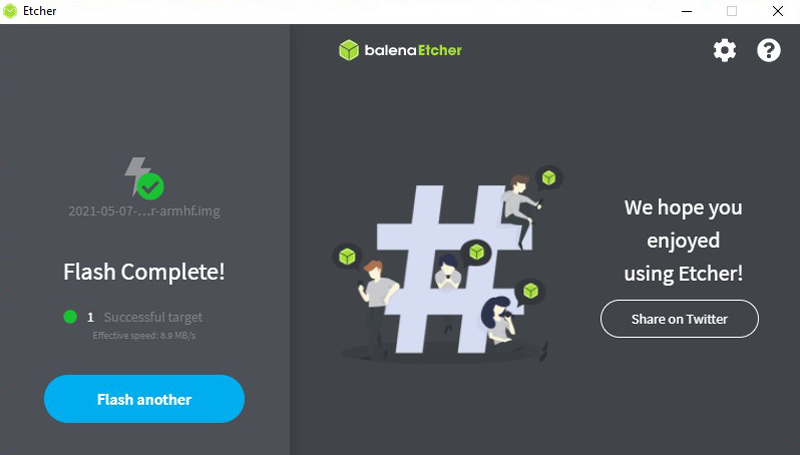
Use BalenaEtcher to flash the OS to SD/USB/SSD
Insert your chosen boot device into your laptop and run BalenaEtcher.
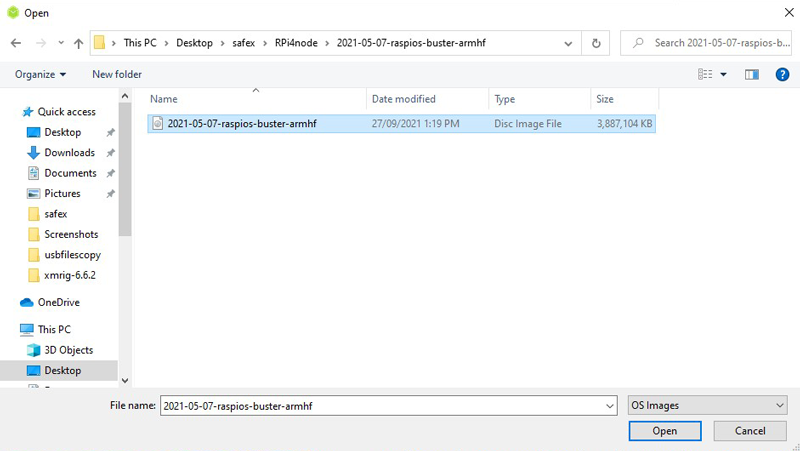
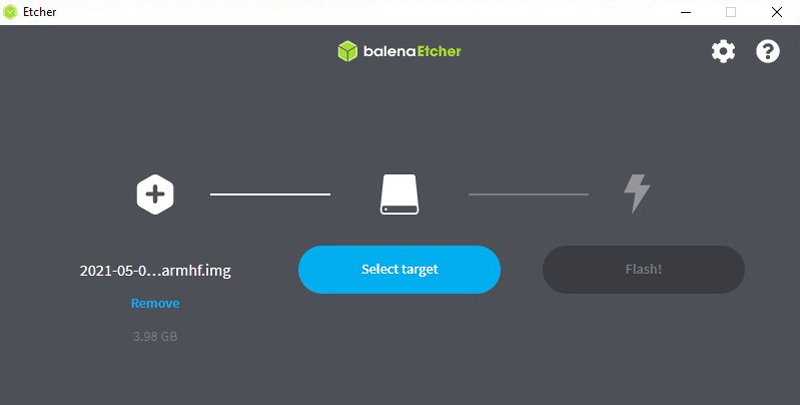
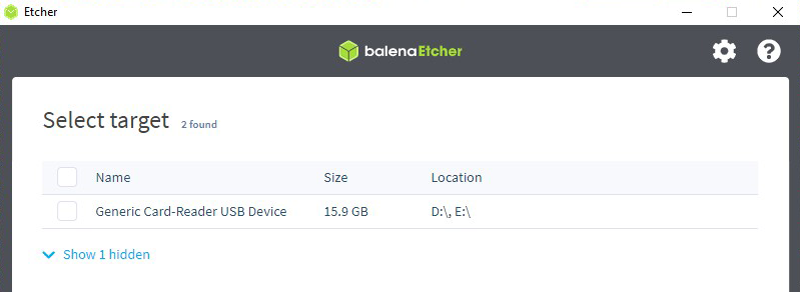
(Or Select the USB Drive or SSD via Adapter. For the SSD, you will get a “Large Drive” warning. If you do intend to use the SSD you can confirm the flashing of it.)
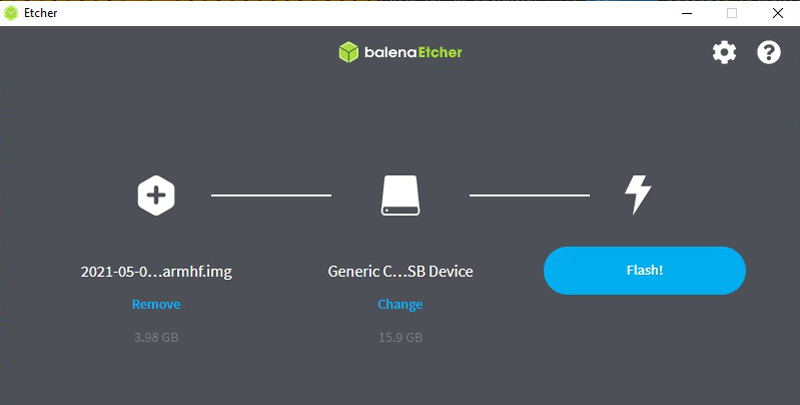
Ignore and click the Cancel button for any drive warnings that Windows may subsequently throw at you about unformatted or empty devices, etc. The SD Card/USB/SSD has just been formatted for use by the RPi4, and Windows doesn’t recognise it.
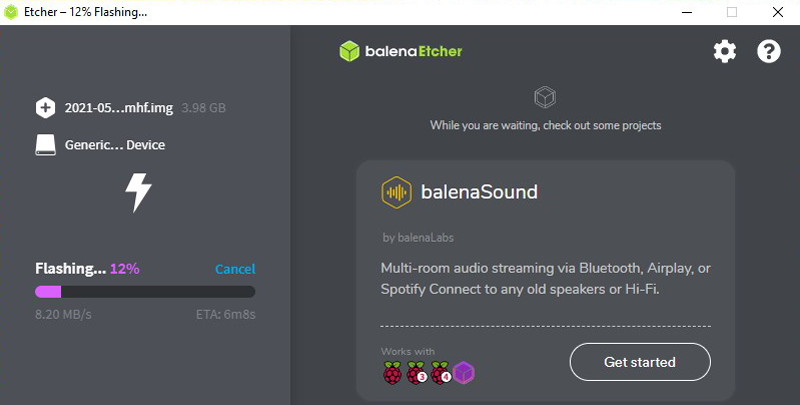
To give you an idea of the read/write speed differences between each device option, the time it took to flash and verify the image:
- 16Gb Micro SD Card: 11 minutes in USB 2 port (no point trying USB 3, as my card adapter is only USB 2 rated [which is faster data throughput than the SD card can use anyway].)
- 64Gb USB 3.1 Drive: 5 minutes in USB 2 port; 2 minutes in USB 3 port
- 250Gb M.2 Sata SSD via an SSD-USB 3.0 Adapter: 26 seconds in USB 3 port
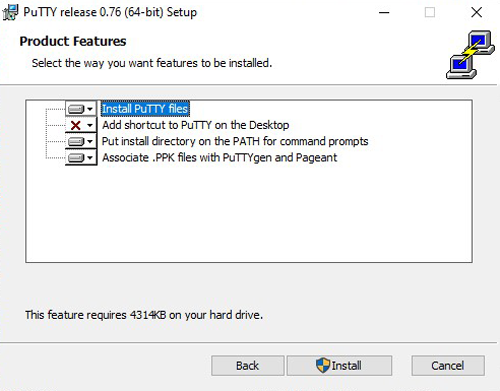
Install PuTTY on your PC/Laptop
Go to putty.org and grab the latest software release for your PC, then install it. For the security conscious, you can find the Checksum files at the bottom of the download page.
As you move through the installation screens, you'll arrive at:
Click on Add shorcut and choose the second option:
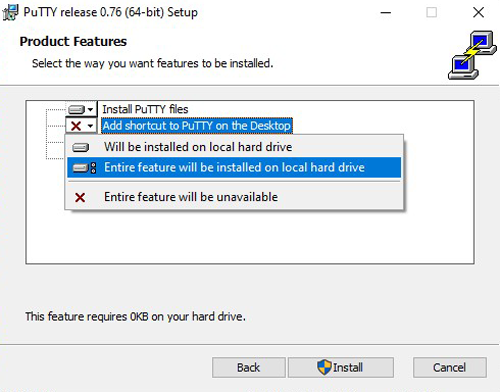
This will ensure you have a shortcut to the PuTTY program on your desktop, when you need to SSH into the RPi node later on. (If you prefer an uncluttered desktop, ignore this step.)
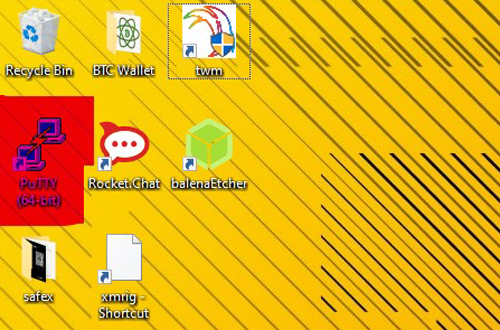
Click on Install, and moments later you will the shortcut on your desktop:
Boot RPi4 for the first time - Check Bootloader version / RPi4 only
(If you’re planning to boot your RPi4 from an SD card, then ignore this section.)
Without any boot device inserted, connect your RPi4 to a monitor via HDMI, and connect a network cable, keyboard, and mouse (use the black USB 2.0 ports). Plug in the power cord and turn on the power - the RPi4 will power on immediately, and the monitor should display the diagnostic screen.
The Bootloader date appears on line two at the top of the screen. You are looking for bootloader EEPROM firmware dated Sept 3, 2020, or later.
If you have an older version, you will need to update the bootloader version first. But as this article is being written in September 2021 - a full year after the firmware release, it will be assumed that this issue will not be a concern for the majority of users.
Depending on when you bought your RPi4 (or how long it was sitting in the store), you may need to update the Bootloader file on the EEPROM.
Additionally, while new RPi4 boards have USB boot enabled by default, the Boot. Order in the bootloader config may need to be modified. If you find that the RPi4 does not boot from your USB straight out of the box, then you will need to look at updating the bootloader configuration: Link
Turn the power off to the RPi4.
You could add a power switch, and if it was a device that was meant to be turned on and off regularly, I'd even recommend it. However, for an 'always on' Safex node, I don't expect to ever need to manually turn it off once it is up and running properly. Additionally, the Official RPI4 power supplies come with a switch built-in to the power cord.
Boot the OS for the first time
With a Monitor, Mouse, Keyboard, Network Cable still attached, insert your chosen boot device (only do one of the three options) into the RPi4:
- Micro SD card in the slot underneath the board
- USB Drive
Insert your USB Drive into a blue USB 3.0 port on the RPi (Keyboard and mouse should be in the two black USB 2.0 ports)
- SSD into powered SATA-USB 3.0 adapter, then to a blue USB 3.0 port
Connect your USB cable from the SATA-USB 3.0 adapter into a blue USB 3.0 port on the RPi (Keyboard and mouse should be in the two black USB 2.0 ports)
Regardless of your boot drive choice, reconnect the power cord to your RPi4/turn the power back on. It will begin booting up.
For those familiar with older RPi operating systems, you needed to Expand the File System after the initial bootup to use all the available drive space on your boot drive. With Raspberry Pi OS, the root file system is automatically expanded when you first boot up. You can check it by simply opening the File Explorer window and looking in the bottom right corner of the window.
Once your RPi4 is up and running, you will first want to ensure the software is up-to-date.
Open a terminal window
sudo apt update
sudo apt full-upgrade
Enter a password and click Y to confirm if prompted. Depending on how old your RPiOS Installation image is, this could take a while.
When completed, close the terminal window by typing exit.
Change Default password & enable SSH
It is always good security practice to change any default password for a software installation.
When Raspberry Pi OS is installed, the default login information is:
Username: pi
Password: raspberry
Click Start Menu - Preferences - Raspberry Pi Configuration
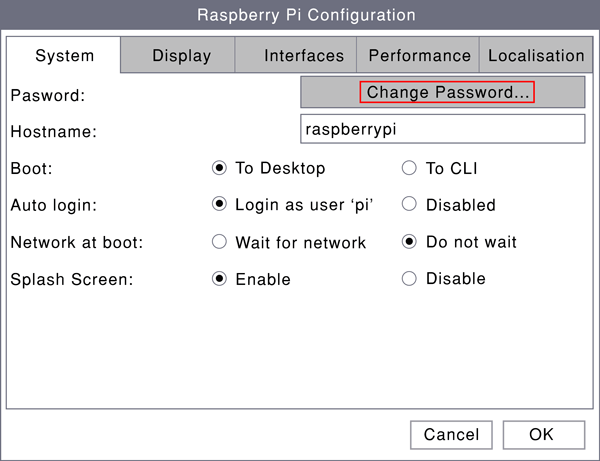
Click on the Change Password button.
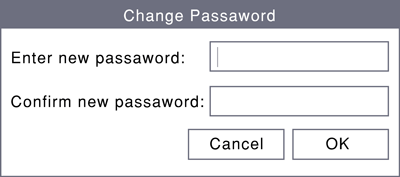
Enter the new password. Write down the new password somewhere! You will need it later when you log in via SSH to start the node remotely.
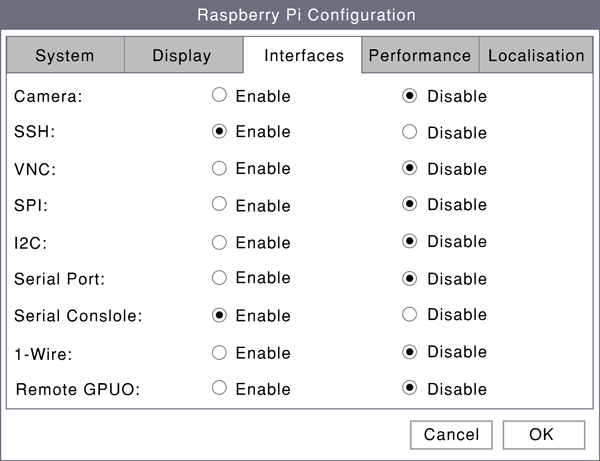
After setting the new password, click on the Interfaces tab and Enable SSH.
Close the Preferences window. (You may be asked to reboot when making these changes.)
Set Static IP Address
Assumption: Your RPi is connected to your home LAN via a wired connection.
Open a terminal window and type: ifconfig
Your RPi4 network connection will be displayed, including your currently assigned LAN IP Address, along with the MAC Address of the Network Port.
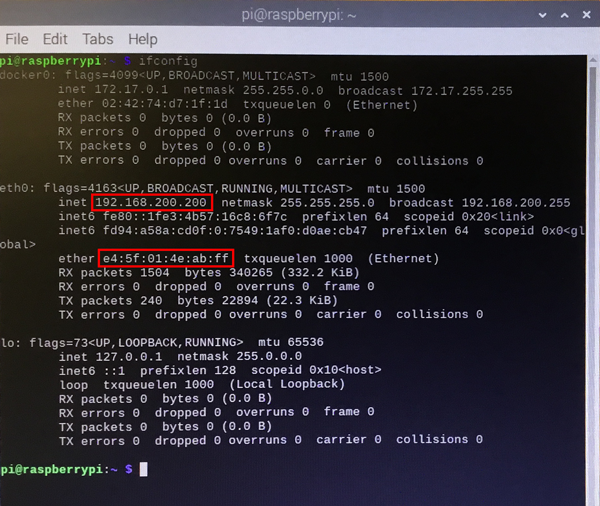
Write down the following details from the eth0: section:
- Current inet (IPv4 LAN IP) Address
- Ether (MAC) Address of the network port
There are several methods of configuring a static IP address for your RPi node:
- Router configured - static DHCP
- Set Manually in Raspberry Pi OS
My personal preference is to configure it within the router, as it is more foolproof (you can’t accidentally set two devices with the same assigned address), so that is the method I’ll explain first. Choose only Option A or Option B, below, as you only need to do either, not both.
Option A: Router configured - Static DHCP
Every router is different, so you may need to consult your router manual for specific instructions. The one consistent thing you need is the MAC address of the wired network port on the RPi, which you have just written down already.
Either via the RPi or your Laptop/PC, open a browser and navigate to your router. Login as admin and assign your preferred static IP address for your Node in the DHCP settings.
Reboot the RPi and once it restarts, open a terminal window and use the ifconfigcommand to check the Network Settings and confirm whether the correct static IP address has been assigned. If so, we’re good to move on. If not, you’ll have to troubleshoot the issue in your router DHCP settings.
A step-by-step guide has previously been explained in this guide.
Option B: Manually Assign Static LAN IP in Raspberry Pi OS Desktop Settings
If you don’t know how to access your home router or simply prefer to assign static LAN addresses in the devices themselves, then choose this option instead of Option A above.
At this point, it is worth pointing out that if you are manually assigning LAN IP addresses to your home network-connected devices, you still need to know a few things about your home network.
Thankfully, when you first boot up your RPi, your router will assign it a LAN address from within the router’s dynamic range of addresses that it is set to assign. As your RPi will likely be running 24/7, then if you just use the assigned address, but set it up manually, then the router won’t look to assign that address to another device on your network while your RPi is turned on.
A better option would be to use an address outside the dynamic assigning range, but you would need to access your router to see what that range is. If you don’t know how to do this, then just go with manually configuring the dynamic address that was assigned as a static address, which you already wrote down with the ifconfig results.
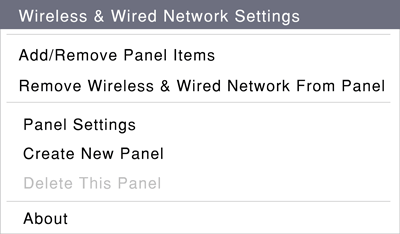
On your RPi desktop, right-click on the two blue network arrows in the top right corner of the screen, then click on the Wireless & Wired Network Setting option.
The beauty of the RPiOS is that you only have to enter the minimum information you need, and the OS will sort out the rest of the network settings. All you have to do is type your chosen LAN IP address into the IPv4 Address field, then click Apply.
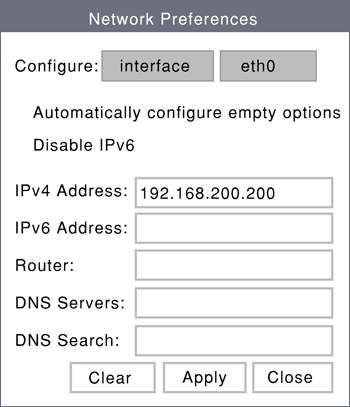
Important: Use the numbers YOU wrote down, not my numbers, in the screenshots!
Reboot the RPi.
Once it boots back up, open a terminal window, type ifconfig again and confirm the assigned IP address is the one you chose. Then, open the Network Settings again and check that the information you entered is still there and matches the ifconfig results.
Close the Network Setting window.
Now that you know the LAN IP address that is permanently assigned to the RPi (the IPv4 address you wrote down), you can now remote access into the rig via PuTTY and always know what address to use.
Additional software installation
The next thing we need to do is install some additional software we will need.
Screen is a program that allows us to start a program via remote access (SSH) and leave it running after disconnecting from the machine. Once the RPI is set up in its final operating configuration and position, we will use this to start the Docker node software.
Open a terminal window and type: sudo apt install screen
Enter a password and click Y to confirm if prompted.
Install Docker Software
Now, we need to install the Docker software. The standard Docker sudo apt install procedure doesn't work for Raspbian/RPiOS. You need to do it as follows, using a script provided by docker.com:
curl -fsSL https://get.docker.com -o get-docker.sh
sudo sh get-docker.sh
Enter the password and click Y to confirm, if prompted. Now just wait, after a few minutes, the screen will scroll through with a pile of information as it completes the installation, and when completed, it will eventually return to a command prompt.
Start Node for the first time
You are now ready to start a node for the first time and begin syncing the blockchain. The default launch commands on the SafexNinja Docker page will save the blockchain data within the docker container. This is not ideal, as it would require a resync in the event of updating the safex node container to a newer version (e.g. in the event of a hardfork in the future).
We will save the blockchain data OUTSIDE of the container in exactly the same place it would be if you eventually decide to compile an RPi version of safexd for yourself and run a non-docker version of safexd. Assumption: you have not changed the default RPiOS username - pi - during the installation process.
The commands provided in this article differ to those on the SafexNinja website because the blockchain data is being saved outside the Docker container.
Go to safex.ninja/docker and look at the Specific Version line.
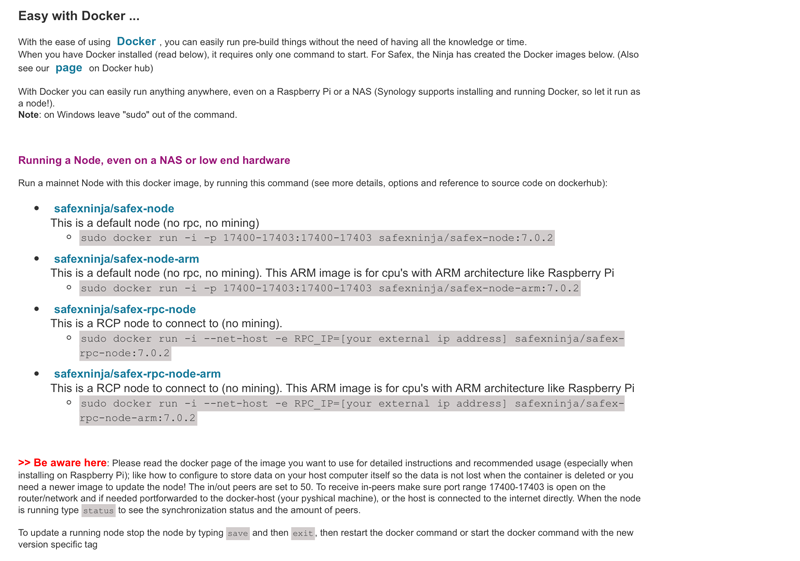
At the time of writing this article, it is 7.0.2 (see far right side of each command line). If that is no longer the case, change the following command lines with the specific version currently showing on the Safex Ninja website.
Here, you have two choices as to which type of node you want to run. RPi runs on arm architecture, so the two options for arm, above, are your options for the RPi:
1. Regular (non-rpc) Safex node: This is a node that you run purely to help support the decentralisation of the Safex Network. You will NOT be able to connect your TWM wallet to it. If running in this mode, you will still connect your TWM Wallet to the default node or one of the other rpc nodes offered by SafexNinja at safex.ninja/nodes.
sudo docker run -i -p 17400-17403:17400-17403 -v /home/pi/.safex:/data safexninja/safex-node-arm:7.0.2
(the above command is all entered on a single command line entry)
2. RPC-Safex node: This is a node that both supports the Safex Network and allows you to connect your TWM wallet to it from another PC/Laptop on your Home Network. It is NOT a full RPC-node that outsiders can connect to - just your own private RPC node that you can use at home.
sudo docker run -i --net=host -v /home/pi/.safex:/data -e RPC_IP=[LAN IP ADDRESS] safexninja/safex-rpc-node-arm:7.0.2
(the above command is all entered on a single command line entry)
Replace [LAN IP_ADDRESS] with your RPi4 Static IP Address (without the brackets).
E.g. For my Home Network, it would be:
sudo docker run -i --net=host -v /home/pi/.safex:/data -e RPC_IP=192.168.200.200 safexninja/safex-rpc-node-arm:7.0.2
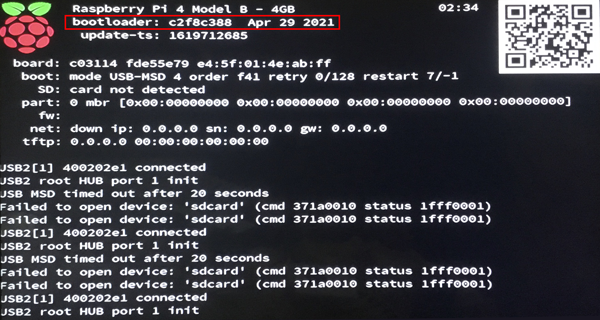
Regardless of which option you choose, you will get a display similar to this screenshot, and the Blockchain Sync process will begin from the genesis block.

(This screenshot was actually done using a compiled RPi safexd build. The colours you see using the Docker node may differ slightly.)
If you are going to let the RPi4 grab the entire blockchain, leave it running - it will take quite some time. Skip ahead to the next section once the node has completed syncing (several days or more).
However, if you are choosing the Highly Recommended (I can’t stress this enough) option of copying the blockchain data from your prepared USB Drive, then after it has grabbed a few chunks of the blockchain, type save then exit to stop the node, as shown above, and close the terminal window.
Insert the USB drive with the blockchain lmdb folder.
Open a file explorer window - you will need to show hidden folders (.safex is a hidden folder) so that you can copy the lmdb folder across from the USB.
Copy the lmdb folder from USB to .safex folder, replacing the current lmdb folder you just created when you briefly ran the docker node.
Once the transfer is complete, remove the blockchain-copy USB stick (NOT the RPiOS boot USB).
You can now restart the docker node using the same command as you did earlier.
If you open the terminal window and then click the Up arrow, you will see it remembered the command. Just click enter to launch the command again.
When the node starts, you will see it now has the full blockchain copy (or very close to it, depending on how long ago you copied it across from the other source). Regardless, you will be synchronised with the Top Block in a matter of minutes.
Ready the RPi4 for its final operating location
Shut down the RPi4 and disconnect the monitor, keyboard, and mouse. If moving the RPi4 to a different location in the house, go ahead and set it up where it will live. You only need a network cable and power supply connected in its final configuration, as you will be accessing it remotely from your PC/Laptop to start the node.
Plug in the power cord/turn on the power.
Start Node Remotely using PuTTY software
Now we use PuTTY to SSH remote access into the RPI and start the SafexNinja Docker Node.
On your PC/Laptop that has PuTTY installed, launch PuTTY and enter the LAN address you assigned to your RPi. For convenience, Save the information for future use by naming it (e.g. rpi-node) and clicking on Save:
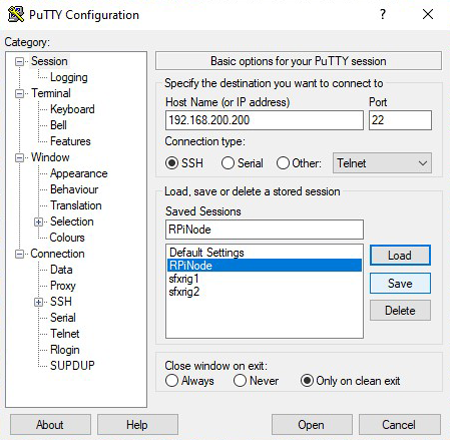
Select your newly saved profile and click Load, then Open. The very first time you make a new SSH connection to a device, PuTTY will present you with this security screen:
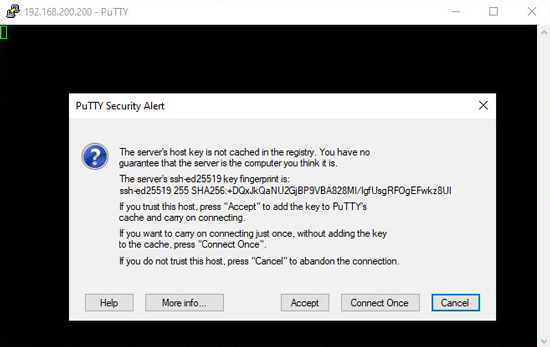
Click the Accept button, and the PuTTY software will remember it in the future.
A remote terminal window for your RPi will open, and you will need to enter the username and password. The username is pi, and the password is whatever you changed it to earlier. You wrote them down, right?
Once logged in, our first command will be to create a detachable screen, which we will name node.
screen -S node
You will be presented with a new terminal window, which is actually the node screen window.
So here, we can start the Docker Node, then detach the node screen, which will leave it running in the background when we close PuTTY.
Start the Docker Node just as you did earlier when working on the desktop terminal window of the RPi itself.
Once you confirm the node is running as expected, you can detach the screen with CTRL+a d
Next time you login to your rig via PuTTY, you can reattach the node screen by typing:
screen -r node
The exception to this is if the RPi has been powered down (e.g. power blockout). In that case, the detached screen no longer exists, so simply start the screen as per the initial screen access above, and start the node again, then detach to exit PuTTY.
Cautionary Note: Try to avoid leaving your RPi node offline for any prolonged period of time. In the writing of this article, I had it disassembled for several days at one point. When I turned it back on and restarted the node, the RPI reached thermal throttling temperature (80+degC) during the several thousand blocks it needed to sync back to the top block. However, once it synchronised back to the top block, the temperature returned to normal.
To check CPU temperature:
cat /sys/class/thermal/thermal_zone0/temp
Divide the result by 1000 to get degrees C
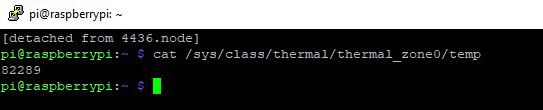
During this resync, my CPU was at 82.289 degC when I made this query.

However, once it reached the top block, the temperature dropped back down. After 5 minutes, it was back below 60 degC, and it continued to get cooler in the minutes that followed, as the heatsinks helped dissipate the heat quickly.
When I checked the following day, it was at 50 degC.
Additional Docker commands, useful for housekeeping purposes
From time-to-time, as newer versions of the Docker node software are released, you may want to purge the old files and free up space on your RPi.
To see what docker images you currently have installed:
sudo docker images
To delete an old image:
sudo docker image prune -a
To remove all images and do a total cleanup of docker:
sudo docker system prune -a
When a new version of the SafexNinja node container gets released:
SSH into the RPi, reattach your node screen, save and exit the node, then restart the docker command with the newer version tag. (If you hit the UP arrow when back at the command prompt (after exit completes), the old command should appear - just hit backspace and change the version number to the new one.)
Final Thoughts
A huge thanks to a community member, Lomax, for all his efforts to support the Safex Project with his safex.ninja website. Between the Docker nodes, globally dispersed rpc-nodes, multiple SFX price oracles, and much much more, he is a leading example of how the Safex Project is a community-driven project.
Read more about running Safex nodes: https://safex.org/run-safex-node