The Safex Big Box Store Front 301: Independent API Merchant Walkthrough
This article provides a step-by-step walkthrough and explanation of setting up and using an independent Big Box Store Front API to offer products for sale via the Safex Big Box Store.


This article provides a step-by-step walkthrough and explanation of setting up and using an independent Big Box Store Front API to offer products for sale via the Safex Big Box Store.
This is the last in a series of articles, which looks to provide a complete set of tutorials regarding all aspects of the Big Box ecosystem. The articles in the series (including this one) are:
- Big Box 101: Introduction & Explanation
- Big Box 102: Installation & Setup
- Big Box 103: Basic Safex Wallet Functions Walkthrough
- Big Box 104: Shopper Walkthrough
- Big Box 201: Approved Merchant Walkthrough
- Big Box 301: Independent API Merchant Walkthrough (separate software release)
Each article builds on the information provided in preceding articles. This article assumes the reader has a knowledge of all previous articles relating to the Safex Big Box Store ecosystem. Unlike the previous articles, this walkthrough relates to a separate, complementary software component, and requires significantly higher levels of understanding. As such, it is considered suitable for expert-level users who wish to run their own Store Front API, and may involve additional operating costs relating to online hosting services, domain name registrations, and the like.
The Safex Big Box Store Front (“Store Front”) allows the operators to provide a product curation and messaging service to users of the Big Box ecosystem, in order for them to buy and sell products on the Safex Marketplace. Although it takes some configuration and more advanced knowledge, anyone can set up a Store Front, whether it is a community member providing a service to other users, or a shop owner running a Store Front just for his/her shop.
A Store Front features:
- Seller registrations (allow, ban, remove)
- Offer registrations (allow, ban, remove)
- Manage offers that were reported/flagged by users of the market
- Price pegs (select price pegs that you want to allow for usage)
- Message queue
- Welcome message (to show when users connect to the Store Front)
- Activation / Deactivation
When the store is deactivated:
- no new seller registrations are allowed
- no new offers by registered sellers are allowed
- no new purchases are allowed
- but the fetching of messages is still in progress
Use this deactivation feature to give the message queue time to get cleared before shutting the store down completely.
The Store Front app includes the following “backend” software components:
- Safex Blockchain Daemon
- Database (Mongodb)
- Server (admin application and public endpoints)
- Nginx (to route traffic and apply an SSL certificate)
Section 1: Setting up
Section 1 of this article takes the user through all steps needed to set up a Store Front from scratch.
Section 2: Walkthrough of the Admin Panel
Section 2 is a walkthrough for using the Store Front API, once it is up and running.
Section 1: Setting up
The goal of this section is to provide a step by step manual to set up a Store Front. There are various ways of setting up a domain and a server, which takes some more advanced knowledge. To provide an easy guide we take this example where we register a domain at Name.com, and we run a server at Vultr.com.
Note: the costs of running a server at the advised setup will cost around $12 USD to $23 USD per month, plus additional costs for the domain name registration.
Users wishing to set up their own Store Front should follow these steps, which are each explained in detail, below:
- Step 1: Get a domain name (bookmark link each dot point to its respective section below)
- Step 2: Setup a server on Vultr com
- Step 3: Point your domain to your server
- Step 4: Get an SSL certificate
- Step 5: Running the Store Front
Step 1: Get a domain name
A domain name is required to enable users of the Big Box ecosystem to navigate to your store. Later on we’ll point the (sub)domain to the server you set up in the next steps.
Step 1A - Create a Name.com Account
First you’ll have to create an account at https://www.name.com
Step 1B - Register a Domain Name
When registered, click on “Domains” in the top menu bar to open up a search box, where you can start searching for available domains. In this case we’ll see if “mysafexshop.com” is available.

The domain was still available and it was added to our Cart. Then go the Cart to view the cart (you might have to click the Cart icon twice to bypass additional option suggestions):
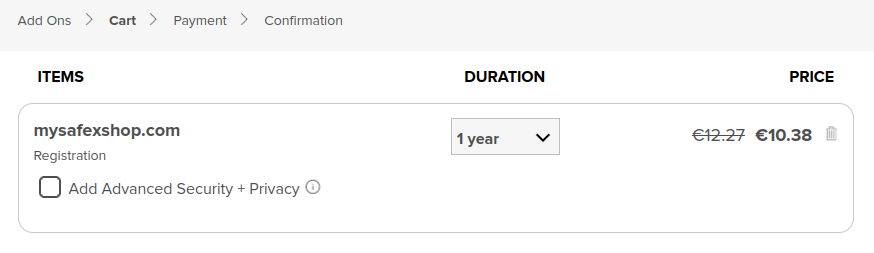
The domain will show in the cart with the correct pricing. Make sure here to select “Add advanced Security + Privacy” => this will prevent spam calls and hides your personal information from public WHOIS lookup.
Now the Cart looks like this:
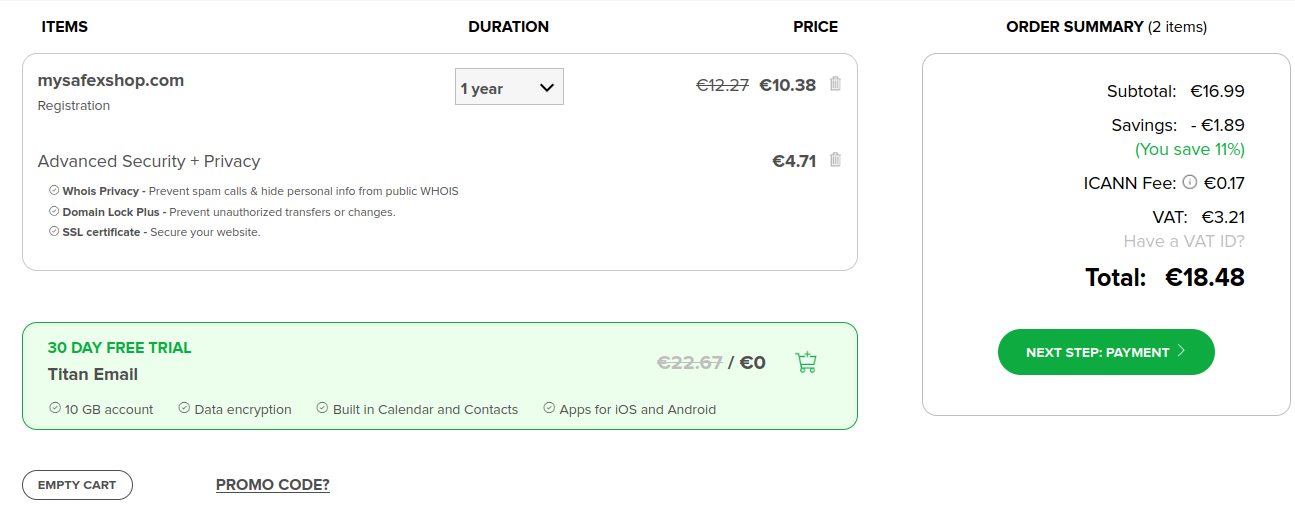
Pay for the registration with your preferred payment method. Congratulations! You now have a domain and the first step of setting up your Store Front is done!.
Note: domains come in various prices, a “.com” domain is usually cheaper but it's harder to find an available name. Newer domain extensions like “.shop” or “.market” are a bit more expensive but have more opportunities to find a catchy name. Pay attention to the annual renewal costs
Step 2: Setup a Server on Vultr com
The costs for running server instances will be billed monthly, and can be automatically paid for with a credit card (in this case always make sure you have enough room for it on your credit card balance). It is also possible to deposit to your balance in advance with credit card, paypal, and even with crypto (BTC, BCH, ETH, DOGE, PAX, BUSD, LTC, USDC, GUSD). Make sure you always have enough in your Vultr balance for the next month to prevent service disruption.
Step 2A - Create a VULTR account
First you’ll have to create an account (sign up) at https://www.vultr.com/.
To start, make a deposit of 50 USD to your VULTR balance.
Step 2B - Set up Firewall
A “firewall group” is used to only allow intended traffic to your server.
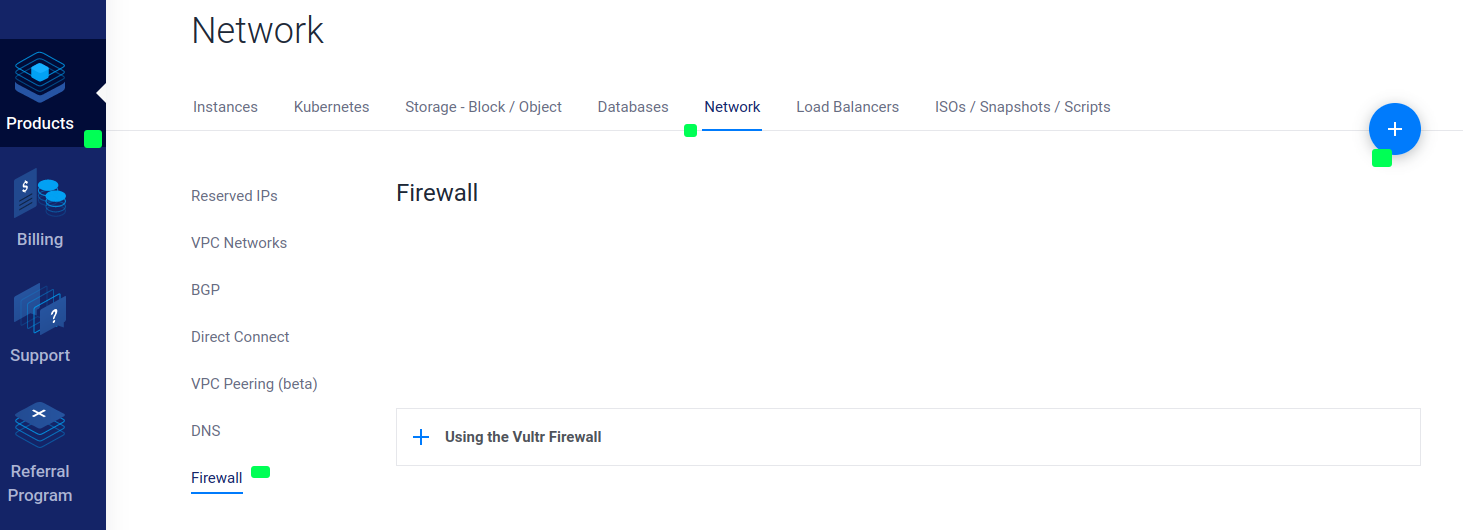
Go to Products => Network => Firewall and click on the blue Add (“+”) button to add a firewall.
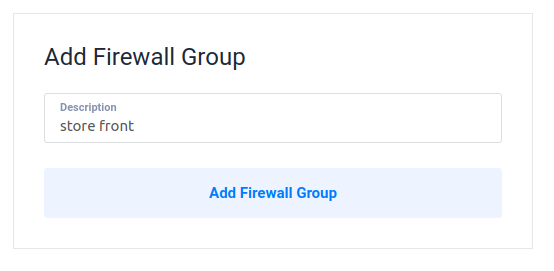
Then give the firewall group a name i.e. “store front”, and click the Add Firewall Group button.
It will take you to the screen to set up the firewall rules. In the default empty new row select “TCP” as a protocol, and enter port 80:
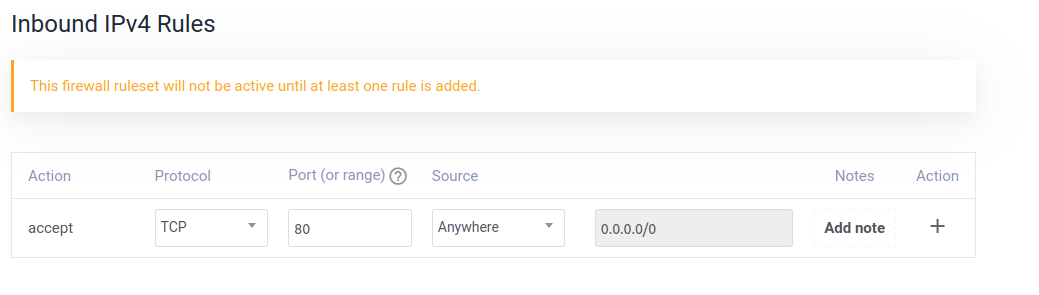
Then click on the “+” to add the firewall rule. Then do the same for port 443 (HTTPS).
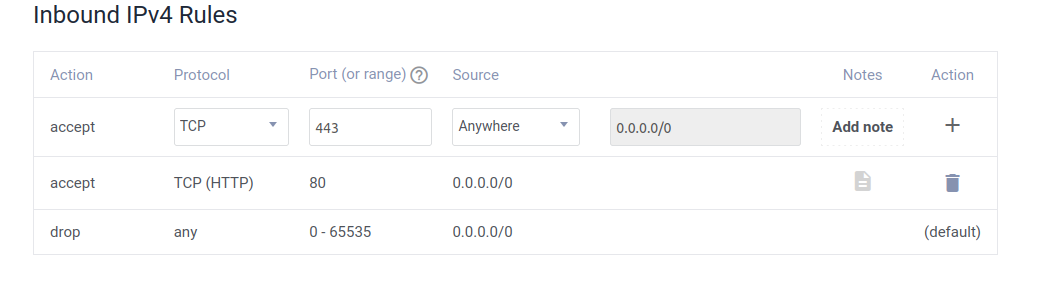
Click the “+” to add the rule again. Then it should look like this:

If you want to enable access to the Store Front admin panel from outside of the server, you repeat this also for port 4433, but out of security measures you should consider to keep this blocked and do not create a rule for port 4433. If needed you can add a rule for 4433 to only allow access from YOUR IP (given you are not using a VPN), then select MY IP (instead of Anywhere) in the SOURCE field/column. The admin panel can always be accessed from within the server, shown later on in the article).
Now, your firewall is set up.
Step 2C - Create Startup Script
A start up script on Vultr can be used to perform additional tasks after spinning up a server, executed as root. The provided startup script contains all required installations and configurations for running a Store Front, so that you don’t have to figure it out all by yourself.
Go to Products => Orchestration => Scripts
And click “Add new” or “Add new startup script”, this will take you to a form to insert a start up script, which will manage all the required installations for you. Give the script a name (i.e. “store front script”, and select type “Boot” (default). In the “Script” field, enter the startup script from the contents of this file: https://github.com/safexninja/safex-big-box-store-front/blob/master/tools/startup_script.txt
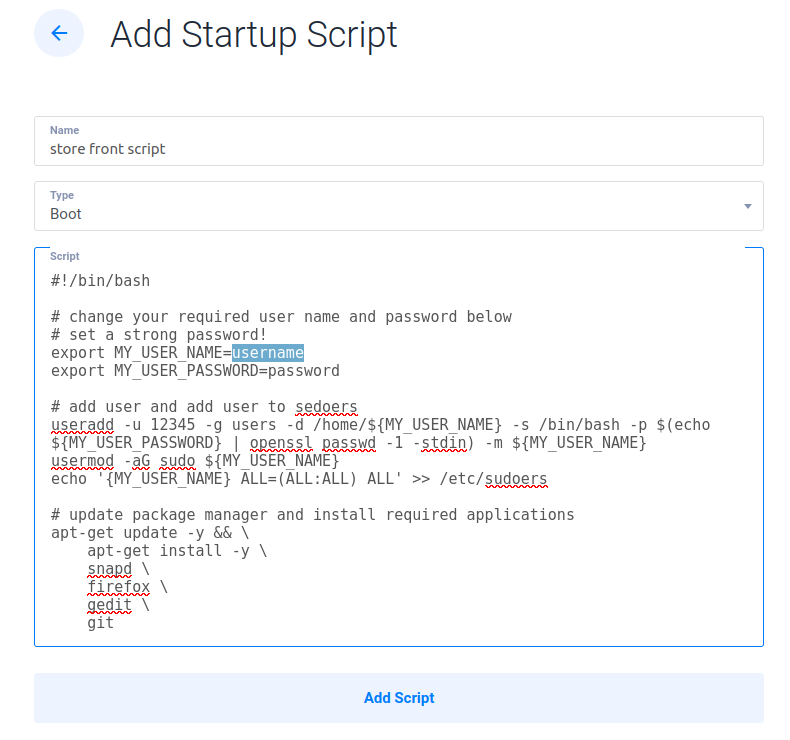
Important!: Make sure here to set your own username and password i.e.
export MY_USER_NAME=dave
export MY_USER_PASSWORD=#myVery!!SecurePass123
Then click “Add script”, it will bring you back to the server configuration. Now the script has been saved and can be used in the next step: spinning up the server.
Step 2D - Spin up Server
Go to Products => Instances

Click on the blue add button (“+”). And select “Deploy new server”. This will take you to the configuration of the new server to deploy. Servers come in various performance classes, which all come with their costs. A basic server will suffice most of our needs. But if required the server size can always be increased later on.
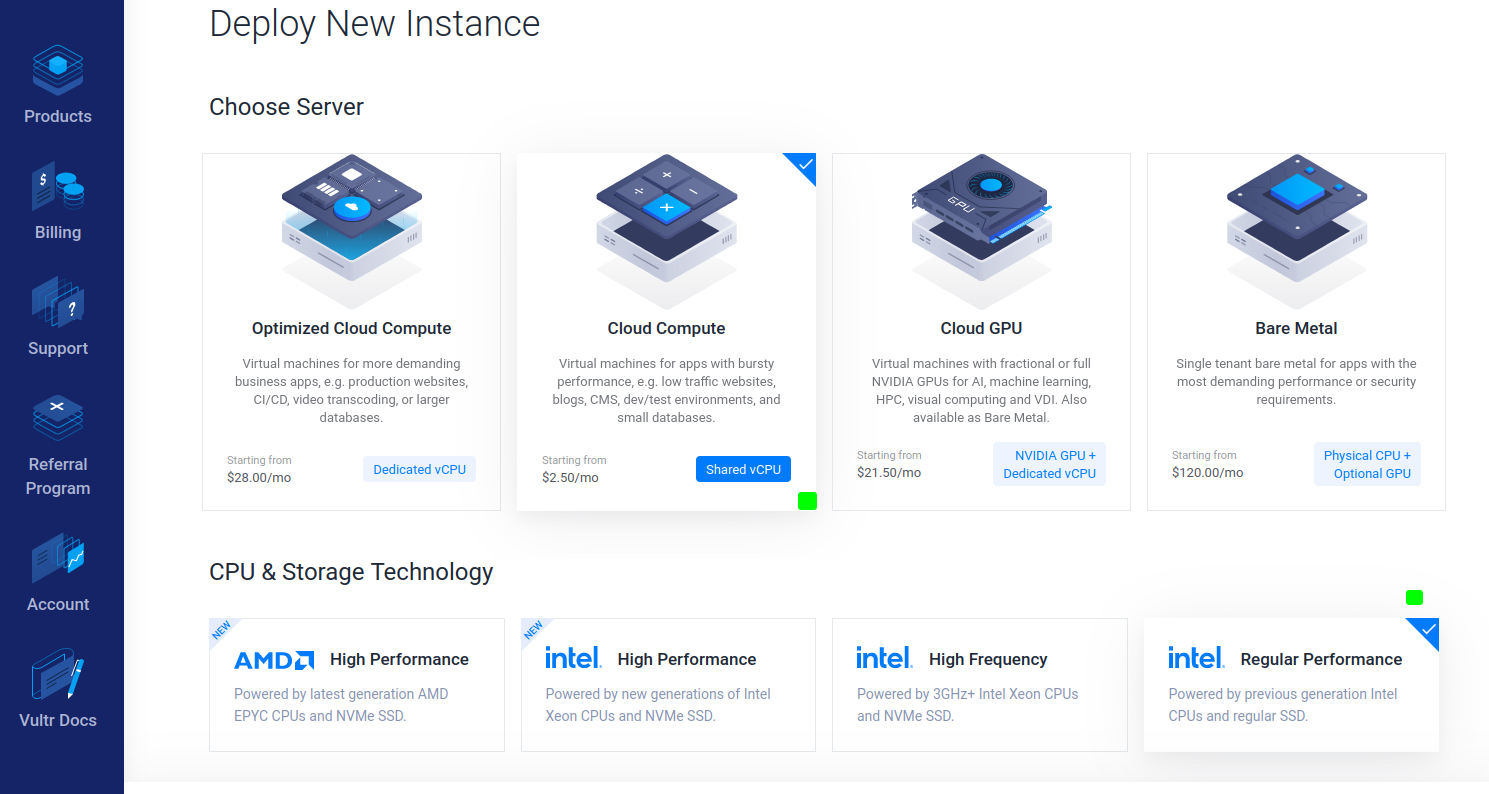
Select “Cloud Compute”, and “Regular Performance”.
Then scroll down and select a location for your server:
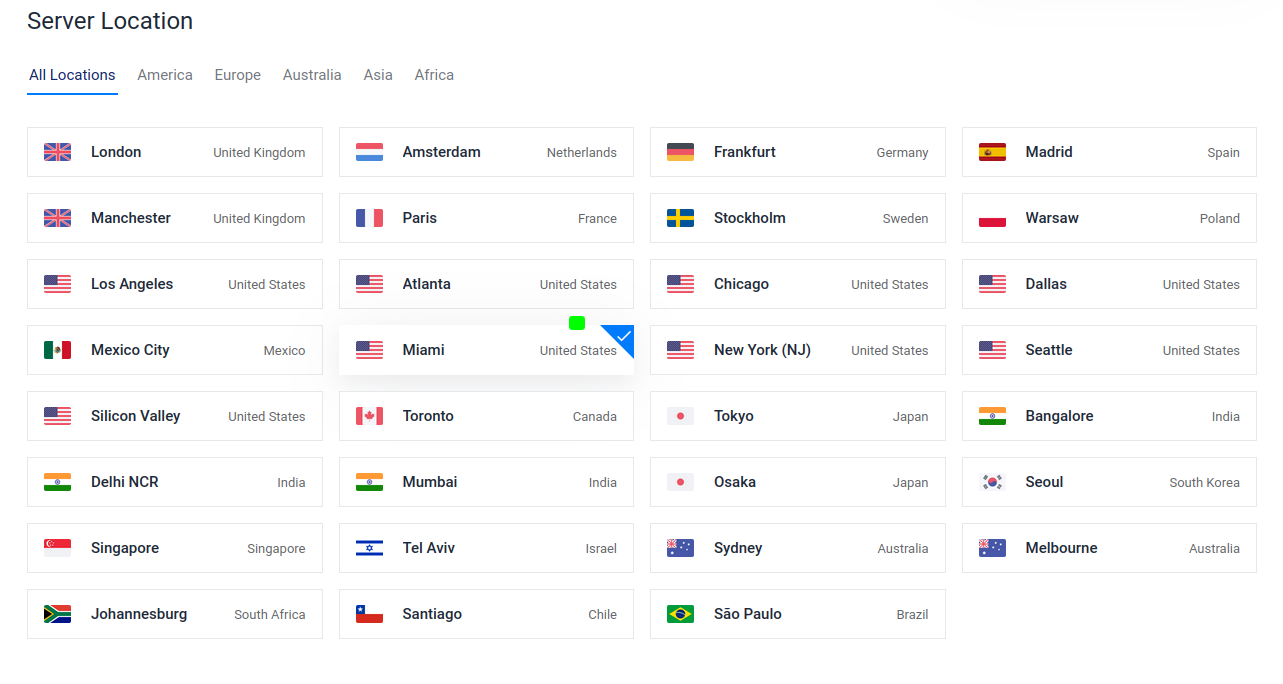
In this case we’ve picked Miami. In regards or response times it is advised to pick a location that is close to your area or operations; but if you are planning on providing a world wide service it would not really matter; then it's best to go for a location in the USA, Europe or Australia where the regulation on crypto related services is clear.
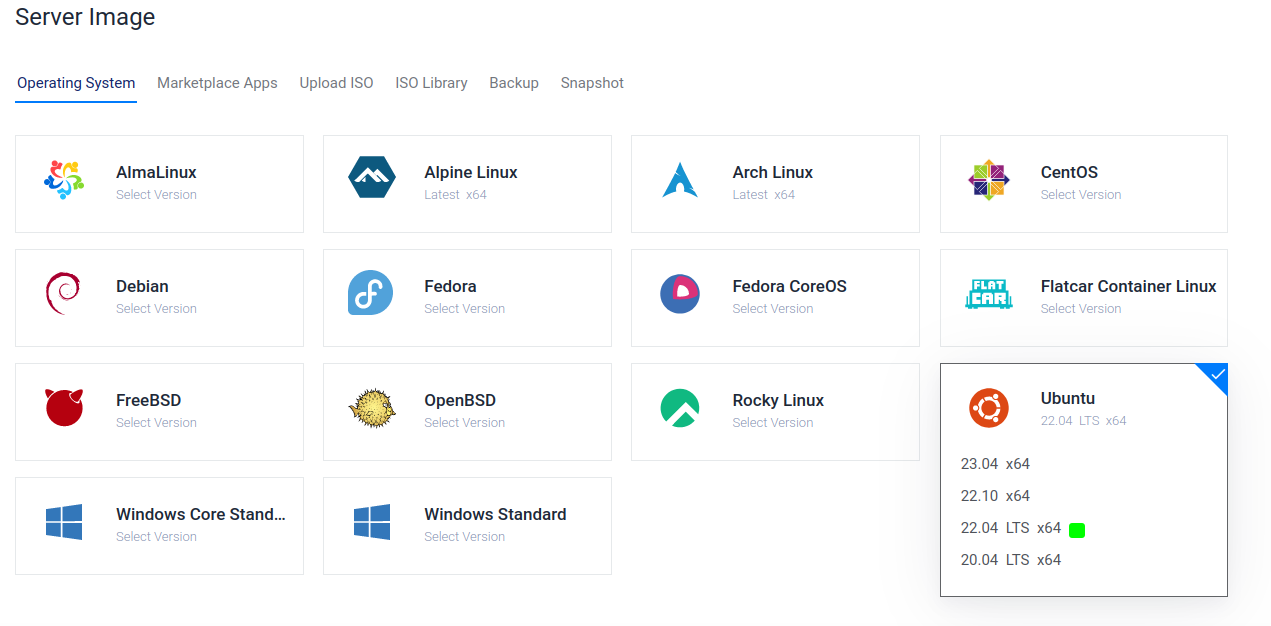
Then scroll down and select Ubuntu 22.04 LTS as an operating system:
Then scroll down and select a server size:
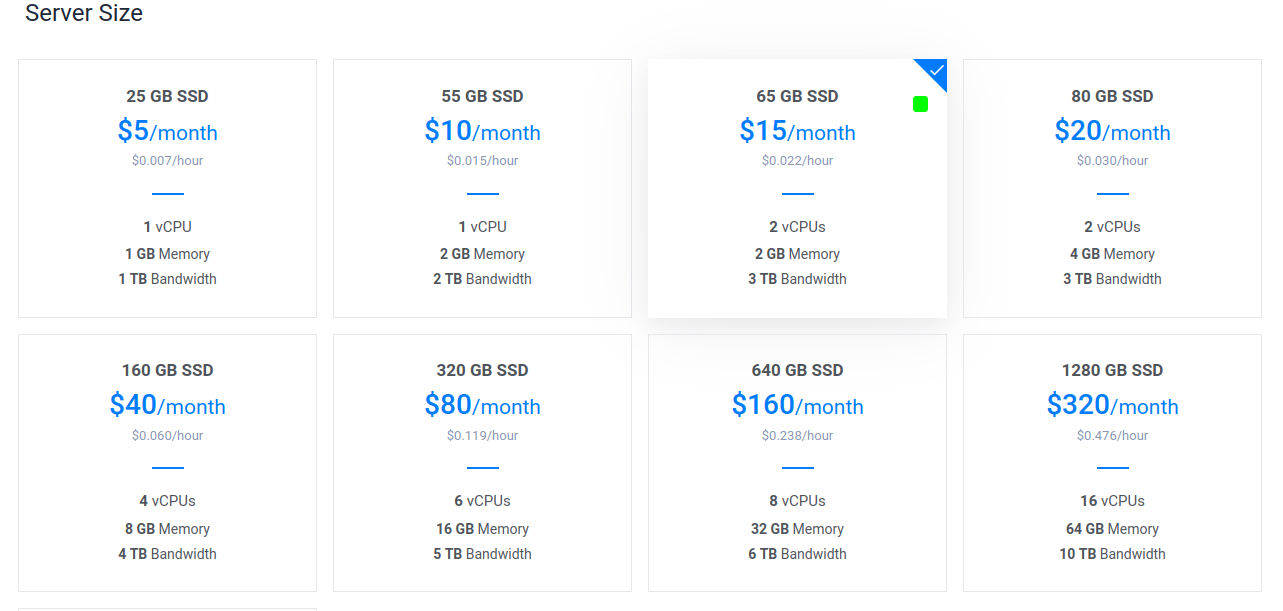
The minimum to operate will be the 1 CPU - 2GB RAM ($10 at the time of writing), but the selected 2 CPU will be a better choice. If you don’t mind an extra 5 dollars, the 2 CPU with 4 GB RAM is even better. If your server appears to get a lot of traffic, the server size can be upgraded later on easily (go to Settings of your instance, then Change plan; downgrading not supported; changing plans will restart the server so the app needs to be restarted.)
Then scroll down to “Start up script”, and select the startup script that was created in the previous step.
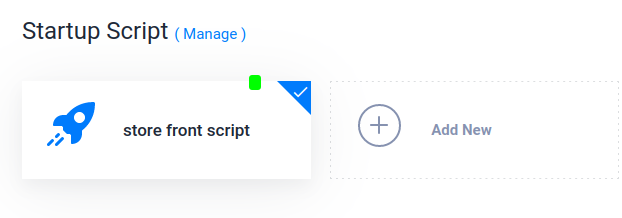
Make sure your script is selected.
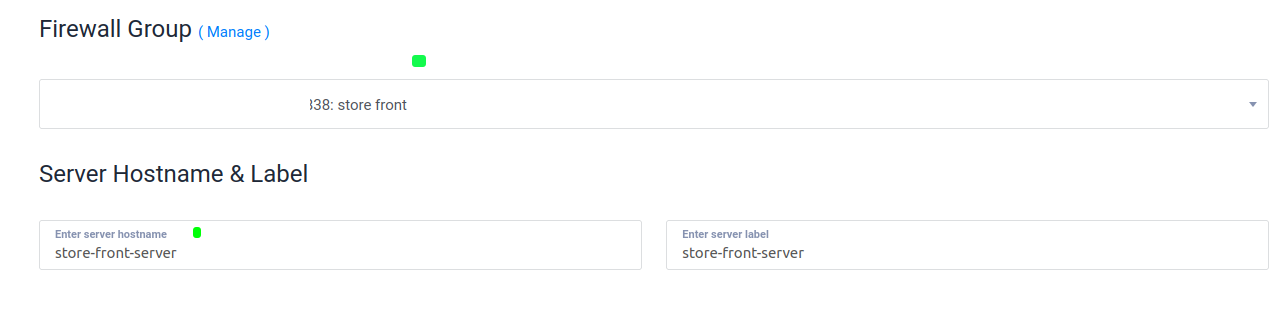
Then scroll down to Firewall Group. Important! Select the firewall group we’ve created earlier!
And give your server a name i.e. “store-front-server‘
Now we are done. This setup will cost $18 USD per month, at the time of writing.

Now click the “Deploy Now” button to start the deployment.
You will be taken to you product overview, which is showing you that the server is installing:

You can open the server details by clicking on it; while it is installing it will give the warning message:
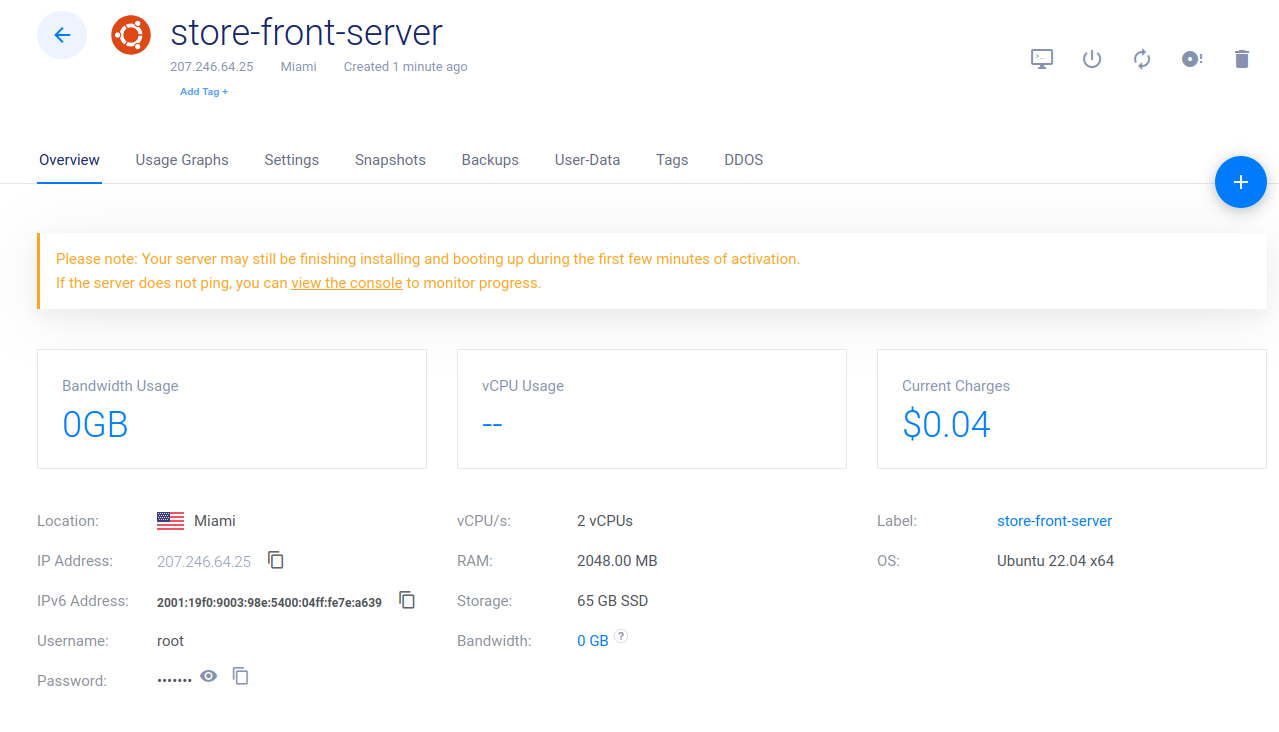
Give it 20 minutes to complete the installation. In this screen you will already see the IP address of the server. We need this later on to point our domain name to this server. When the server is done installing the message will disappear:
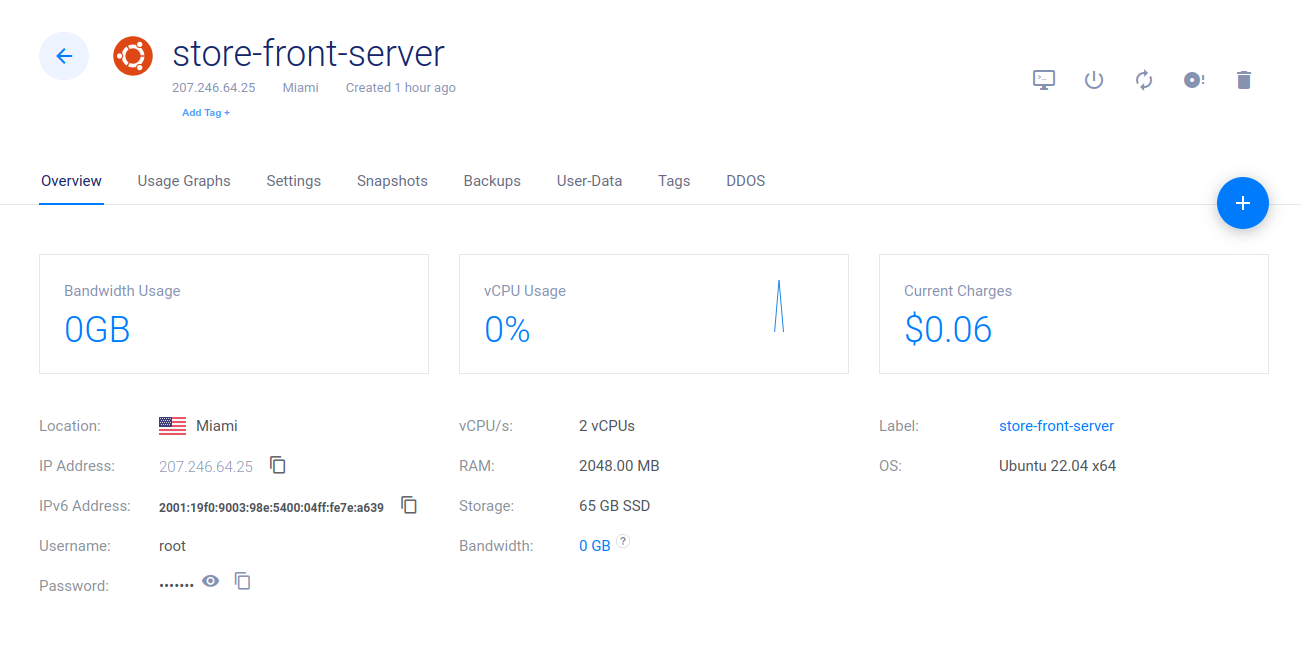
From that point on, you can open the server with the View Console button:
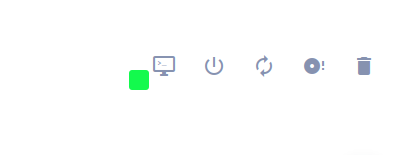
Clicking this icon will open a separate window, where you can log in to the server with the username and password you’ve provided in the start up script:
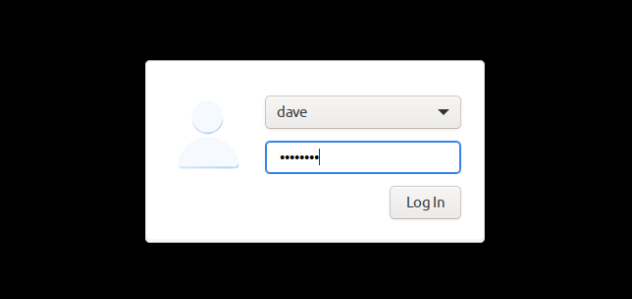
If you can log in and see the desktop environment, it is all good for now.
You can resize the window to fit your needs.
Step 3: Point Your Domain to Your Server
Note: the example below is for a domain registered on Name.com, but other registrars will likely provide similar options to change the DNS Record settings.
Go back to your Name.com account.
Go to “My Domains”, open the domain you’ve registered for your big box Store Front. Then go to Manage DNS Records:
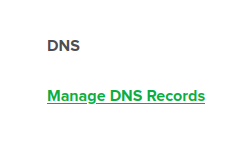
This will provide an empty DNS Record table:
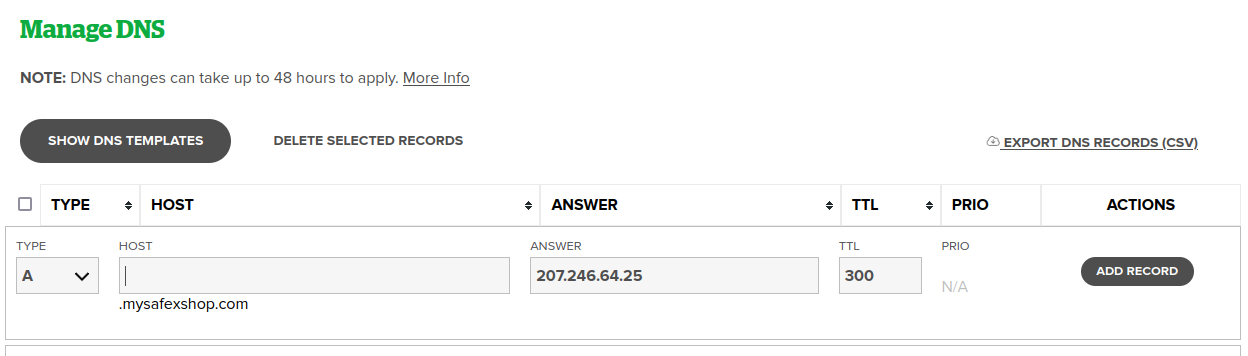
In the “ANSWER” field to add the IP address of your server, which you can copy from VULTR.
If you want to use the domain itself you can leave HOST field blank. In this case the Store Front will be available at https://mysafexshop.com (this is not a real domain, just an example)
If you want to use a subdomain (so you can use the main domain itself for a website or something), then put desired subdomain in the HOST field:
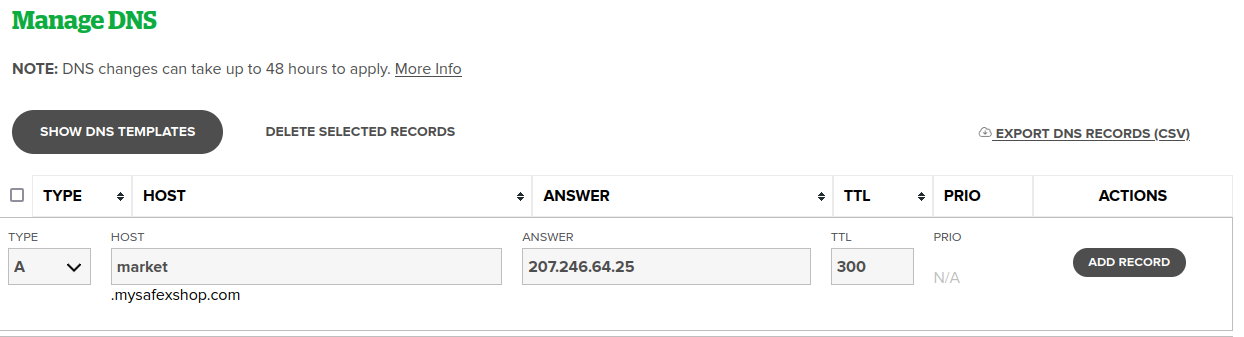
In this case the Store Front will be available at “https://market.mysafexshop.com” (this is not a real domain, just an example).
The DNS changes at Name.com are usually pretty quick. Wait a minute for it to process. Then continue with Step 4.
Step 4: Get an SSL Certificate
Step 4A - Generate the certificate
Go back to the opened VULTR server desktop window. The startup script installed certbot, which is a tool for using Let’s Encrypt certificates on websites to enable HTTPS.
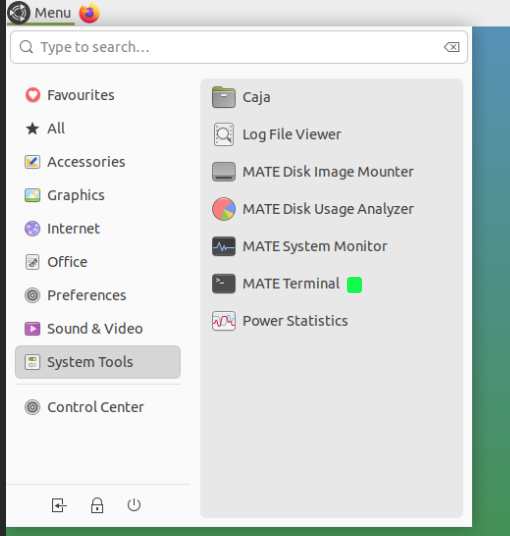
Open a terminal window:
Go to the Menu => System tools => Mate Terminal
In the terminal window type the command:
sudo certbot certonly --standalone
It will prompt you for your user's password first. After confirming the password it prompts you for providing an email address for certificate renewal notices. Make sure you enter this correct!
Then it will ask you to accept the terms

Type “Y”. After that it will ask you if you want to share your email address, that is up to you. Type Y or N (No is fine).
Then it will prompt you for the domain you want a certificate for (in our case “market.mysafexshop.com” (this is not a real domain, just an example):

Hit Enter and the certificates will be generated. At the end of the process it will tell you it has created certificate files in /etc/letsencrypt/live/<your-domain-name>. If an error occurred then maybe the DNS changes still have to be processed and you can try again a little bit later.
Step 4B - Copy the Certificate
Now we want to copy the generated certificate files in the folder of the Safex Big Box Store Front, so that the app can find it. In the terminal give the following 2 commands, where the domain name is the domain you’ve just entered, and the user name is the user name you’re logged in with (“dave” in our case).
To copy the certificate file
sudo cp /etc/letsencrypt/live/<your-domain-name>/fullchain.pem /home/<your-user-name>/safex-big-box-store-front/cert/cert.pem
To copy the key file
sudo cp /etc/letsencrypt/live/<your-domain-name>/privkey.pem /home/<your-user-name>/safex-big-box-store-front/cert/key.pem
Step 4C - Updating the Certificate
The certificate is done for now! But it needs to be updated every 3 months. You’ll receive a notification when the certificate has almost expired in the email address you've provided in the certificate setup.
A guidance on how to renew the certificate can be read here: https://github.com/safexninja/safex-big-box-store-front/blob/master/README.md (section “Updating SSL Cert”)
Step 5 - Running the Store Front
Now we are almost ready to run the Store Front.
Open your user's home folder (from the desktop). There you’ll see the safex-big-box-store-front folder. Open this folder.
Step 5A - Changing the Admin Panel
!important! Just One more thing! Open the file /src/common/auth/config.json in a text editor (right click, open in text editor). This contains the user and password for the admin panel. Change these default values to a strong user/password combination! Save the changes.
Step 5B - Running
Now we are all set to give it a go.
Open a new terminal window again (from the menu, so that it will open in your home directory) and navigate into the safex-big-box-store-front folder. (type “cd safex” and then press tab, it will autofill the path for you, and hit Enter)
To start the application, give the command “sudo ./run-store-front-api.sh” (type “sudo ./run” and then press tab, it will autofill the rest for you, and hit Enter). It will prompt you for your user's password.
Note: If for whatever reason the server restarted and you need to start the application again, you repeat the steps in this paragraph to start the Store Front again.
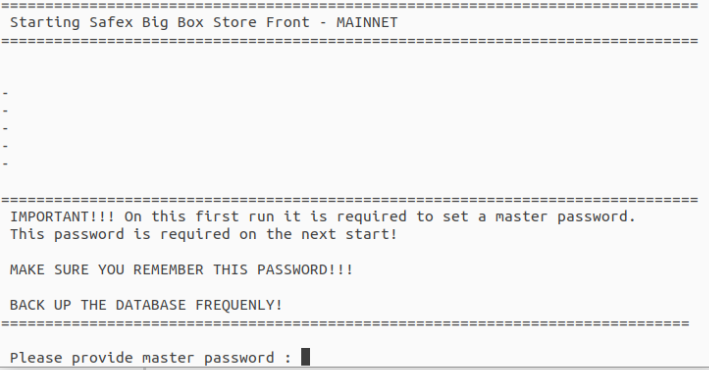
Step 5C - First use
On first use it prompts you for a master password. Do not forget this password! It will be asked for when you start the app again later on (i.e. after a server restart). Losing it will obviously lock you from accessing all the data.
Step 5D - Installing
On the first use (or after updates) it will take some time to download parts of the application (using Docker).
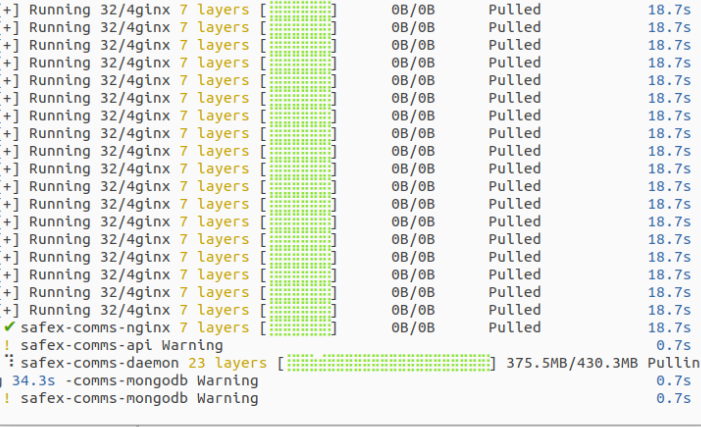
Once these lines have finished the application will start. It will take 5 to 10 minutes.
Seeing lines like the ones below, of the different components, will indicate everything was downloaded and the application is starting. The daemon is syncing:
Note: the daemon needs to sync with the network. On the first start this might take a while. (The lines in the terminal from the daemon might indicate the progress; and in the System tab of the admin portal you can see the blockheight later on. Give it time to sync before using the Store Front, otherwise it might not be able to find offers or pricepegs yet.)
In a new terminal window you could give to following command to see some statistics on the running services:
“sudo docker stats”
It should look like this, then everything is up:
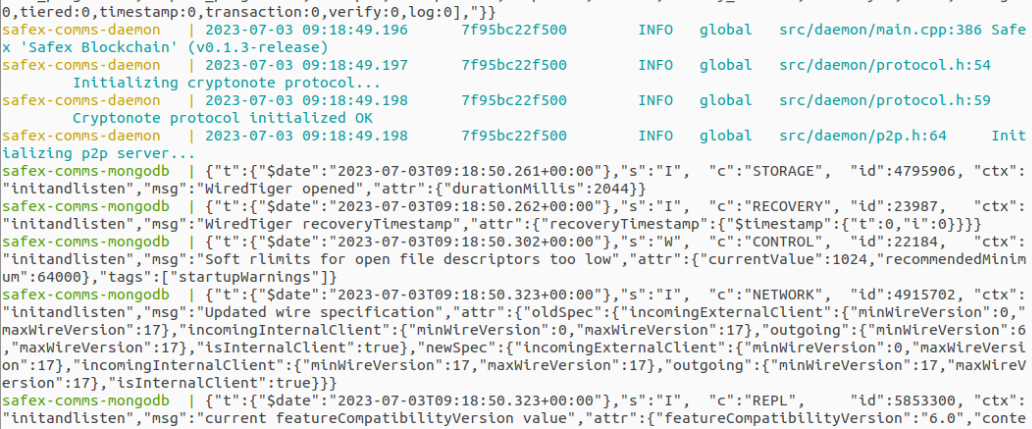
It will take some minutes for the application to start. When the app is up and running you’ll briefly see this logged in the terminal window:

Step 5E - Opening the App
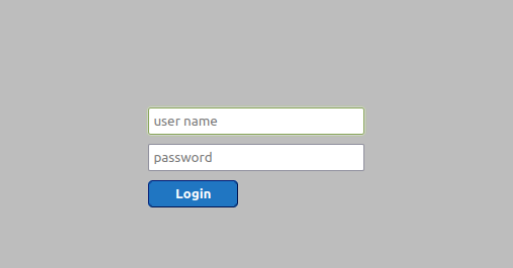
Now you can open a browser (firefox is installed) and go to https://localhost:4433 (you might have to accept a security risk because of the SSL certificate and using it “locally” on the machine itself).
It will present you the login screen where you can log in with the username and password you have provided in the configuration file.
From here you can use this admin panel to manage your Store Front and allow seller registrations, configure price pegs, etc.
Go to “System” in the menu to activate your Store Front and set a nice welcome message for the visitors of your store!
Step 5F - Customize your Landing Page
When someone would navigate to your Store Front URL in a regular browser (instead of from the Safex Big Box Store Wallet) a default landing page is shown (this is not a real domain, just an example):
You can customize this page by changing the files in the “/nginx/public” folder (index.html). Or you can redirect from here to another website (i.e. if you run the store on a subdomain you could redirect from here to you main domain to get users to your main website).
Section 2 - Walkthrough of the Admin Panel
The goal of this section is to give a walkthrough of the Store Front admin panel. The admin panel is a simple and light weight application to manage the Store Front, and to do seller/product curation and moderation.
Running a Store Front comes with the job and the responsibility to provide a reliable service to sellers and customers to enable them in using the platform in a convenient way. It takes time and effort to monitor your Store Front, act upon seller registration requests, reported offers, and to update the software if required.
Note: All screen captures of the Big Box Store Front used in this article are of the testing “Stagenet” version. All price pegs, account names and offers are fake and are for testing purposes only. The api.safex.ninja URL is a demonstration shop used for testing and cannot be accessed on the mainnet live version to register real merchant accounts or list products.
Menu
The menu of the admin panel allows you to navigate through the various pages for managing your Store Front. When logged in, the session is valid for 1 hour and the application logs out after the session has expired. There is also the option to log out; it is advised to not leave it open unattended. Below the different pages will be described in more detail.
Sellers
The Sellers page allows you to do seller (and thus product) curation.
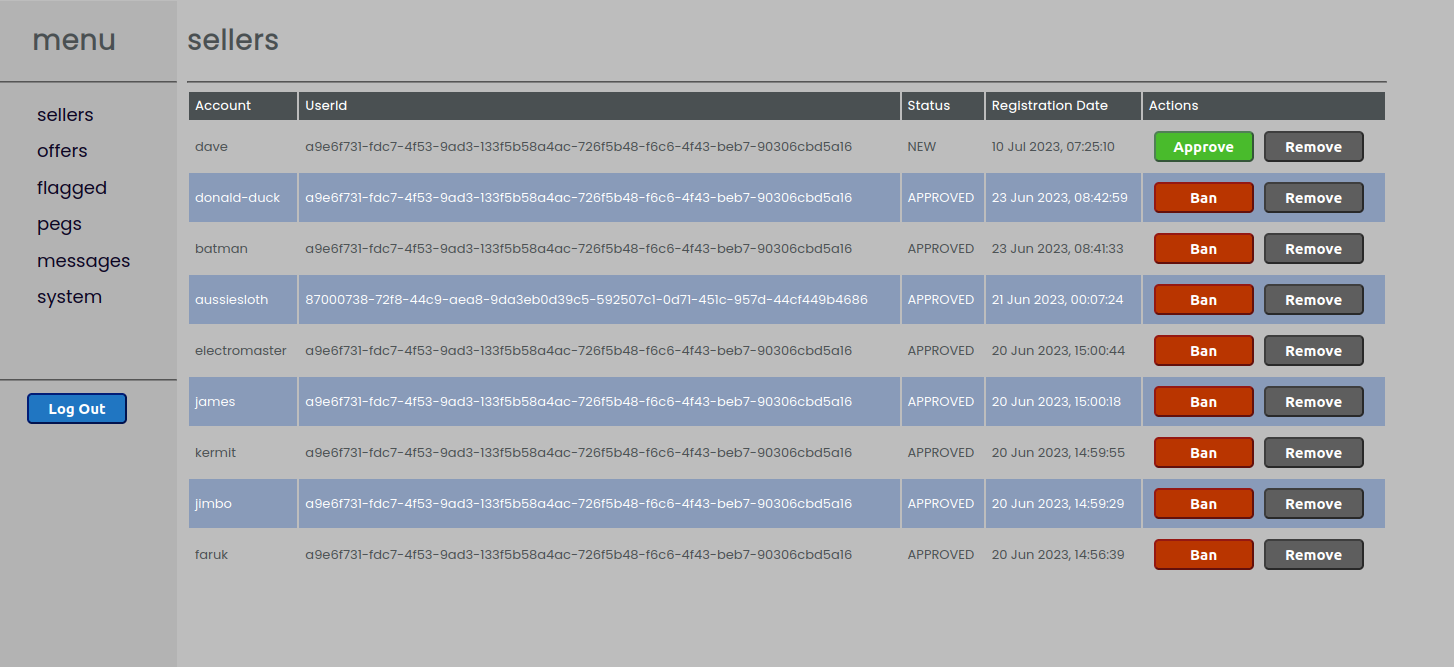
New Registrations
When a seller/merchant that is using the Safex Big Box Store wallet registers a seller account to your Store Front, the new registration will pop up at the top of your sellers list. To allow a seller to be active on your Store Front, you click the green “Approve” button. The page will refresh. Only approved sellers can add offers to the store.
Active Registrations
All active registrations will be displayed in the list. To ban a seller and prevent the seller from being active on your Store Front, click the red “Ban” button. The seller can no longer sell through your Store Front, and the seller can not do a new registration request. After banning, the seller can be Approved again later on. In the example below, the seller “donald-duck” has been banned:
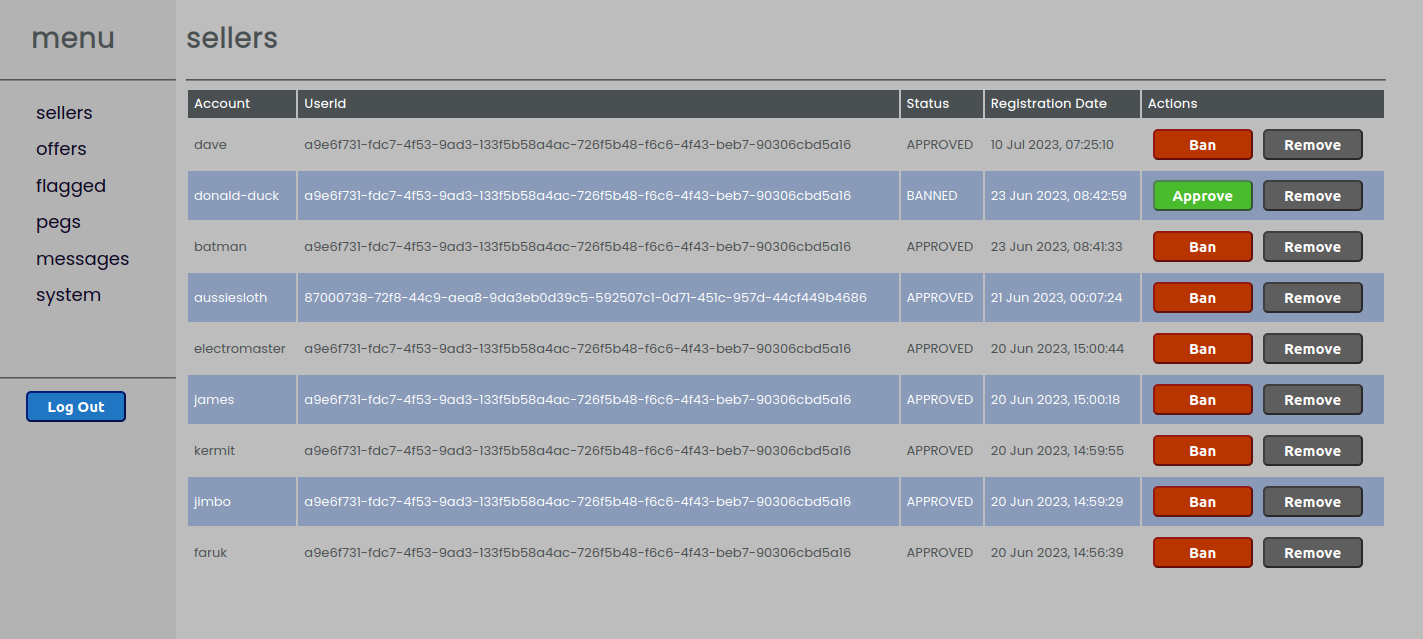
Removing registrations.
To remove a seller from your Store Front click the grey “Remove” button. The seller and all the offers of this seller are removed. The seller can no longer use your Store Front for selling activities, BUT the seller can submit a new registration request later on.
Important!: Removing a seller from your Store Front will break the communication between the seller and its customers. So only do this in case:
- You are sure the seller is inactive and does not have any messages in the queue.
- The seller requested removal (possibly when he lost access to his wallet, and can not revoke the registration from the wallet).
Note: If you don't want a seller to be active in your store, leave it Banned, and don't remove it.
Offers
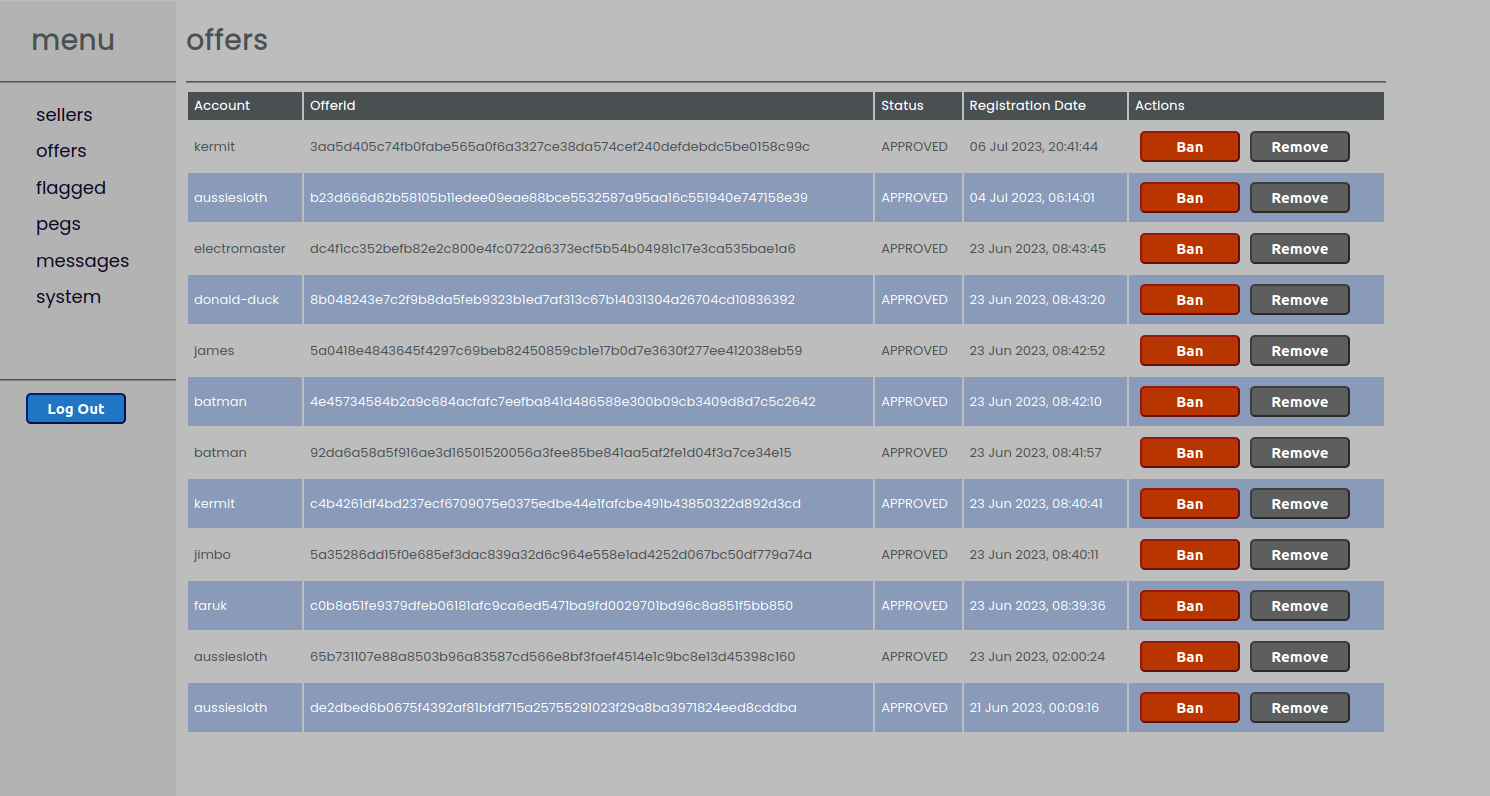
Offers that are added to your Store Front by allowed sellers (by the “Show in Store” button in the wallet) will automatically be allowed in the Offers list. So an approved seller can list offers on your store without any further required intervention. To ban a specific offer (and not the entire seller) click the red “Ban‘ button on the offer. The offer will not be available anymore in the store, and the seller can not add it again. Other offers from this seller are still active! To remove an offer click “Remove”; then the offer is not available anymore, but the seller can add it again.
Flagged
This section displays a list of offers that have been reported/flagged by the users of the wallet. A user of the wallet can report an offer if the user thinks the offer contains content that is undesired to have on the platform.
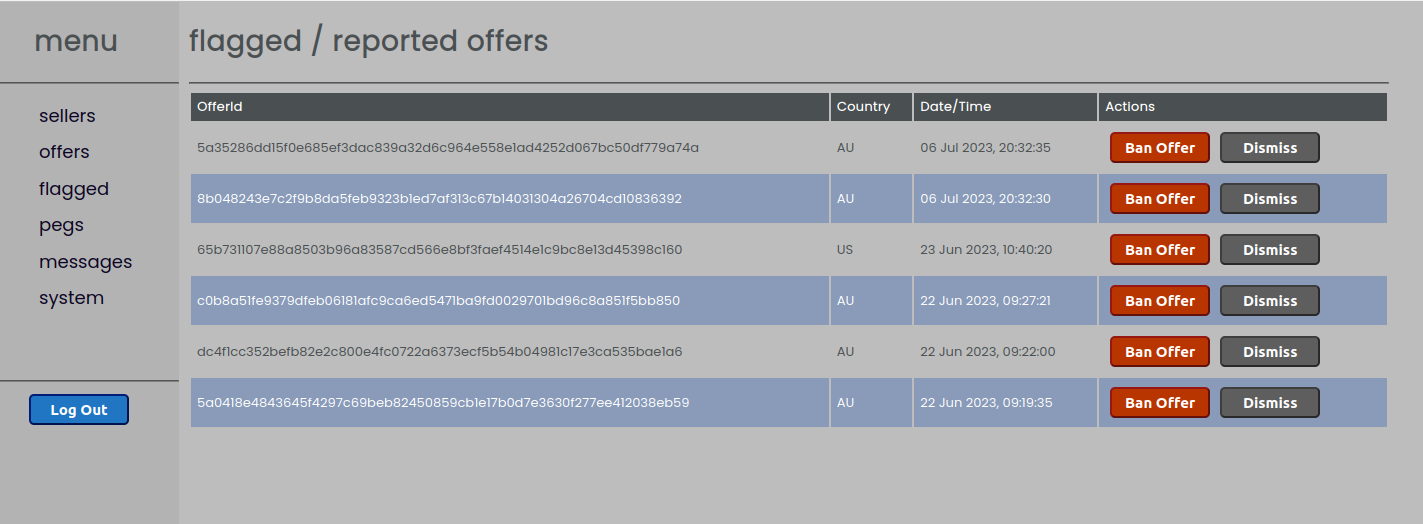
When an offer is already in this list, it can not be reported again to be prevented from ban request spamming.
You can use the offerId to look up the offer in the store/wallet. The Country column displays the country code on which the reporter was searching when he/she reported the offer. If you agree the offer should be banned click the red “Ban Offer” button. The offer will be banned from the platform. It is up to you whether to take action upon reviewing and/or banning the entire seller. If you think the offer is OK and want to leave it on the platform, you can dismiss the report by clicking the grey “Dismiss” button. The offer can be reported again by a user later on.
Pegs
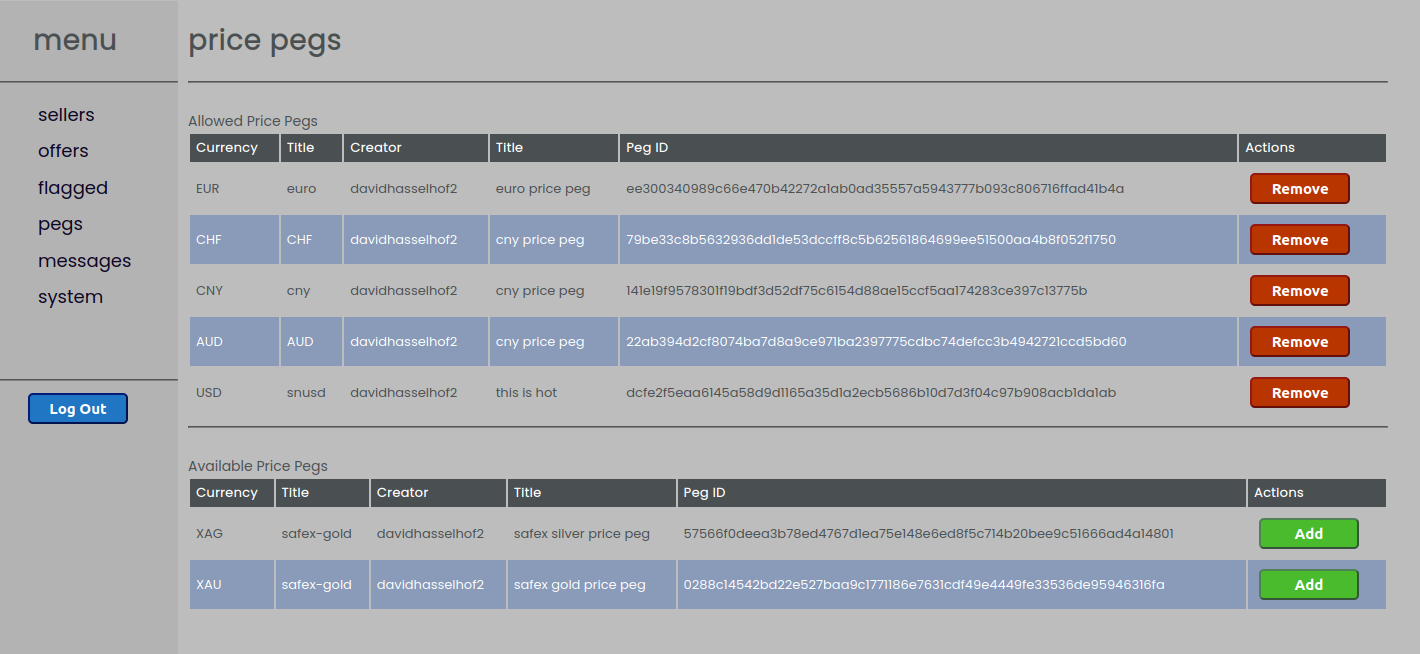
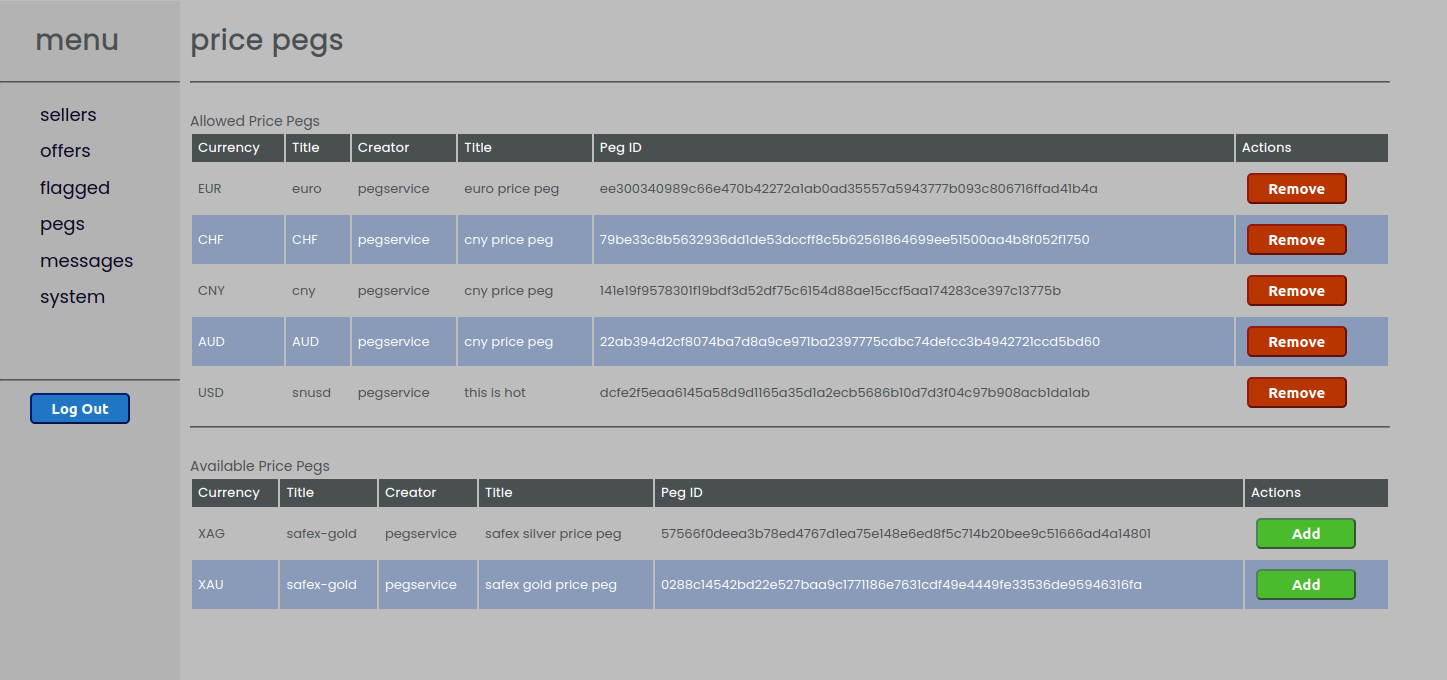
There may be many price pegs on the blockchain. It might be confusing which price pegs to use for the users of the wallet. In this section you can select which price pegs you think are trustworthy and good to use by the users of your store. The list of “Available Price Pegs‘ contains a list of all the price pegs on the blockchain. By clicking the green “Add” button, the price peg will be added to your Store Front and it will be available for sellers to select in the offer creating process in the wallet. To remove a peg click the red “Remove” button.
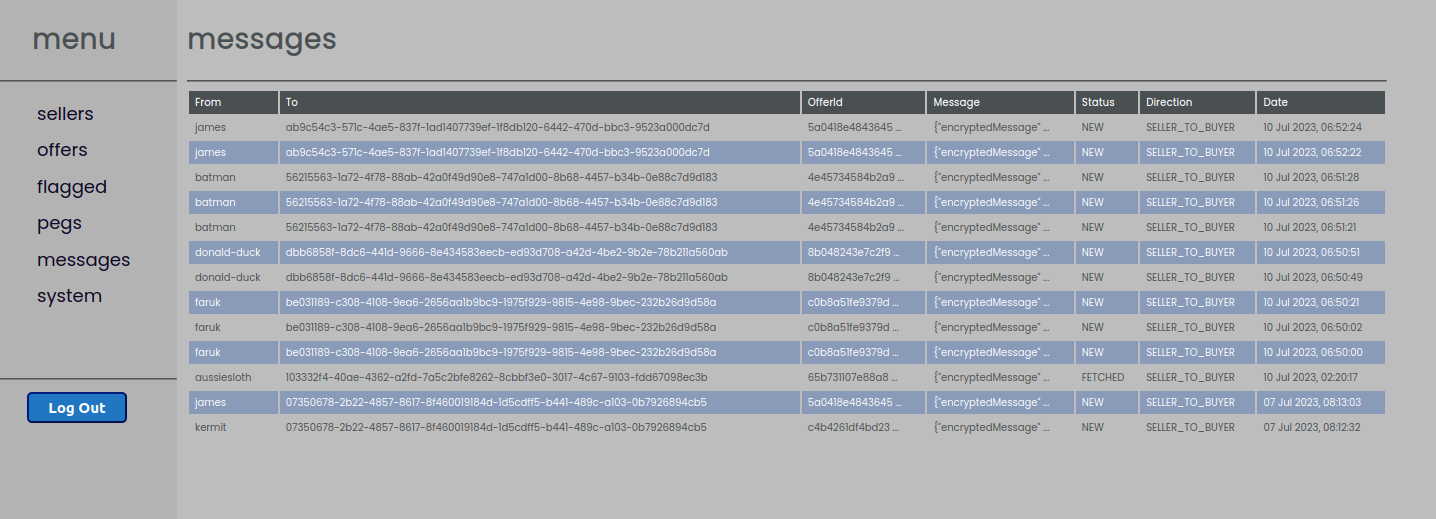
Messages
This section contains a list of the message queue. You can use it to see the messages that are still stored in the Store Front and have not been fetched yet by buyers or sellers. When messages are fetched and correctly processed by the receiving end, the messages will be automatically deleted from the Store Front. The messages are encrypted, so you can't read them. But is for getting an overview of the queued messages.
Important!: When you think of closing down the Store Front, keep the Store Front running in a Deactivated state (see “System”). In a deactivated state the Store Front does not allow new seller registrations, offer registrations or purchase transactions, BUT the messages can still be fetched by the receiving party. So in this way you provide the important service of still delivering the messages. When the message queue is empty the store can be shut down. Give it at least 2 months for the message queue to be cleared.
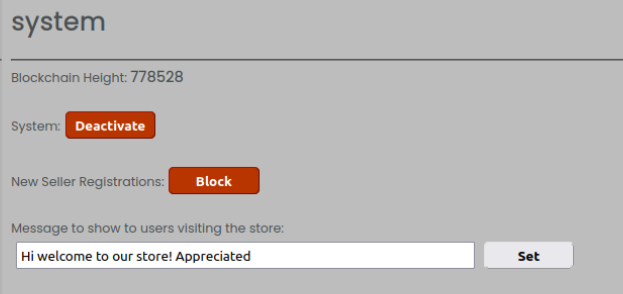
System
In this section the state of the Store Front can be managed. The block height is shown, which can be used to see whether the Store Front’s daemon is synced to the correct height (in comparison to the block explorer).
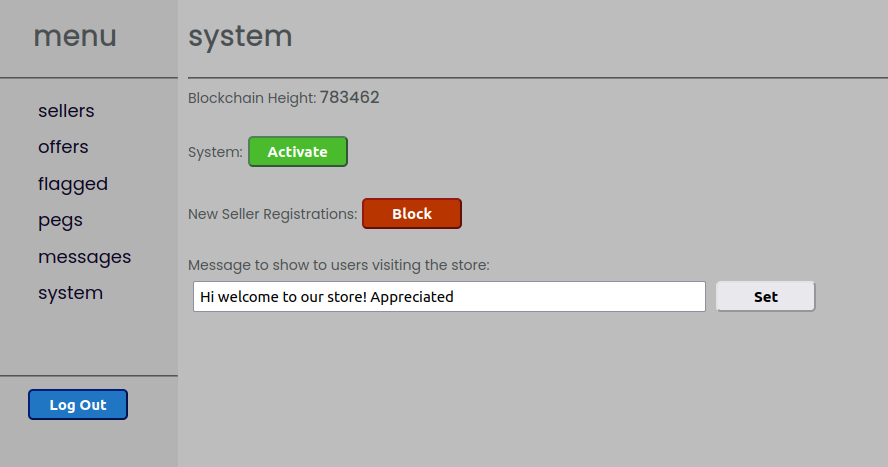
To activate the store, click the green “Activate” button. To deactivate the store, click the red “Deactivate‘ button.

In a deactivated state the Store Front does not allow new seller registrations, offer registrations or purchase transactions, BUT the messages can still be fetched by the receiving party.
Important Note: When you are about to perform maintenance on the server, like updating the Store Front or requesting a new SSL certificate, please Deactivate the store first, and wait 2 minutes before you start your maintenance. This is to make extra sure no user is a process of submitting a purchase transaction though your store. (There is a check in the wallet, that checks right before submitting a purchase transaction, whether the store is still available, but just to be extra sure give it some time).
If you don't want any other users to do a seller registration request, click the red “Block” button. Your store is operational, but no new seller registrations are accepted, to prevent you from seller request spamming while you don't want any other sellers to join your store.
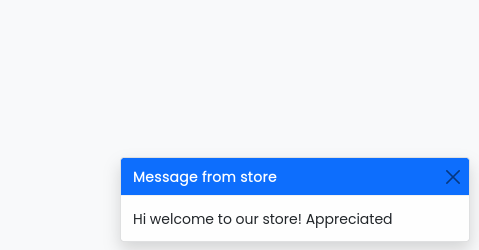
And last but not least, this page allows you to set a welcome message. This message is shown to the users of the wallet when they connect to your store! You can provide a nice customized welcome message here. Example: