Setting Up a Safex Node for Linux
In this text, we will explain how to set up a Safex Node for Linux. The instructions will give you enough information to set up a Node on your own.

The below instructions will give even a complete novice enough information and instructions to successfully get a Safex Full Node up and running on their Ubuntu 20.04+ PC
Recommended system requirements checklist:
- Dual-core CPU or better
- 4+ Gb RAM*
- 160+ Gb HDD/SSD Free Space
* It is possible to have the node running with less RAM (Eg. on a RaspberryPi3 or better), but it isn't recommended.
Before you go to the trouble of setting up a Safex Node, you need to first ask yourself whether you should...
IMPORTANT!
Running a Node requires you staying updated with project development, and ensuring you perform software updates to the safexd software whenever new updates are released.
If you fail to keep your node updated, you will no longer be supporting the network, and attempts to connect your wallet via your node will result in you not being able to perform transactions at the correct blockheight, as your node will have been ban/blacklisted by those nodes running the correct software version.
Even worse, if you happen to be solo mining from a node no longer on the correct software version, you’ll be wasting your time and electricity, as any blocks ‘found’ will not be on the consensus chain, and thus will be invalid.
Perform updates as soon as practicable after code updates are released by the development team.
Preparing your PC to download the Node software
1. In your preferred folder location, create a new folder: safexcore
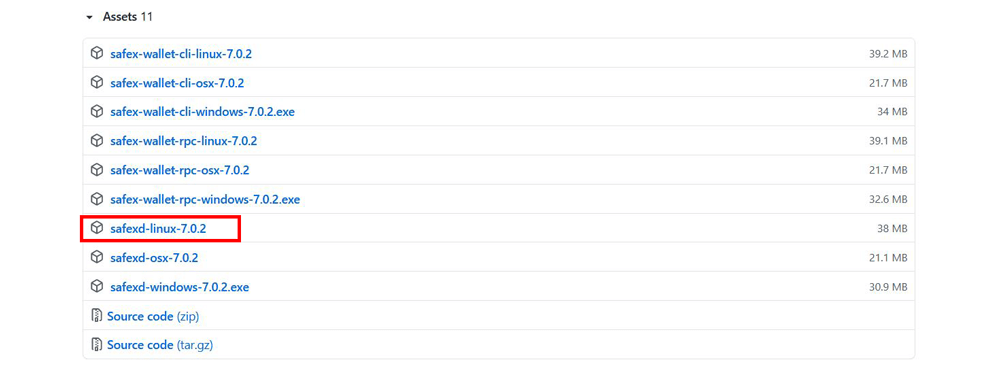
2. Download the latest binary release of safexd-linux from the safex GitHub repository and save it to your safexcore folder.
3. When the download completes, navigate to your safexcore folder. Your new file should be the only file in the folder.
4. On the file, right click - Properties and in the Permissions Tab, ensure the Execute checkbox is Ticked. For convenience, you could also rename the file to something shorter, to save on typing when launching it in a terminal window. Close the Properties window when done.
5. You can now launch the safexd-linux program by starting a terminal window and navigating to the safexcore folder
If you didn’t tick the Execute checkbox in the Permissions Properties earlier, you can also do it via the terminal window by typing:
chmod +x safexd
You can now launch the node by typing the following command:
./safexd
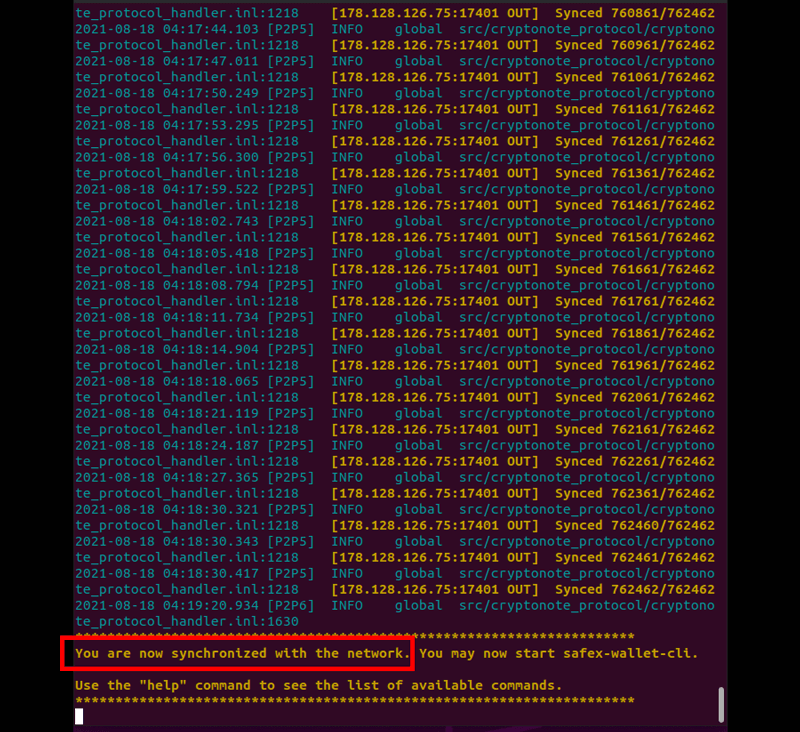
After some software initialization, the blockchain will begin to synchronize. Your new node will start connecting to other Safex Nodes around the world and the blockchain will be written to your hard drive from scratch, arriving in 100-block chunks. This will take some time, depending upon your computer speed and internet connection.
If you ever turn off your PC, when you subsequently restart the safexd-linux program, it will resync from the last block it had received prior to shutdown.
When the node finally reaches the consensus top block, a SYNCHRONIZED message will appear in the terminal window.
At this point, type status in the terminal window and hit the Enter key.
Status will show you:
- Blockheight on Mainnet (when fully synced, it will say 100%, otherwise it will show height currently synced to and the corresponding percentage)
- Whether your safexd instance is [solo] mining or not
- Net hashrate (of the entire Safex network)
- Hardfork version (as of this article v7 is current), followed by üp to date”if it the current consensus fork
- Connections (ideally both IN and OUT show >0. If there are no IN connections, ports 17400-17404 should be opened on your Firewall settings)
- Node Uptime
When you boot up the node, the default maximum number of connections your node will connect to is 10 OUT and 10 IN.
You can adjust this maximum, should you choose to do so.
For a full list of commands, type help
Scroll through the commands and you’ll note in_peers <max_number> and out_peers <max_number>
You can change your maximum peer connections by using those commands, and simply replace <max_number> with your desired target number, eg. 50.
If you do need to shutdown the node, it’s always best practice to manually save (Enter) the blockchain before you exit (Enter).
Be a supporter of the Safex Network - learn about Safex Full Node, and thanks to this guide, run your own node.