Step-by-Step Safex Cash Mining Rig Build and Setup: Linux/xmrig
Build and set up a Safex mining rig on Ubuntu using this guide.

Here we will show the building and configuration of a Ryzen 9 3900X SFX mining rig, including initial assembly and setup for the rig, the installation of Ubuntu 20.04, and finally, accessing the rig via SSH terminal window to install xmrig and set it to mining SFX.
Jump To In-Document Quicklinks:
- Equipment
- Install Balena Etcher
- Flash the Ubuntu 20.04 ISO onto a USB drive
- Install PuTTY
- The Build
- Initial Boot
- BIOS Setup/Checks
- Install Ubuntu
- Setting Static IP address for the rig
- Use Ubuntu Desktop to install xmrig
- PuTTY SSH remote access into the Rig
- The Mining Pool Website Settings
- Feedback or Issues
Equipment
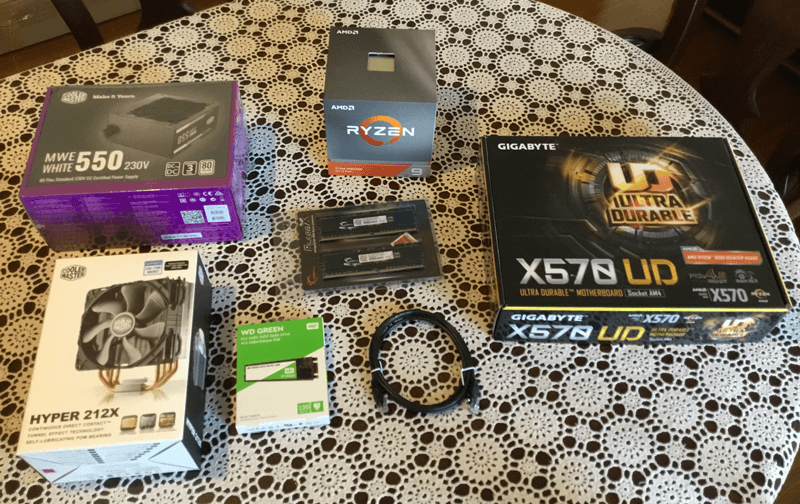
Equipment purchased for the rig:
- AMD Ryzen 9 3900X CPU
- Gigabyte X570 UD AMD Motherboard
- G.Skill Flare X 16GB (2x8GB) 3200MHz CL16 DDR4 RAM
- Western Digital Green 120GB PC M.2 3D NAND SSD
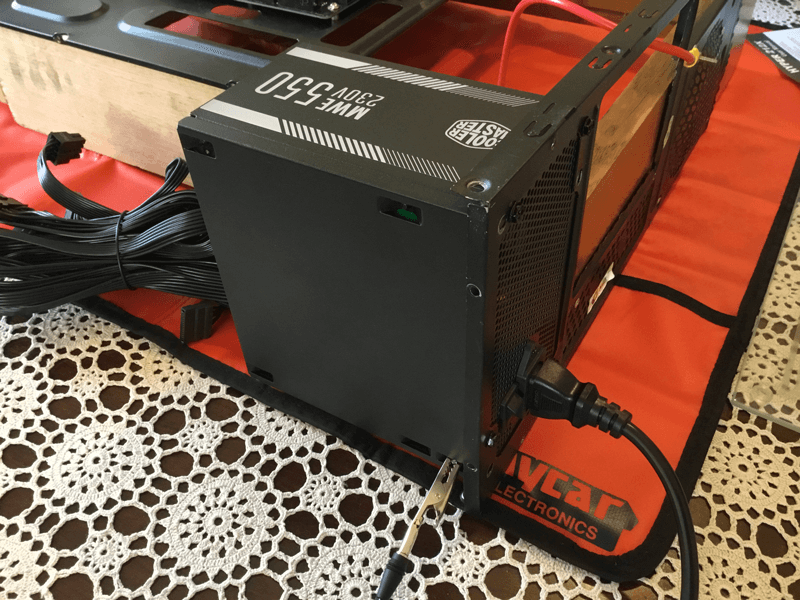
- Cooler Master MWE White 230V 550W 80 Plus V2 Power Supply
- Cooler Master Hyper 212X Universal CPU Cooler
- Network Cable
Other equipment:
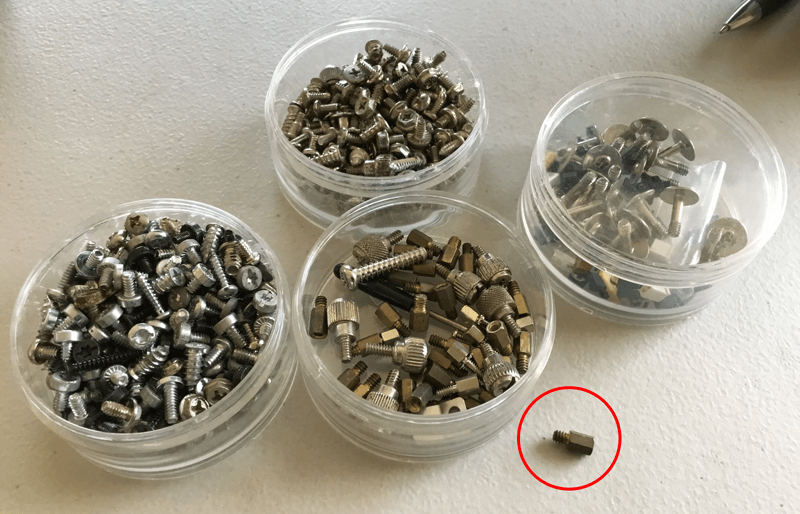
- Motherboard Spacers and screws
- ATX Motherboard Mount and/or timber rig frame
- ATX PC Power Switch
- PSU Mount (optional)
Additional components - only needed during the build and initial rig config:
- Spare (empty) USB Drive, 4GB+ (for Ubuntu 20.04 ISO)
- Another USB Drive with a text file containing your Safex public address (so you can copy/paste it into the config file)
- GPU Card
- Monitor (& suitable cable - HDMI/DVI/VGA), Keyboard & Mouse
- Phillips Head Screwdriver
- Thermal Paste
- Anti-static strap/mat
Software/Other Access needed:
- Internet access (to download xmrig, and then for mining, obviously)
- Ubuntu 20.04 ISO
- Balena Etcher (for creating bootable USB drive with the Ubuntu ISO)
- Login access to Home Router (to set static IP address for each rig via DHCP)
- Another PC with PuTTY (SSH) installed
The Key Pieces of Equipment
Ryzen 9 3900X CPU
- Currently the most efficient (purchase cost vs hashrate vs power use) CPU for mining SFX.
X570 AMD Motherboard
- My component supplier indicated that their 450, 520 and 550 series motherboards needed a BIOS update for the Ryzen 9 CPUs to work properly. Their X570 motherboards required no BIOS update to work with the Ryzen 9 straight out of the box. Other anecdotal evidence suggests these other motherboard series also work with the 3900X without a mandatory BIOS upgrade, so this was just a personal preference.
- Ensure the specific MB you buy has dual channel RAM slots.
16GB (2x8GB) 3200MHz CL16 DDR4 RAM
- 2 Sticks of RAM to use the dual channel RAM available on the X570 motherboard, giving slightly better hashrate than a single stick.
- If you can find 2 x 4GB sticks of 3200MHz RAM, that would also be fine, but my supplier didn’t have any in stock.
GPU
- The 3900X CPU has no built-in graphics capability, so any old cheap GPU can be used during the initial setup, to get the rig configured to a point where you can access it remotely from another PC.
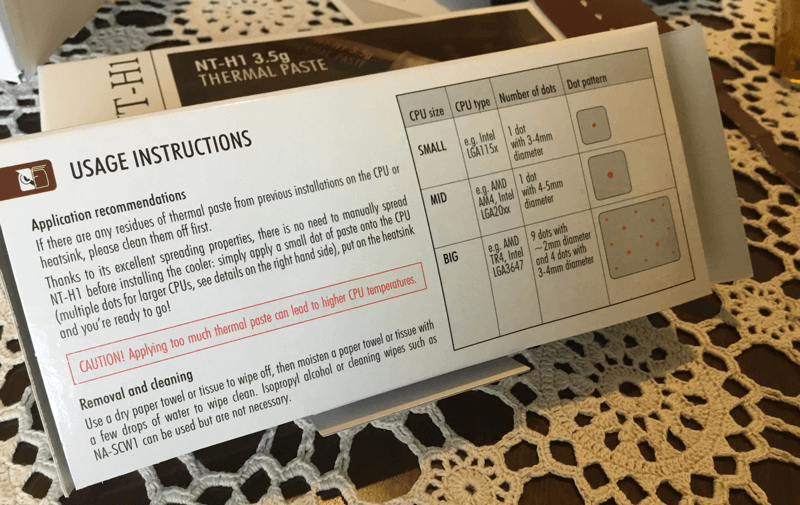
Thermal Paste (unless using the pre-pasted stock cooler that comes with the 3900X CPU)
- Feel free to google reviews on the various types of thermal pastes on the market, along with their pros and cons. For this build, I’m using Noctua NT-H1 Pro-Grade Thermal Compound, which is not electrically conductive (safe if it oozes out onto the motherboard or other circuitry bits), is non-corrosive, and has excellent long-term (3 years) stability.
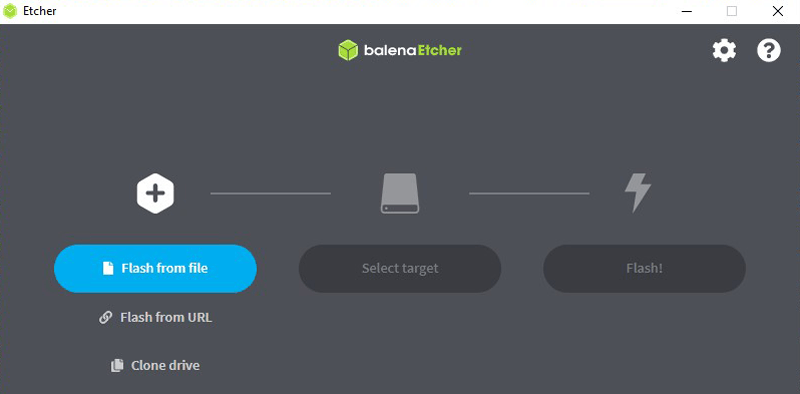
Install Balena Etcher
On your laptop or PC, browse to balena.io and download the latest release. Double-click the download, and in a matter of seconds it will install, and you’re ready to flash a USB Drive.
Flash the Ubuntu 20.04 ISO onto a USB drive
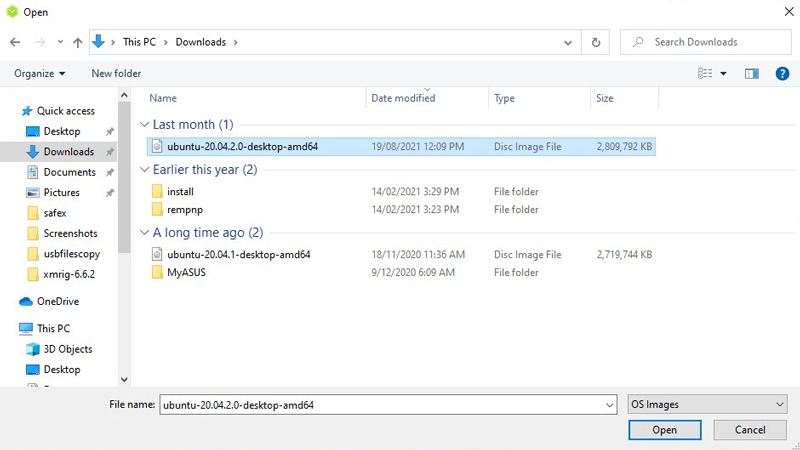
On your laptop or PC, browse to ubuntu.com and find the latest stable release. We will be using Ubuntu 20.04.2.0 LTS at the time of this article being written.
The ISO is 2.7 GB in size, so any USB drive at least 4+GB will suffice.
Download the ISO to your PC.
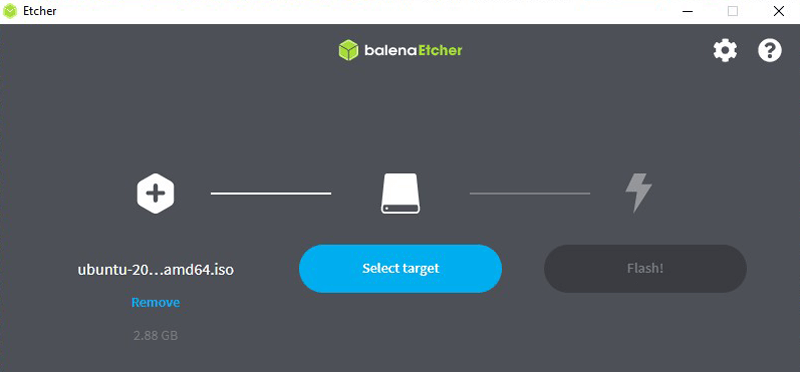
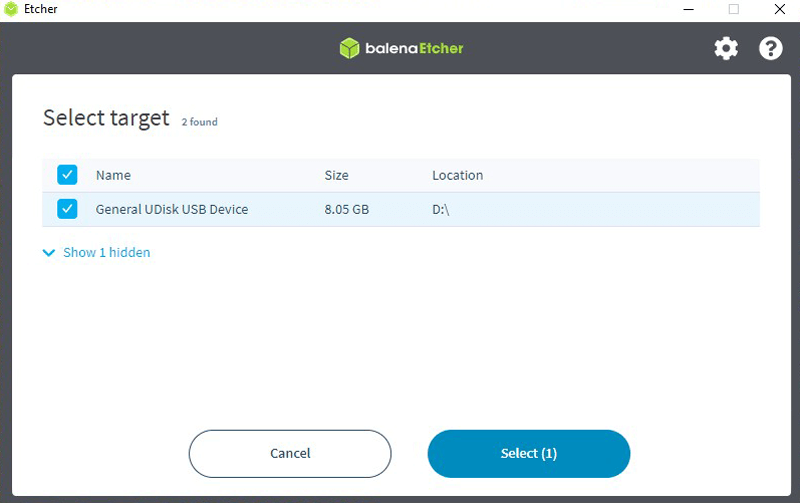
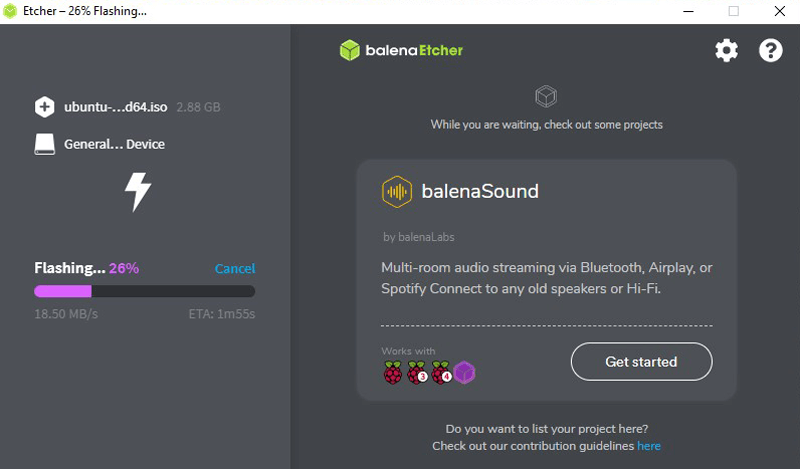
For the security conscious, you can verify the download by following the links on the Ubuntu Thank you for downloading page. Using the Balena etcher software, flash the USB with the Ubuntu ISO, which makes it bootable.
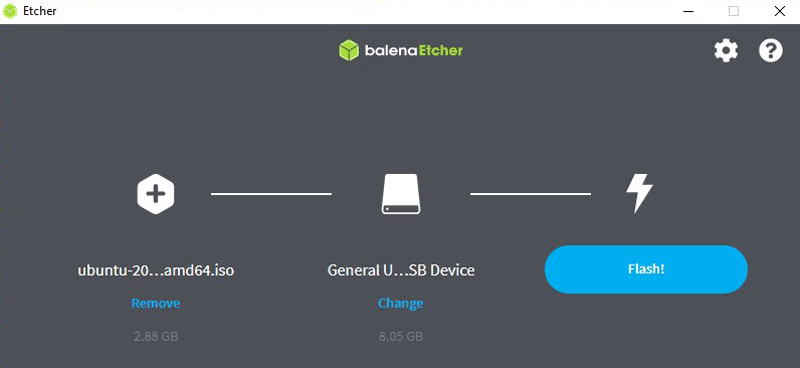

Close the program and Eject the USB from your PC.
Install PuTTY
Go to putty.org and grab the latest software release for your PC, then install it.
Note: Besides PuTTY, any other SSH client that the user may prefer can also be used. If you have Git Bash installed you can use that, or even PowerShell, which is installed by default in Windows10, you can also do SSH.
For the security conscious, you can find the Checksum files at the bottom of the download page.
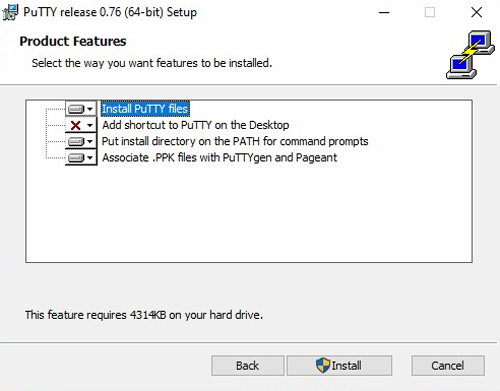
As you move through the installation screens, you’ll arrive at:
Change it to:
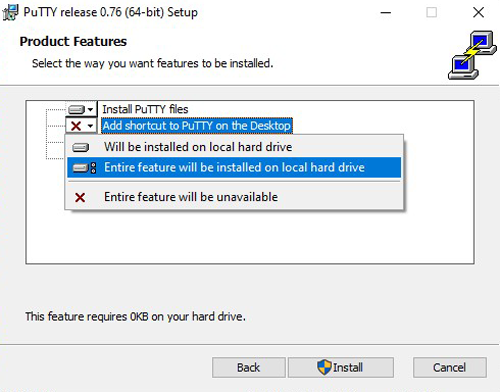
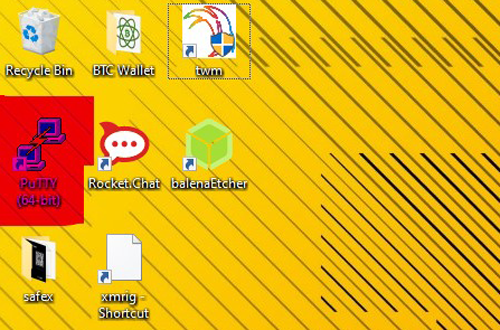
This will ensure you have a shortcut to the PuTTY program on your desktop, when you need to SSH into the mining rig later on. If you prefer an uncluttered desktop, ignore this step. Click on Install, and moments later:
Safety Message: static electric discharge and the potential to damage PC components.
Over the years, I’ve built numerous PCs, replaced components, and generally tampered with all manner of IT bits and pieces. I’ve never had an issue with static electric discharge damaging anything. However, in line with best practice, particularly when doing this as a tutorial for others, it would be remiss of me to not point out the risks/dangers to ICs (Integrated Circuits) on your motherboard and other computer components by NOT using an anti-static mat/wrist strap, or regularly grounding yourself when playing with electronics.
For this instructional, I specifically went out and bought an anti-static mat and wrist strap, just to show best practice during the build. In all honesty, if I was just doing it for myself, I wouldn't have bothered. If you avoid polyester or other highly static clothing items, plus ground yourself regularly, you are generally okay. But please be warned.
In Australia, wall sockets have an ON/OFF switch and a permanent ground/earth pin. By plugging the PSU into a switched OFF wall socket, the anti-static mat earth-wire can be clipped to the earthing/grounding pin on the PSU or metal frame of the mining rig which has the PSU attached.
Recommendation: Check on the best practice earthing/grounding option for your region.
The Build
Mise en place - although a french culinary term, meaning everything in its place, it applies equally to a rig build. Basically get all your bits and pieces ready before you begin the build.
Be sure to read through all accompanying manuals for your specific components and ensure you follow your manuals/guides, if there’s any difference to the information presented below.
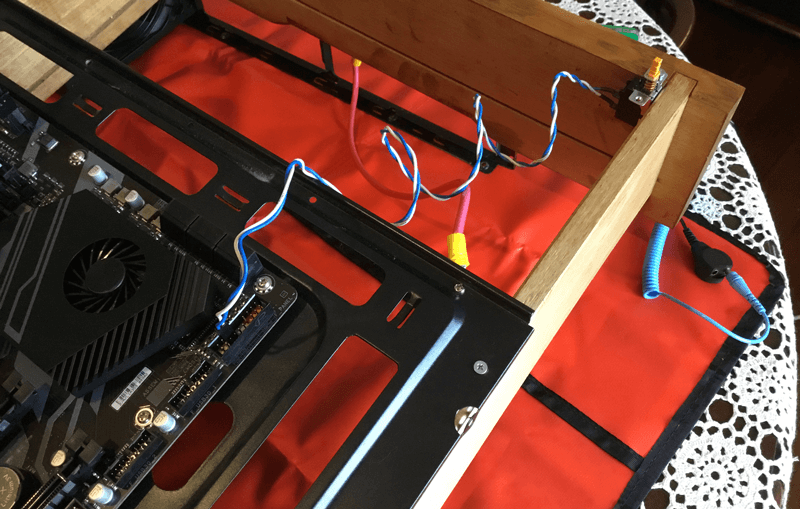
I personally think it’s important to have a solid chassis for mounting your motherboard. It can be an old chassis from a disused case, or even a simple timber frame that allows all the mounting points on the motherboard to be screwed down. Regardless of the chassis, be sure to use spacers underneath the mounting points, to allow the motherboard to sit up off the frame a little way.
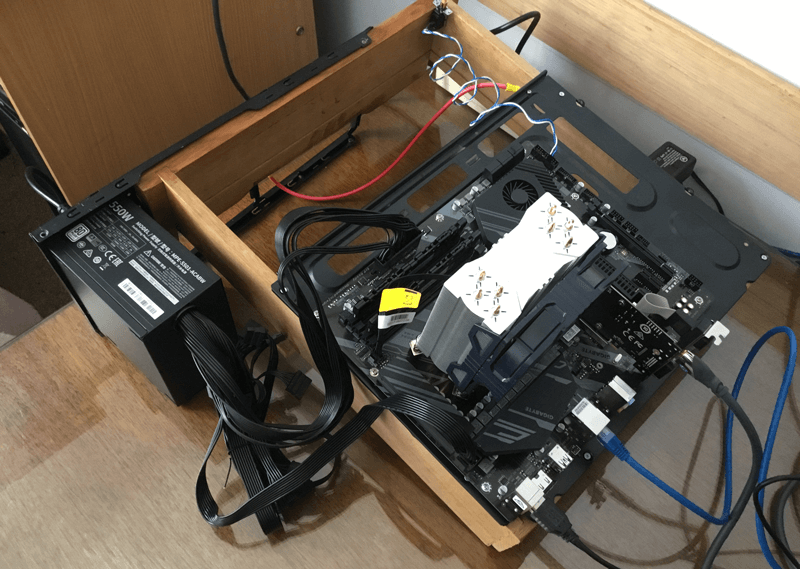
Let’s begin with building the Safex rig
- Mount the PSU in your rig and then earth/ground your anti-static mat/strap.
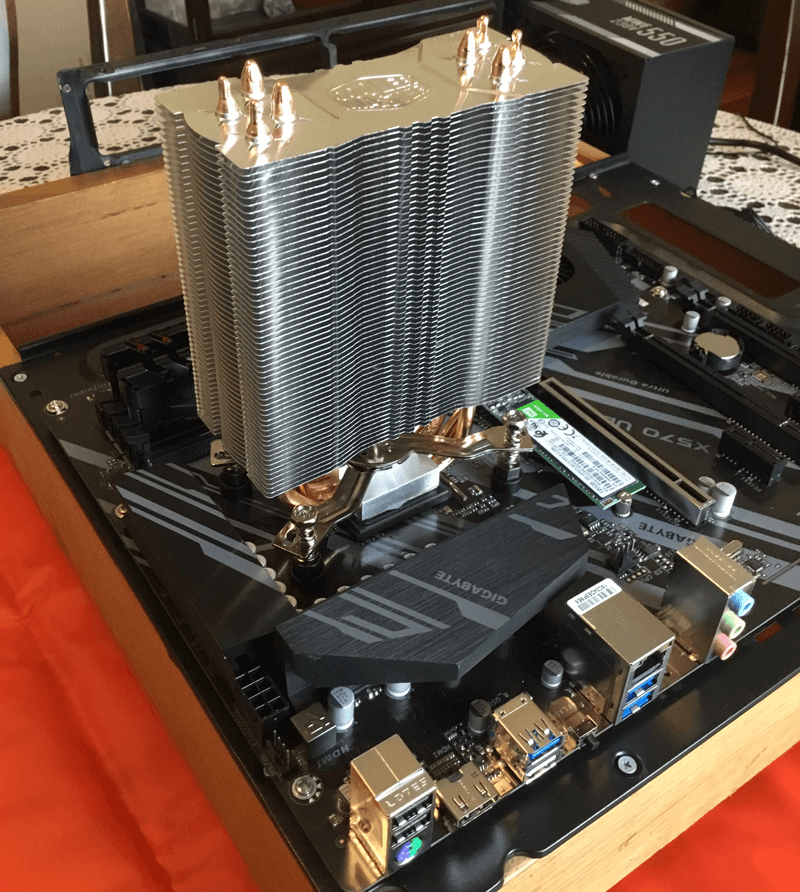
2. Mount the Motherboard on the spacers and screw down firmly, but not stupidly tight.
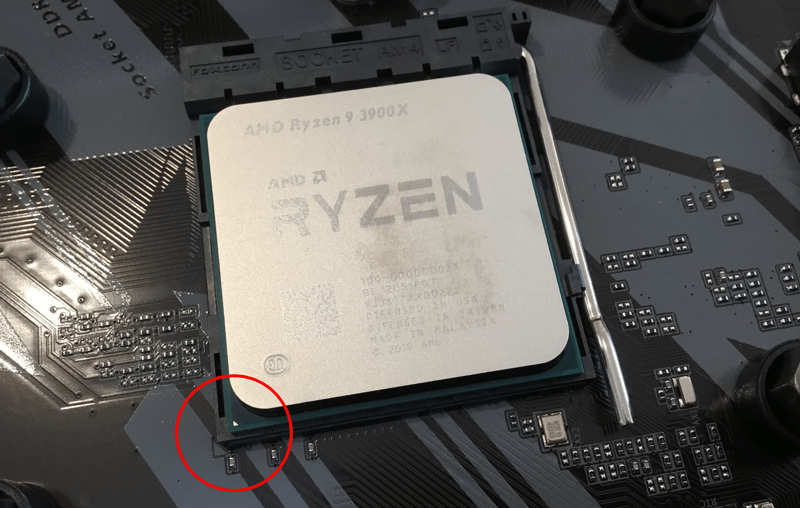
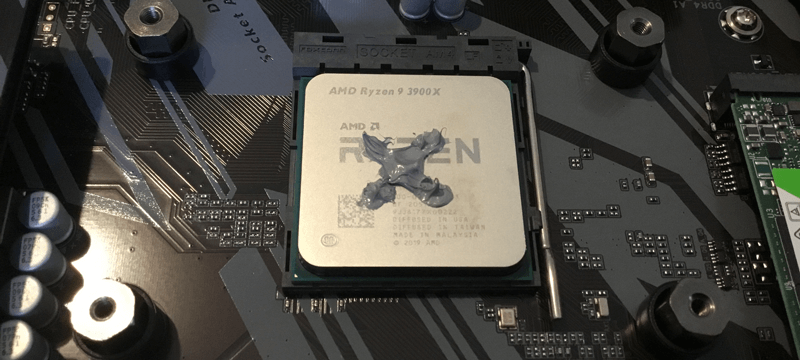
3. Install the CPU. Be sure to locate the pin 1 triangle on the CPU and corresponding triangle on the AM4 socket and fit the CPU in the correct orientation. Lock it into place.
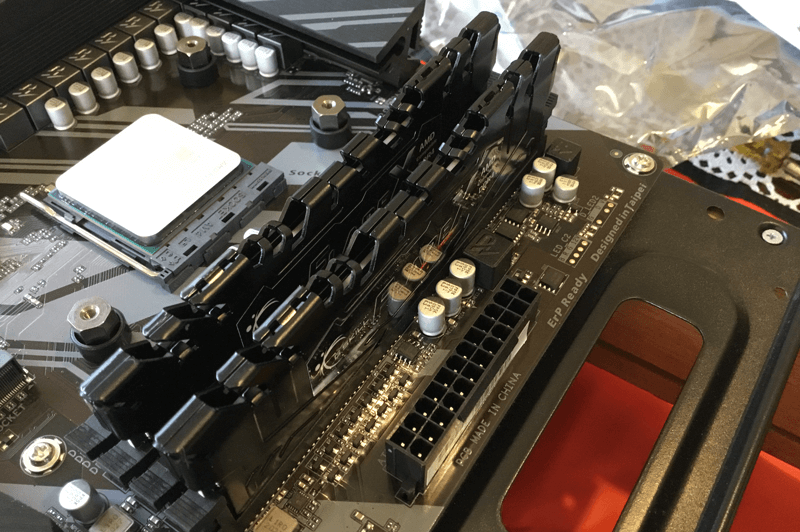
4. Mount your RAM sticks, ensuring you check the specific motherboard manual to ensure you're using the correct slots for dual channel RAM use.
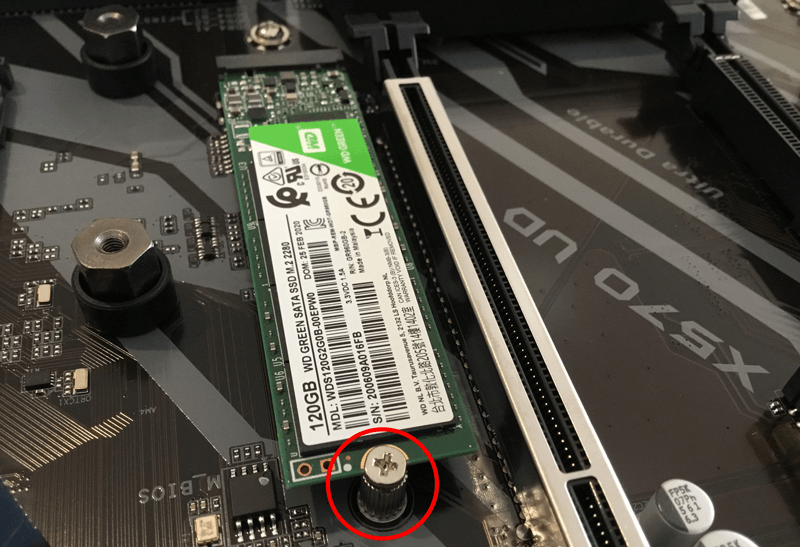
5. Reposition (if necessary) the M.2 Standoff to the correct distance for your SSD, then fit it and secure it with the screw into the standoff.
6. If using the stock CPU cooler that comes with the 3900X CPU, then mount it (the base of the stock cooler already has thermal paste applied) on the CPU and secure it in place.
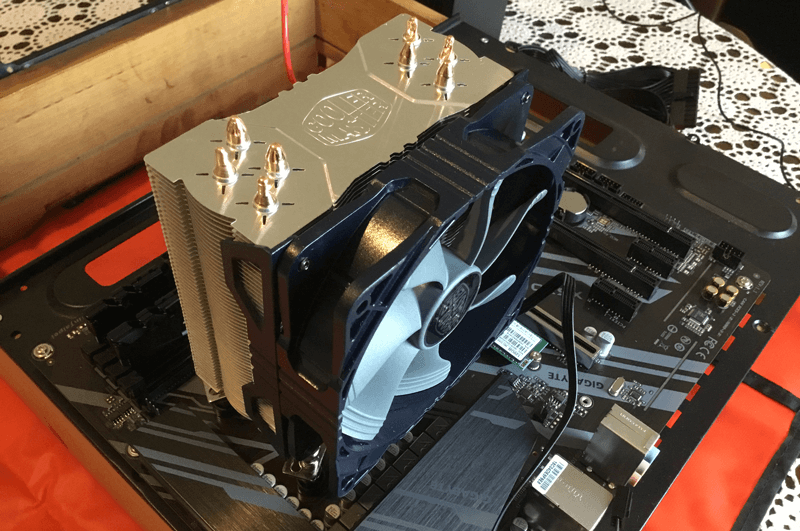
a) If using an aftermarket CPU cooler, remove the prefitted cooler mounts on the motherboard, if necessary, and replace with the aftermarket mounts. Follow the specific instructions for your aftermarket cooler.
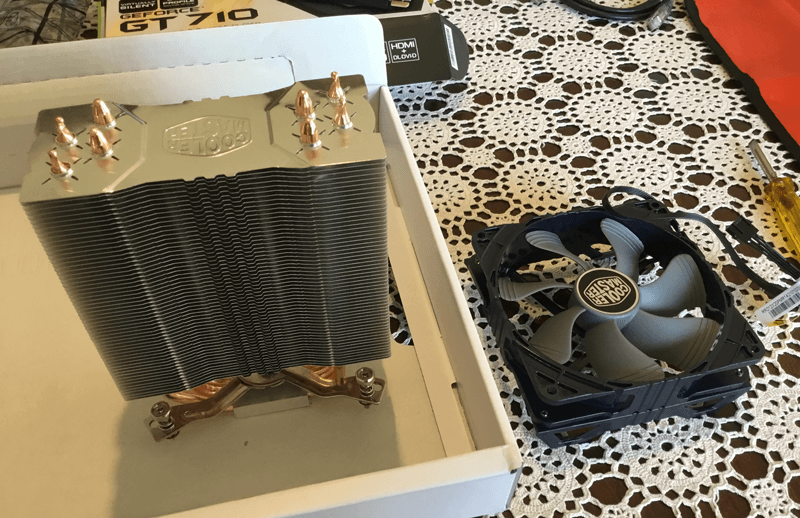
b) If not using the stock cooler, apply Thermal Paste to the CPU prior to fitting the cooler.
c) Seat the cooler squarely and firmly onto the CPU, then secure into place with the screws (or any other securing mechanism your cooler uses).
d) If the cooling fan was removed from the cooler during the installation, refit it now.
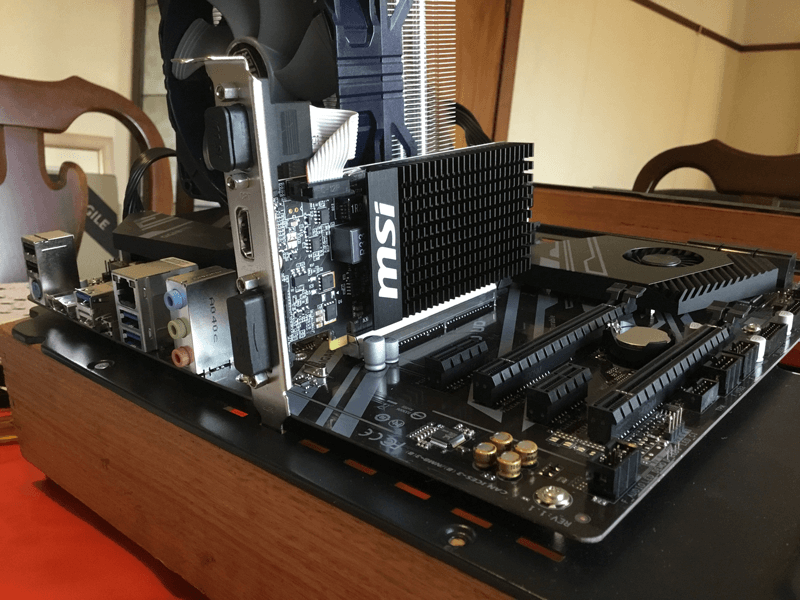
7. Fit the (temporary) GPU.
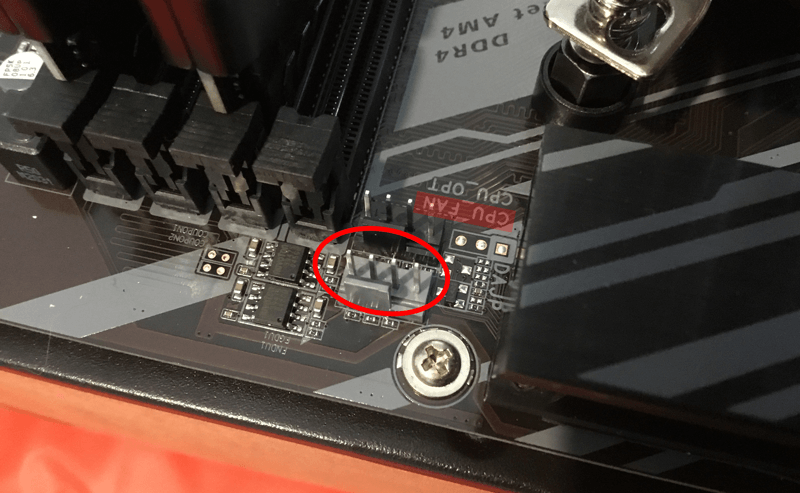
8. Connect the 4-pin cooler fan cable in the CPU_FAN header, ensuring correct orientation of the pin socket. If using an aftermarket cooler that has 2 fans, connect the second fan into the CPU_OPT header, or wherever the motherboard manual recommends.
9. Go and double check your PSU is turned off. Once confirmed, connect the ATX_12V (2x4 pin) and the ATX (2x12 pin) power connectors.

Whatever you do, do not build your chassis in such a manner that the PSU cables can’t reach the headers on the motherboard.
If you did, then reposition the PSU so the cables reach (...which I then proceeded to do. Oh, dear).
10. If using different components to this specific build, you may also need to connect additional PSU cables, sata cables, LED strips, etc. If not using a modular PSU, then go and bundle up any unused cables and tie them together neatly.
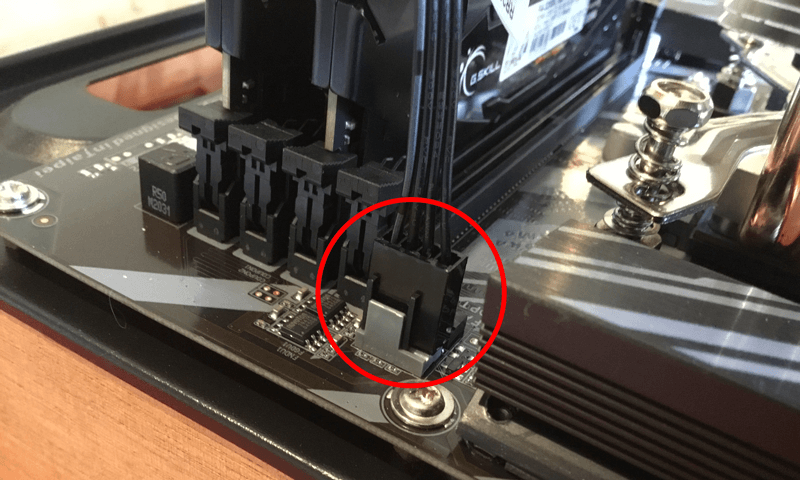
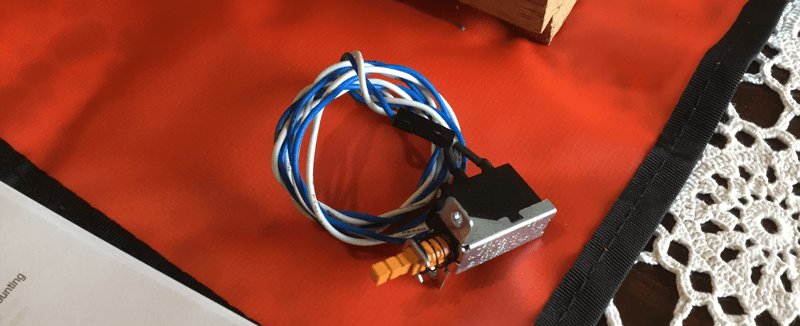
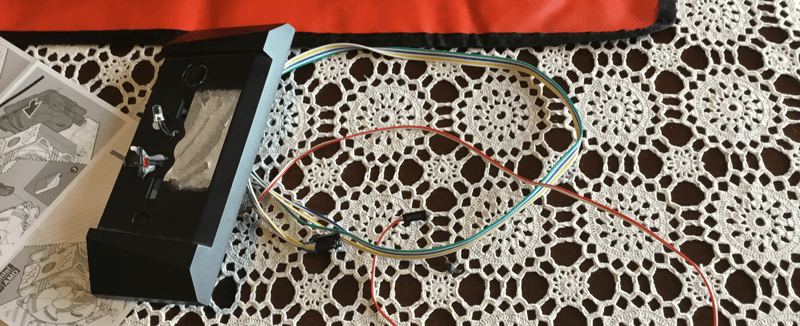
11. For my rig, I’m also fitting an ATX PC Power Switch, so that I don't have to use a screwdriver to short the two power pins (PW+ and PW- in the F_PANEL Header) on the motherboard each time I need to start it.
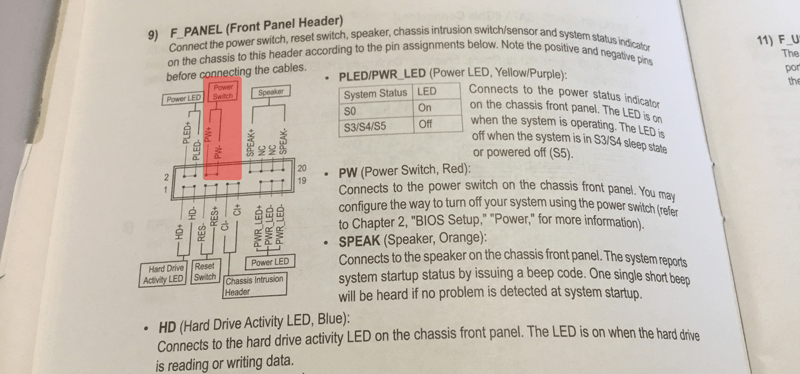
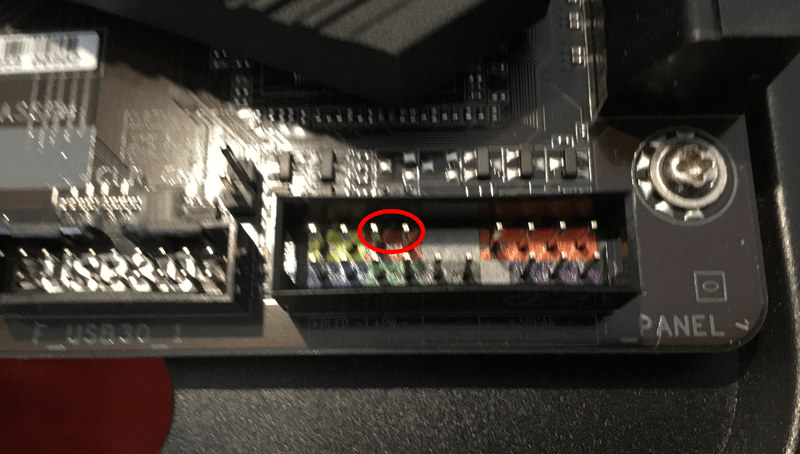
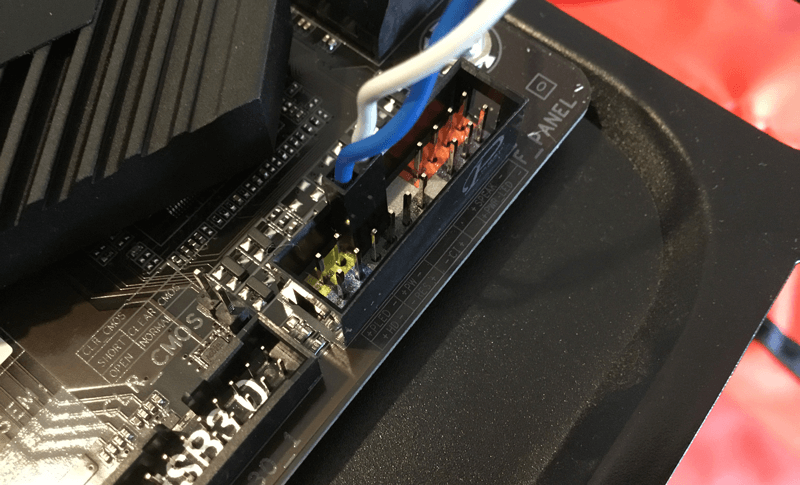
12. You could also optionally connect a Reset button and/or LED lights for Power/Hard Drive activity, salvaged from an old PC case. Connect as per the correct header pin instructions in the motherboard manual.
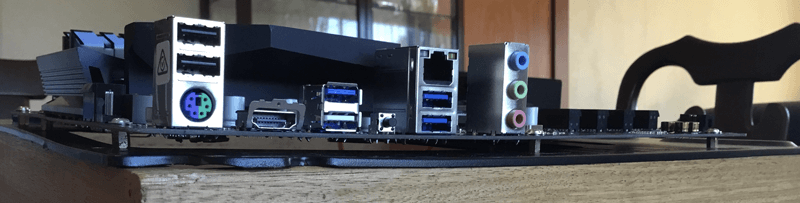
13. Connect monitor to GPU.
14. Connect network cable, keyboard and mouse.
15. Turn on power to your PSU and at your PSU switch.
Initial Boot
Ensure the Network Cable, Monitor, Keyboard and Mouse are correctly plugged into the rig. With your bootable Ubuntu ISO USB Drive inserted into the motherboard, turn on the rig.
If you added the otional on/off switch, then press the power button. Otherwise, grab a small screwdriver and briefly short the two PW pins on the motherboard by touching both pins with the screwdriver tip, only until it starts to power up.
If you bought a different motherboard, check the specific manual for where to locate the PW pins on your board.
You should enter the BIOS by pressing the Delete button on the keyboard during POST (Power-On Self Test). If using a different motherboard, check the specific manual for what key needs depressing to access BIOS on boot up.
BIOS Setup/Checks
- Set the System Time/Date (if connected to the internet correctly, the time/date will self adjust.)
- Check the Boot Option Priorities include USB
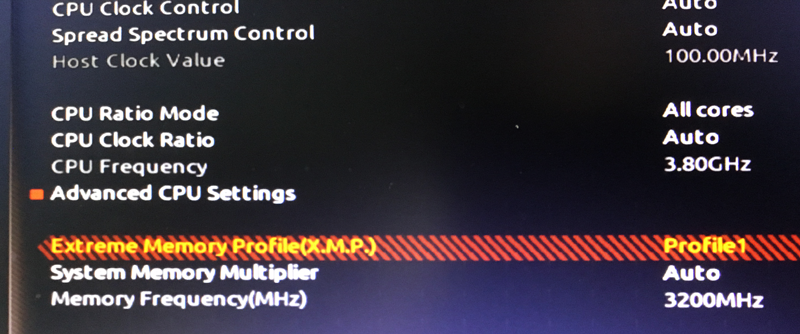
- If using XMP-compatible RAM, go into the frequency settings and change the RAM profile. For the motherboard used in this build, you enter the Advanced Frequency section on the MIT tab, then change the XMP from Default to Profile1. You’ll see the frequency change to 3200
- Change the Fan Settings to Maximum.
If the rig doesn’t boot from the USB drive, try another USB slot on the motherboard - not all USB ports necessarily have the capacity for boot function, or may require activation in the BIOS, depending on the specific motherboard being used. If in doubt, check the motherboard manual for any guidance it may offer.
For the motherboard in this build, the USB booted from the white USB slot.
Install Ubuntu
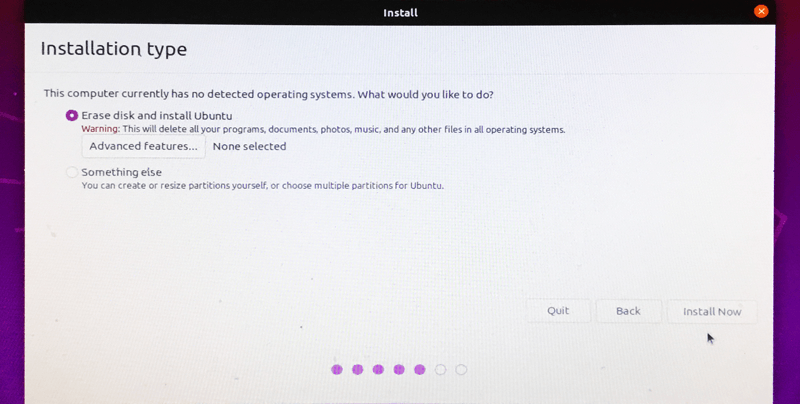
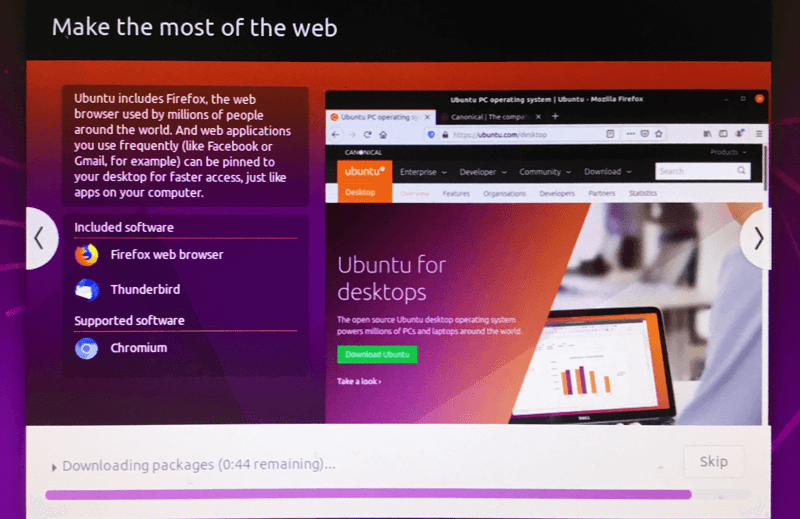
Once the rig boots from the USB drive, you will be presented with:
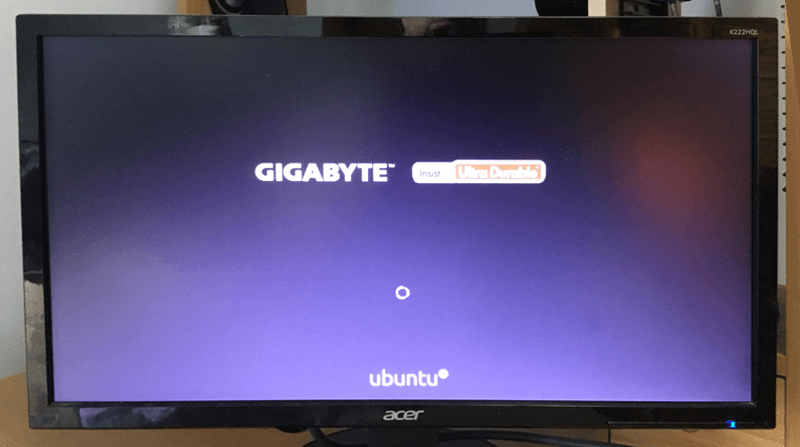
It will initially do a check of the files on the USB.
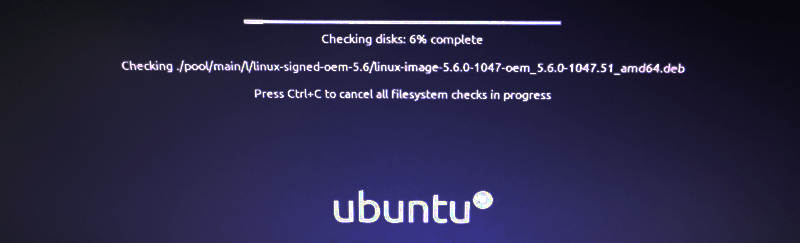
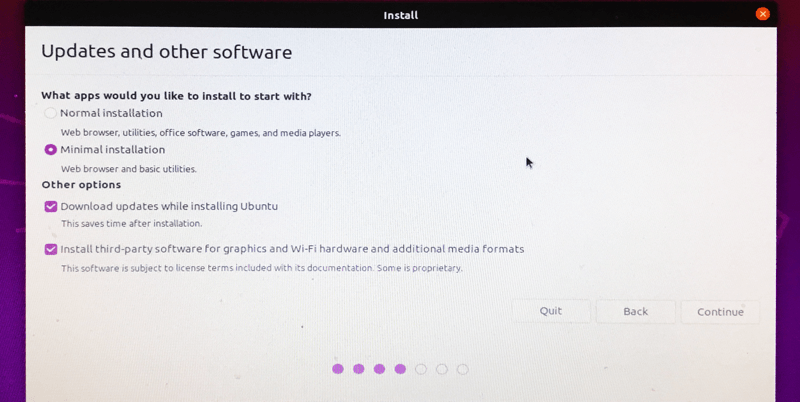
Then this:

Select Install.
Follow the installation prompts and enter your desired rig username and password. Select the other settings, as is appropriate for your region and preferences. Take a note of the username and password you create - you will need them later for logging back into the desktop on bootup, and for remote access login.
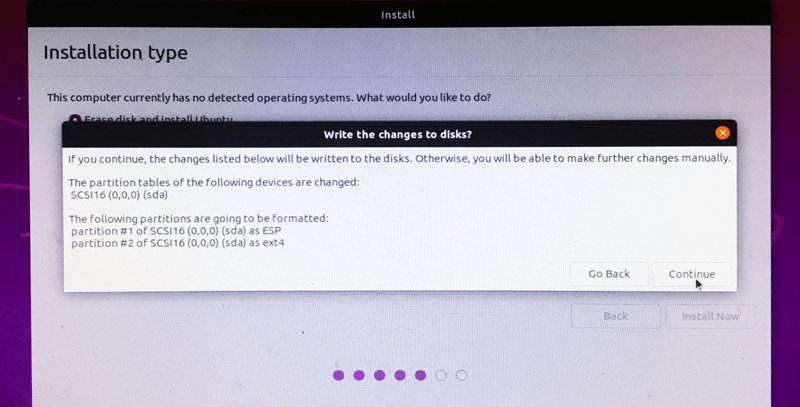
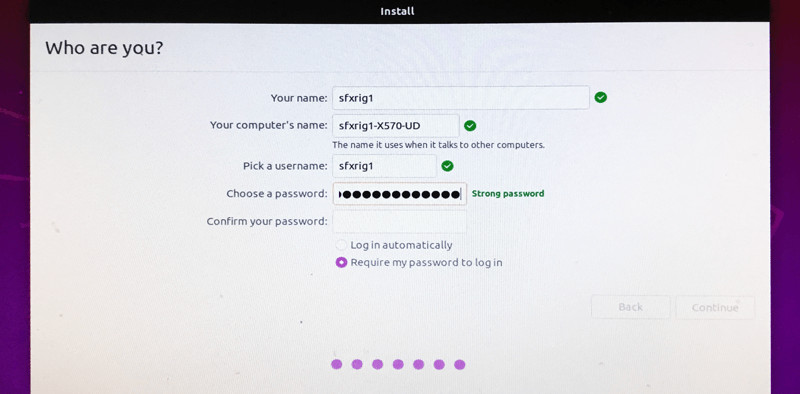
Confirm your password in the next field, then click continue.
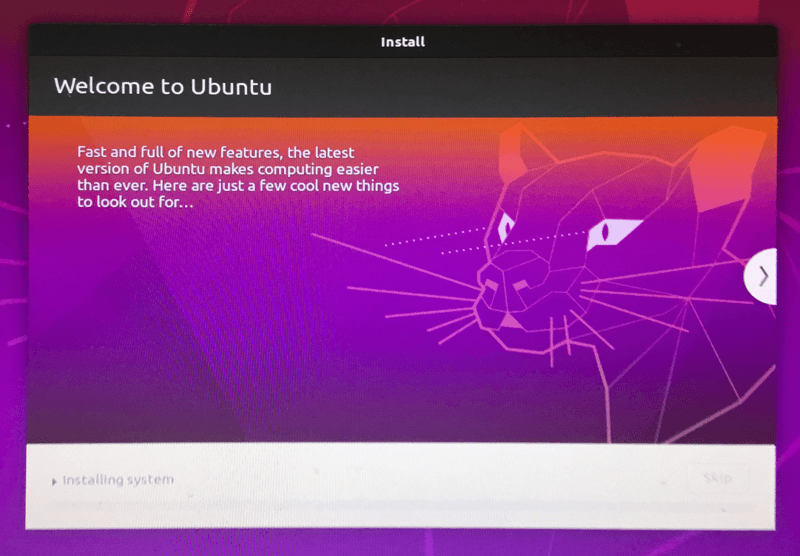
It will eventually finish the install and then reboot.
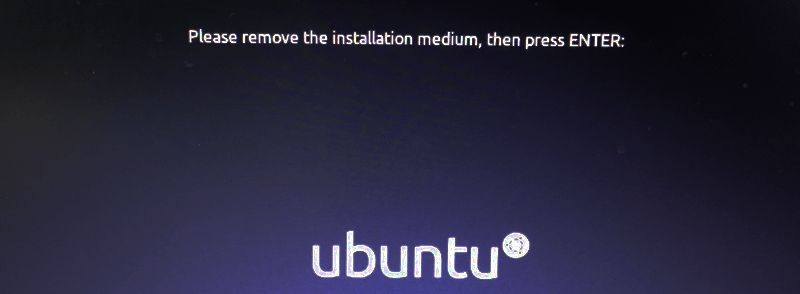
Remove the USB stick now, and click Enter.
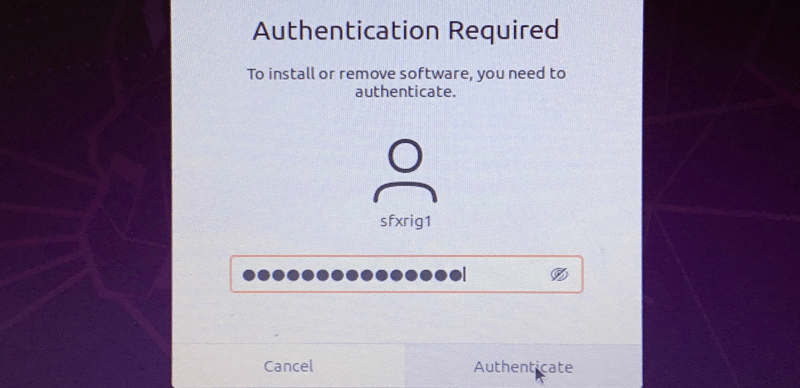
Once the install finishes, and you’re at the Ubuntu Desktop, just wait a few minutes - the OS will check for any recent updates since the ISO was released. Proceed with those updates, entering your password if/when prompted.
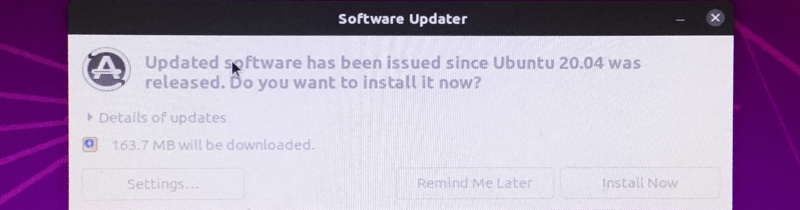

Restart.
Setting Static IP address for the rig
Assumption: Your rig is connected to your home LAN via wired connection. There are several methods of configuring a static IP address for your mining rig:
- Router configured - static DHCP
- Set Manually in Ubuntu
My personal preference is to configure it within the router, as it is more foolproof (you can’t accidentally have two devices with the same assigned address), so that is the method I’ll explain first. Choose only Option A or Option B, below, as you only need to do either, not both.
Option A: Router configured - Static DHCP
Every router is different, so you may need to consult your router manual for specific instructions. The one consistent thing you need is the MAC address of the wired network port on the mining rig. To find the MAC address on the rig:
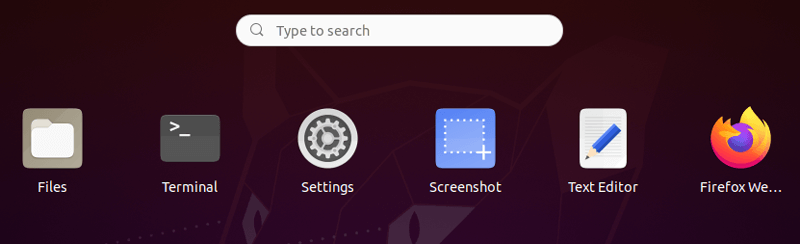
1. Open Settings window
2. Click on Network
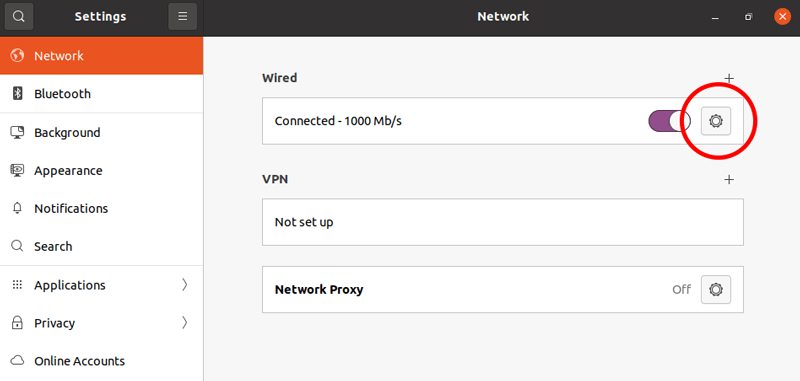
3. Click on Wired cog ⚙️
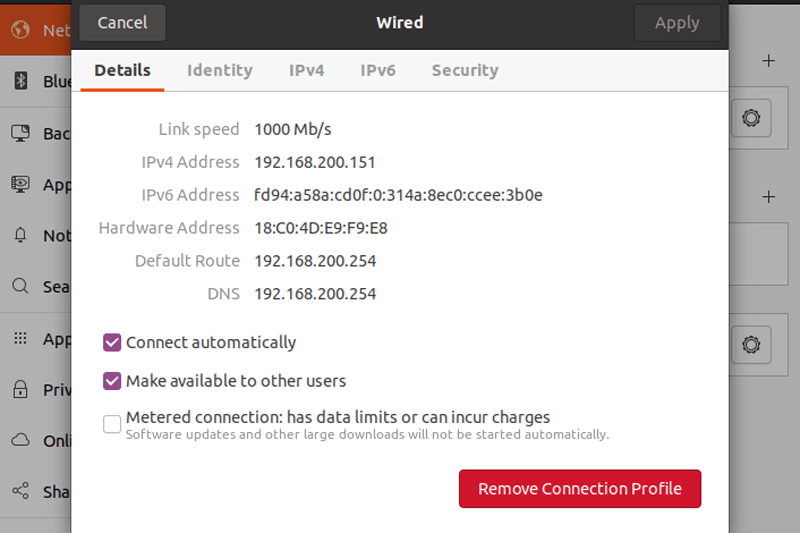
4. Find the line that says Hardware address - that is the MAC address you need.
5. Take a note of the MAC address for future reference.
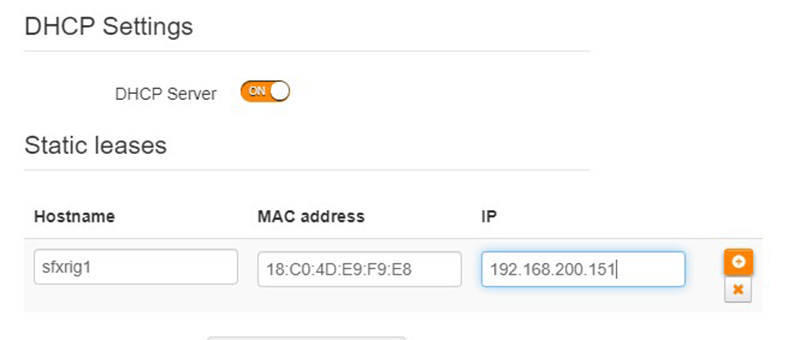
Either via the Rig or your Laptop/PC, open a browser and navigate to your router. Login as admin and assign your preferred static IP address for your Rig in the DHCP settings.
Reboot the rig and once it restarts, check the Network Settings (as described above) and confirm whether the correct static IP address has been assigned. If so, we’re good to move on. If not, you’ll have to troubleshoot the issue in your router DHCP settings.
Option B: Manually Assign Static LAN IP in Ubuntu Desktop Settings
If you don’t know how to access your home router, or simply prefer to assign static LAN addresses in the devices themselves, then choose this option, instead of Option A, above.
At this point, it is worth pointing out that if you are manually assigning LAN IP addresses to your home network-connected devices, you still need to know a few things about your home network.
Thankfully, when you first boot up your new rig, your router will assign it a LAN address, from within the router’s dynamic range of addresses that it is set to assign. As your rig will likely be running 24/7, then if you just use the assigned address, but set it up manually, then the router won’t look to assign that address to another device on your network, while your rig is turned on.
A better option would be to use an address outside the dynamic assigning range, but you would need to access your router to see what that range is. If you don’t know how to do this, then just go with manually configuring the dynamic address that was assigned as a static address, per the instructions below.
On your rig desktop, go into Settings, click on Network, then click the cog symbol:

On a piece of paper, write down IPv4 Address and Default Route from the automatically assigned wired LAN info:

Click on the IPv4 Tab and click the Manual option:
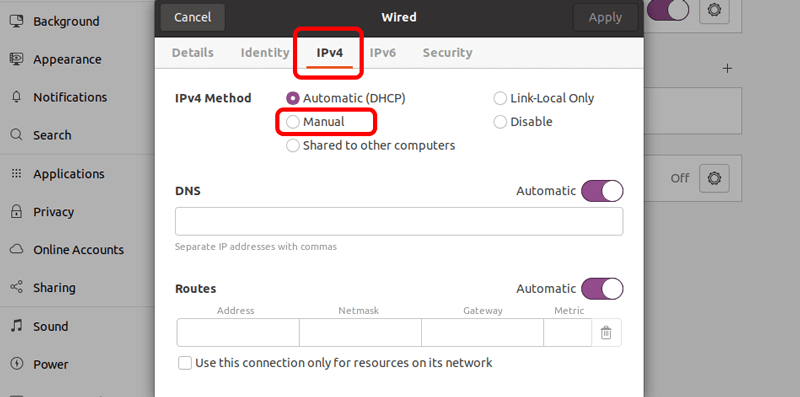
In Address, type in the IPv4 address you wrote down.
In Netmask, type 255.255.255.0
In Gateway, type in the Default Route address you wrote down.
Then click Apply:
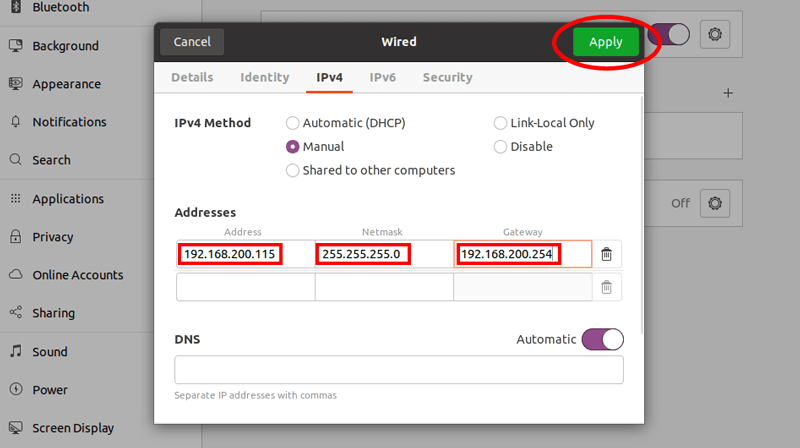
Important: Use the numbers YOU wrote down, not my numbers in the screenshots!
If you wish to specify DNS addresses, you can, but as this is a dedicated SFX mining rig, you can most likely just leave it set to Automatic.
Close the Settings window and reboot the rig.
Once it boots back up, head back into the Network Settings and look at the Details that have been assigned. It should look much the same as before you manually assigned the address, except DNS will be blank, if you left it on Automatic, or will now specify the DNS address/es you entered.
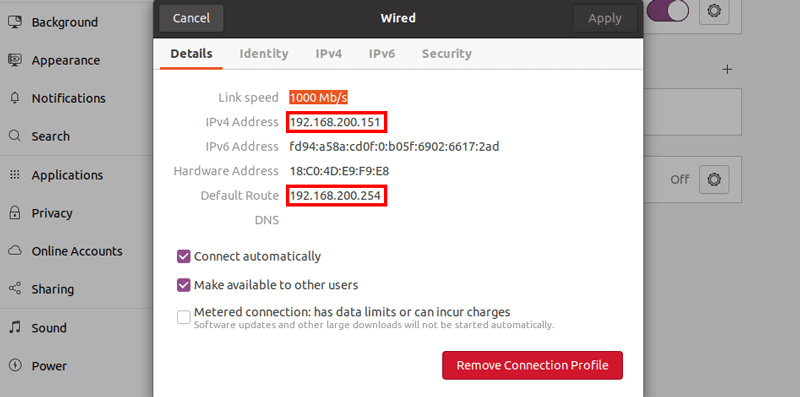
Close the Settings window.
Now that you know the LAN IP address that is permanently assigned to the rig (the IPv4 address you wrote down), you can now remote access into the rig via PuTTY and always know what address to use.
Enable SSH on the rig
To access the rig remotely from another PC on the Home network, we will be using the Secure Shell (SSH) network protocol. However, when Ubuntu is initially installed, SSH is disabled by default. We need to install it and enable it.
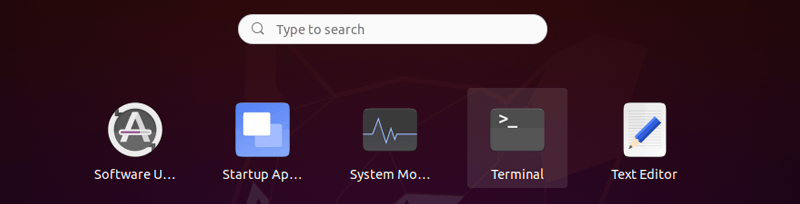
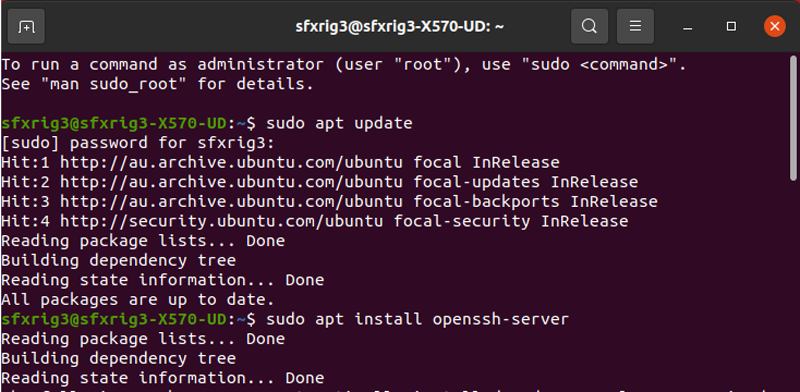
Open a Terminal window and install openssh-server
sudo apt update
sudo apt install openssh-server
Click Y to confirm the install is wanted, and enter your rig password, if prompted.
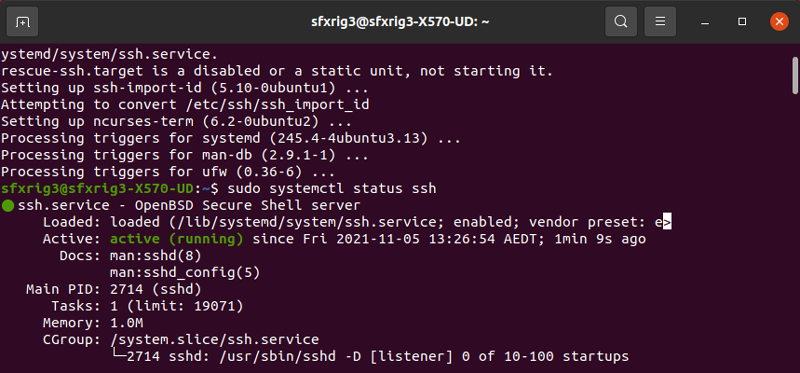
The SSH service will start automatically after the installation completes. You can check with:
sudo systemctl status ssh
The result output should say enabled and active (running).
Press q to return to the command line prompt.
The final thing needed is to allow Ubuntu Firewall Access for incoming SSH connections. Type:
sudo ufw allow ssh

You can now exit the terminal window.
Use Ubuntu Desktop to install xmrig
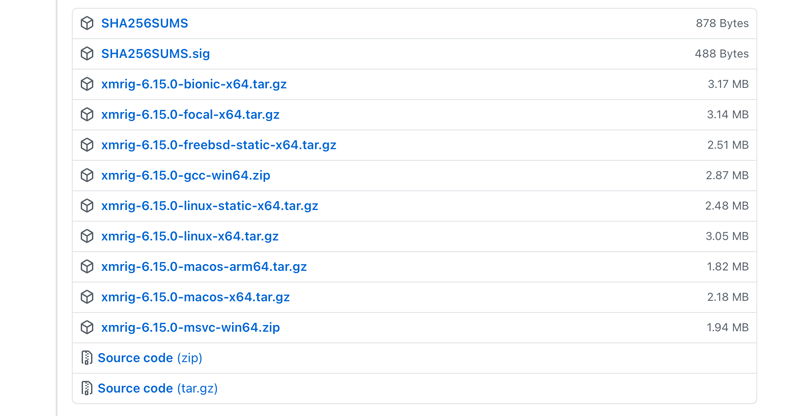
Open Firefox on your rig and search ‘xmrig github releases’, then on the search results page, check the website is in fact GitHub.com and click the link. Or open this article on your rig’s Firefox and click here.

Find the latest stable release and scroll down to the binary downloads. Select the Linux archive that includes the word “static”. Because we did the Minimal Ubuntu install, we will select the static download, which includes all the library dependencies and therefore means we don’t need to manually add a pile of other libraries to get xmrig working.
Once downloaded, go to your Downloads folder and right click the xmrig .tar.gz you just saved. Select Extract Here to unpack the download.
Go into the newly extracted folder and you will see another folder named with the version for the xmrig release you grabbed.
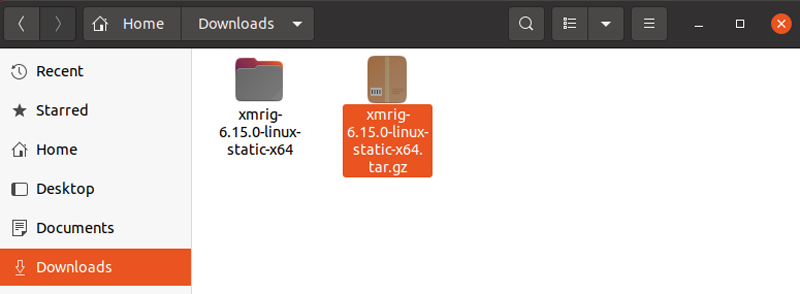
Drag a copy of this folder to your desktop, then rename the folder on the desktop to just xmrig (for convenience later). Then go into that newly named folder on the desktop and you will see 3 files:

Insert your USB drive with the text file containing your Safex public address. Navigate to the USB and open the text file. Copy your Safex public address.
Right-click on the config.json file and Open with Text Editor. Scroll down to the pools section:
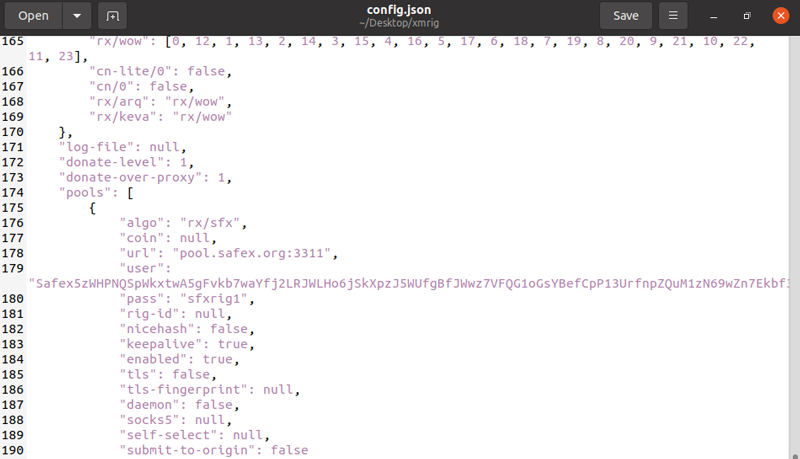
Set the algo, url, user, pass, and keepalive lines:
"algo": "rx/sfx",
"url": "pool.safex.org:3311",
"user": "(paste your Safex public address here)",
"pass": "name_of_rig",
“keepalive”: true,
Additionally, scroll back up to the randomx section of the config.json and find the 1gb-pages line and change the false to true:
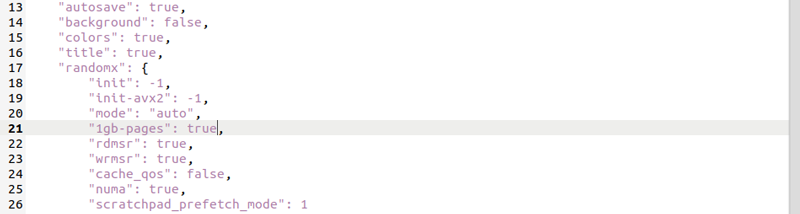
Save your modified config by clicking the Save button.
Okay, let’s test this beast!
Open a terminal window. Navigate to the xmrig folder on your Desktop
cd Desktop (yes, it is case sensitive - you need the capital D in Desktop when you type it in)
cd xmrig
sudo ./xmrig
Enter your password.
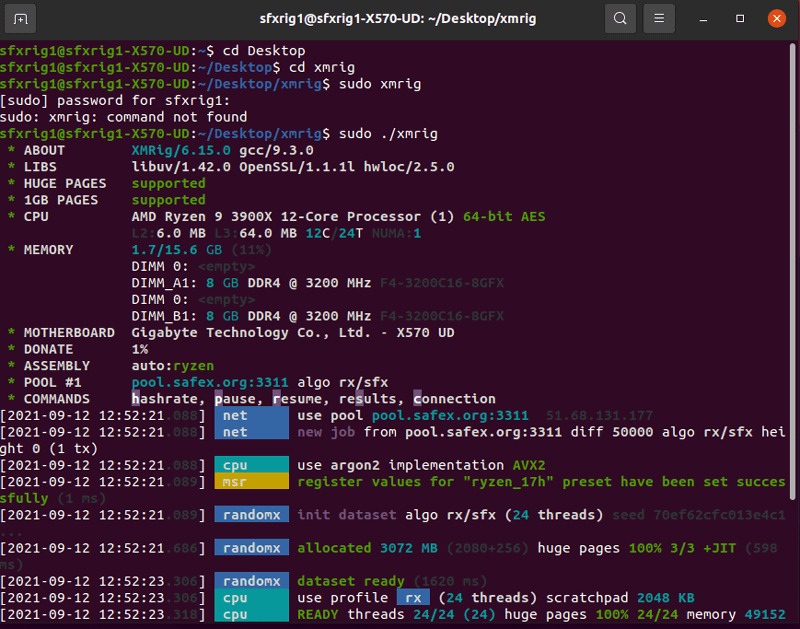
Check:
- HUGE PAGES says supported;
- 1GB PAGES says supported;
- There are no issues like FAILED TO APPLY MSR MOD.

If you only get a ~7.8kh/s hashrate, then you didnt run xmrig as root user (the sudo part of the command line entry).
We are now finished with our local rig configuration and can ready it for its final operating configuration. As we no longer need the Ubuntu desktop environment, we can power down the rig (and unplug/turn off the power), then remove the GPU, Monitor, Keyboard and Mouse. Leave the network cable plugged in.
As the rig is now in its final hardware configuration, it can be moved to its final location. Reconnect the network cable and PSU, if you’ve moved the rig into a new operating position.
Turn power back on and boot up the rig again. Head to your PC/Laptop that you installed PuTTY onto earlier.
PuTTY SSH remote access into the Rig
Now we use PuTTY to SSH remote access into the rig and start it mining.
Launch PuTTY and enter the LAN address you assigned to your rig. For convenience, Save the information for future use by naming it (eg. sfxrig1) and click on Save:
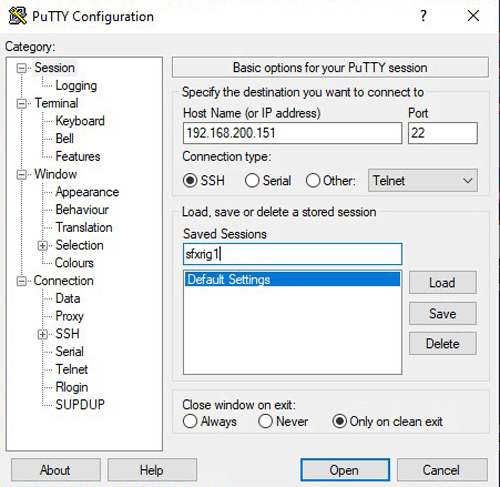
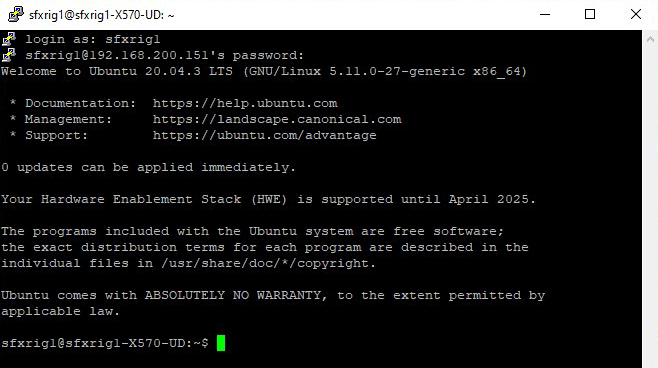
Select your newly saved profile and click Load then Open. A remote terminal window for your rig will open, and you will need to enter the rig name and password. You wrote them down when you installed Ubuntu on the rig, right?
So that we can close the SSH window once we start xmrig, we will need to create a screen we can detach from PuTTY, but access again later, if we want to check on things. There are various ways of doing this, but the simplest way I’ve found is the screen command.
First, we need to install screen.
sudo apt install screen
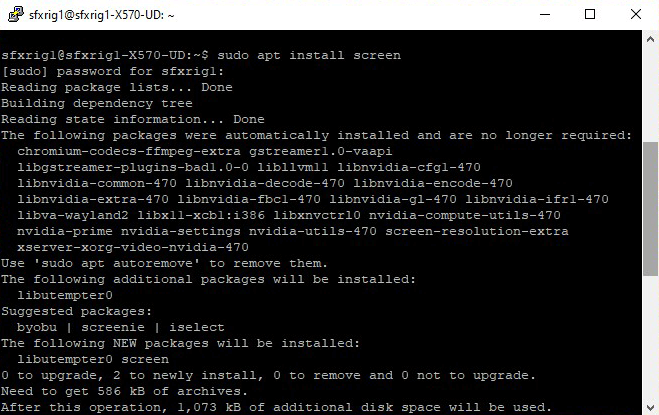
(and type Y to confirm the install)
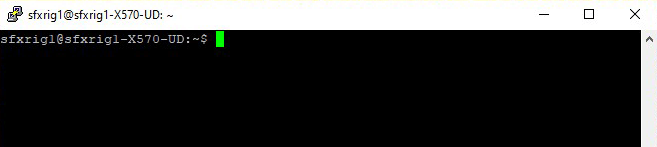
So our first command will be to create a detachable screen, which we will name miner.
screen -S miner
You will be presented with a new terminal window, which is actually the miner screen window:
So in here now, we can start the xmrig miner, then detach the miner screen, which will leave it running in the background when we close PuTTY.
Start xmrig just as you did earlier, when working on the Ubuntu desktop terminal window at the rig. Navigate to the xmrig folder and then:
sudo ./xmrig
Once you confirm the miner is running as expected, you detach the screen with CTRL+a d

Next time you login to your rig via PuTTY, you can reattach the miner screen by typing:
screen -r miner
The exception to this is if the mining rig has been powered down. In that case the detached screen no longer exists, so simply start the screen as per the initial screen access, above, and start the miner again, then detach and exit PuTTY.
The Mining Pool Website Settings
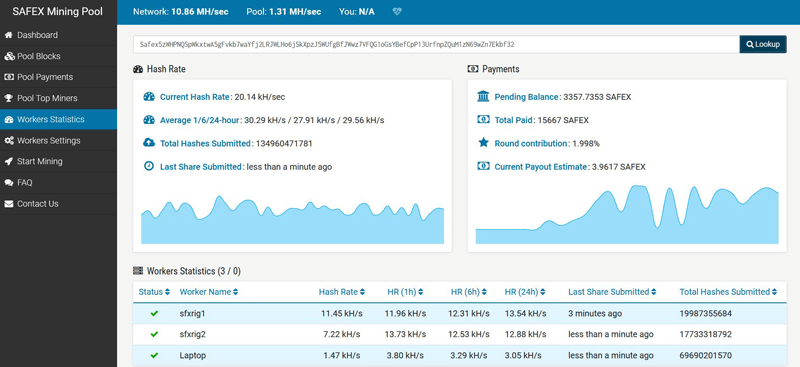
To check your rigs are still mining, go to safex pool and paste your Safex public address into the Lookup field.
Your rig’s spot hashrate will vary wildly, as the calculation from the pool-side of things isn’t done the same as what you see on the xmrig output at your rig. However, the 24hr average will be a very good indication of the approximate hashrate of your rig, as it averages out all the ebbs and flows of the pool calculations of your rig hashrate.
The default payout figure for the Safex.org pool is 15 SFX. Do not leave it at that number with a 3900x rig, or you will end up with a huge amount of very small outputs in your wallet, which will then cost you additional SFX in transaction fees to turn them into bigger, more useable sized outputs. The more outputs in a transaction, the higher the transaction fee, because each output needs to be identified, and that requires data. More data = higher transaction fees.
The author personally looks to get a pool payout no more than once per month. However, in attempting to set a new payout amount after building two of these 3900x rigs, it was found that the maximum permissible payout figure on Safex.org pool is 4000 SFX.
This amount would be my recommendation, as you will have far fewer outputs in your wallet, and have lower transaction fees when you subsequently go to use your mined SFX.
To change your pool payout figure:
On a PC (not running a VPN service) on the same LAN as your rigs, Google “What is my IP”. Copy the resulting IP Address and paste it here:
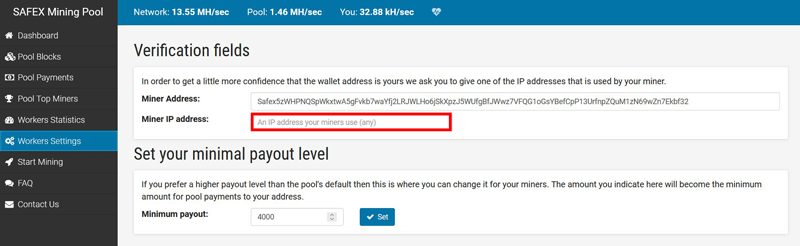
Change the Minimum Payout figure and click the Set button.
Note: Although you can set pool payout to 4000SFX, as at the writing of this article, the pool seems to have a maximum payout (per transaction) of only 1000SFX, but actual payouts can vary, each time you reach your nominated payout target. The balance remains until you again reach your payout target.
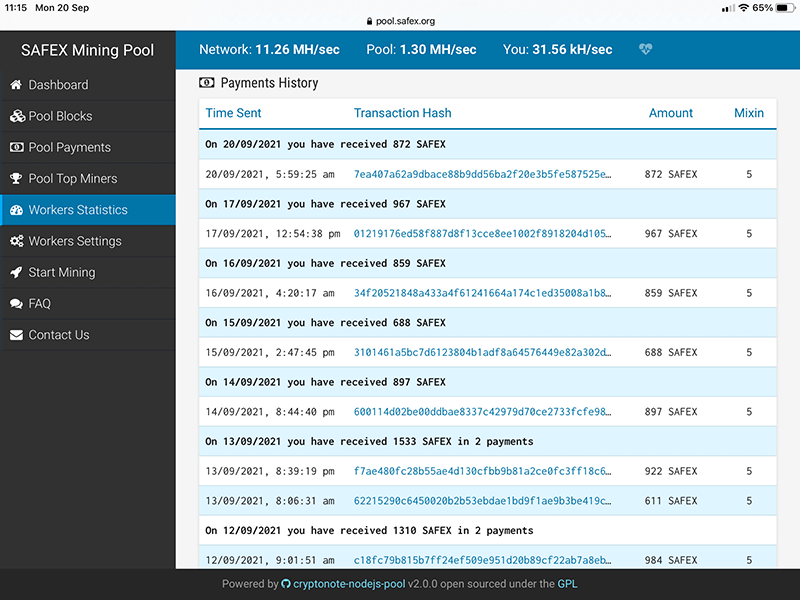
This completes the build, configuration and setting modifications for your rigs. You can check your rigs are mining by simply going to the Worker Statistic page of the mining pool each day.
If the status is a ✅ then it is operating as it should. If you see a ❌, then the miner has stopped or your internet is offline. In this instance, make appropriate checks and PuTTY into the miner, as previously described, if you need to restart xmrig.
Congratulations, you now have all the information necessary to build a mining rig capable of producing 13.5kH/s. Enjoy your ongoing SFX returns.
Feedback or Issues
If you have any further questions (or issues to report) about the content of this article, please use the Safex Forum.
Learn about other ways of mining Safex Cash.