The Safex Big Box Store 102: Software Installation & Setup Walkthrough
This article discusses the PC system requirements upon which Big Box can be installed, and walks the user through the installation process and initial setup of the Safex Big Box Store software suite.

This article discusses the PC system requirements upon which Big Box can be installed, and walks the user through the installation process and initial setup of the Safex Big Box Store software suite. It also provides guidance on how to use the basic Safex wallet functions.
*The Lite Wallet version for Windows (which is just a one click installer) can be found here: https://github.com/safexninja/safex-big-box-store-wallet-lite/releases. A separate blog article will come out for the Lite wallet soon. Additionally, work is being progressed on a Mac version Lite Wallet.
This is the second in a series of articles, which looks to provide a complete set of tutorials regarding all aspects of the Big Box ecosystem. The articles in the series (including this one) are:
- Big Box 101: Introduction & Explanation
- Big Box 102: Installation & Setup
- Big Box 103: Basic Safex Wallet Functions Walkthrough
- Big Box 104: Shopper Walkthrough
- Big Box 201: Approved Merchant Walkthrough
- Big Box 301: Independent API Merchant Walkthrough (separate software release)
Each article builds on the information provided in preceding articles. It is recommended that users first read the Big Box 101 article, to gain a thorough understanding of this software ecosystem.
Users should also read and consider the contents of the README document on the Github repository website, located here. Of note, users will see that the Big Box Store runs on the Docker software platform. Installation of Docker on either Mac or Linux operating systems (OSs) is relatively straightforward, but there are caveats to performing a direct install on a Windows PC, as copied below:

Therefore, this walkthrough will focus on guiding Windows users through the process of installing Docker within a Linux virtual machine (VM) instance, running on their Windows PC.
For those users who are determined to use the native Windows environment, please refer to: https://docs.docker.com/desktop/install/windows-install/.
Summary:
- Suggested System Requirements
- Big Box PC Resource Use
- Install Oracle VirtualBox on Windows 10
- Create a VM Instance
- Start up your VM Instance and Install Ubuntu 22
- Install Docker
- The Big Box Installation Process and First Run
- Future Big Box Store Wallet Updates
- Frontend: Accessing Big Box
- Create a Big Box User Login
- Big Box Settings page
- Final Thoughts
Suggested System Requirements
All users should consider the following system requirements for successful, long term use of the Big Box ecosystem. Regardless of the OS, users should have the following minimum resources available to the Docker/Big Box ecosystem:
- 4 CPU cores
- 4GB RAM
- 40GB HDD Space (see below comments)
For Docker:
- Allow at least 5GB HDD space.
For the Big Box components:
- Allow at least 35GB HDD space.
Because a Safex Blockchain Node/Daemon is installed as part of the Big Box ecosystem, the blockchain will continue to grow as each block is found, and thus will use more HDD space as time passes.
For Windows users, who also have to install Oracle VirtualBox, see https://www.virtualbox.org/wiki/End-user_documentation.
Windows PCs should have at least the following specifications:
- 8 CPU cores
- 8GB RAM
- A comfortably larger amount of HDD free space than the needed 40GB+ used in the VM instance.
If your PC has an AMD CPU, then be sure CPU Virtualization is enabled in BIOS. (Refer to your specific BIOS/Motherboard manual.)
When creating the Ubuntu VM instance in VirtualBox, Windows users should allocate, at a minimum:
- 4 CPU cores (suggested = half the available cores)
- 4GB RAM (suggested = half the available RAM)
- 40GB+ HDD Space*
* If users have the HDD space available, it is suggested they provide some additional space to the VM instance, to allow for long term future blockchain growth. (100GB used in the demo pics)
Big Box PC Resource Use
CPU resources are generally only placed under load during:
- initial blockchain sync,
- subsequent startup resyncs, and
- Safex wallet hard rescans.
Once up and running, the Big Box ecosystem has a “resting” RAM usage of about 800MB, but each wallet opened adds an additional 250MB RAM.
Mac and Linux users can jump to Installing Docker to skip past the Windows VM installation instructions.
Install Oracle VirtualBox on Windows 10
As it is impossible to cover all possible permutations of how users have their PC configured, or what software they already have installed. You may find that you need additional prerequisite software installed on your PC in order to run VirtualBox.
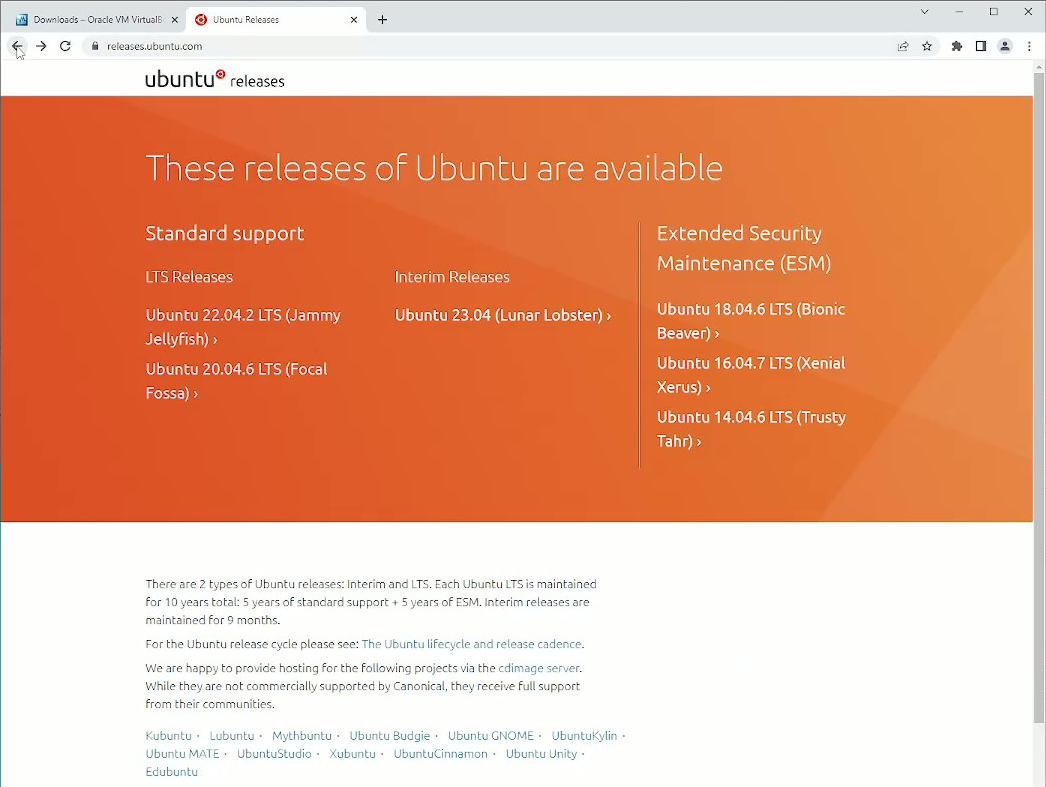
The github README for the Big Box Store Wallet indicates users can use either Ubuntu or Linux Mint as their Linux OS choice. Users familiar with Mint can certainly choose to install that OS instead of Ubuntu, but this walkthrough is focussed on the setup for Ubuntu 22, so that is the ISO file you should download, if following these instructions.
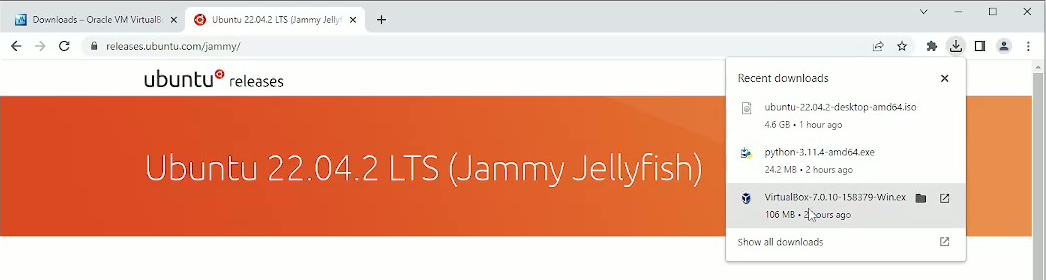
To begin, download the following software and then proceed with the installation. If you get a download warning, click the Keep button for the download files:
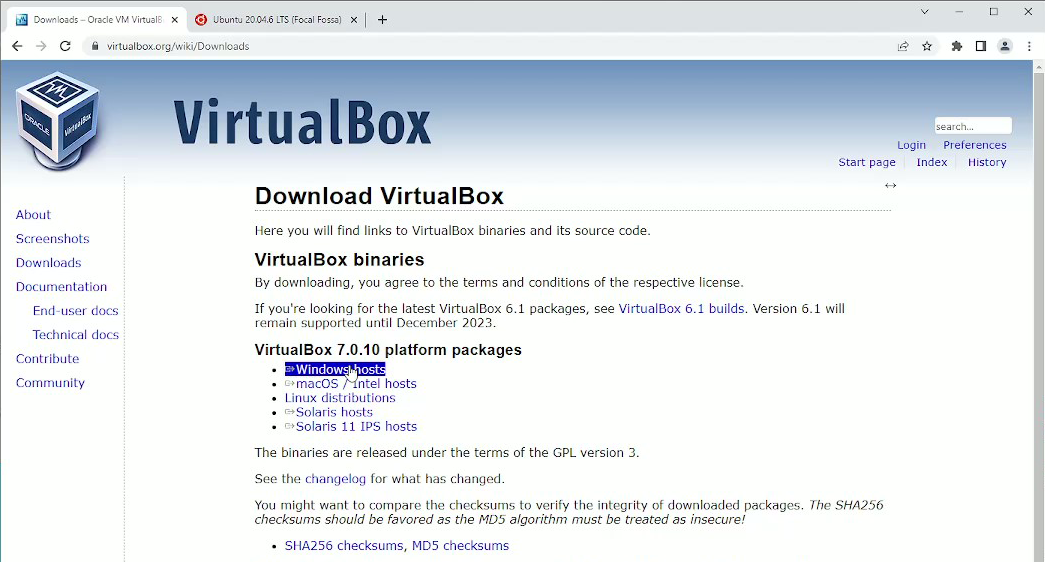
- Download the VirtualBox installer for Windows Hosts from here.
- Download the Ubuntu Desktop ISO file from here.
- Install VirtualBox.
Run the VirtualBox installation file by clicking the downloaded file.
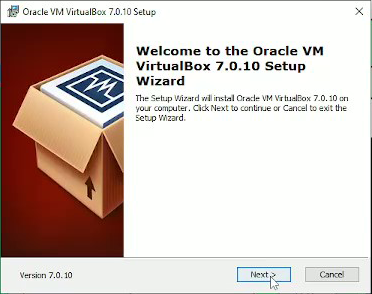
Click Next and follow the prompts to complete the installation.
When attempting to install VirtualBox, users may get a notification that there are missing dependencies, such as Python Core / win32api. If you do get warnings for missing dependencies, then exit the install and install those dependencies before you install VirtualBox. As the Python Core / win32api dependency is likely to be needed by the majority of users, we will cover that here.
Download the most recent stable release from here. Once downloaded, install Python Core.
With Python Core installed, we can add the win32api dependency. To do so, right-click the Windows Start button and then click the Run option.
In the command line type:
py -m pip install pywin32
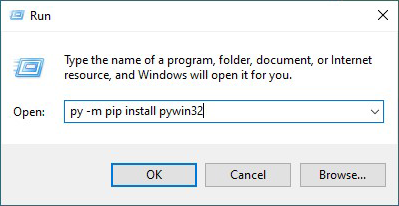
Hit Enter (or OK button) to run the command. A cli window will popup and after a few moments, the win32api dependency will be installed.
Now return back to the installation of VirtualBox, as outlined above.
Click the Finish button to complete the installation, and VirtualBox will start automatically:
Create a VM Instance
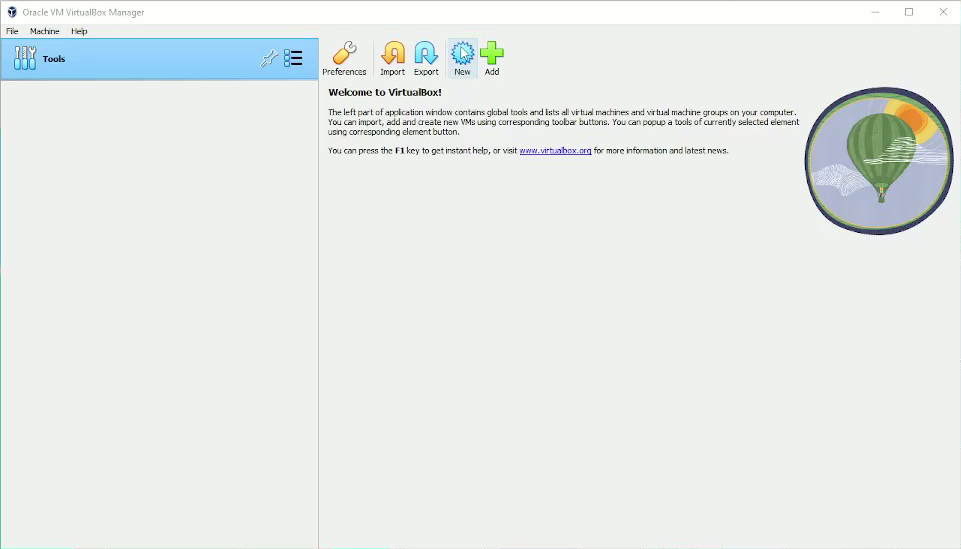
With VirtualBox successfully installed, we now move onto creating the Linux OS VM instance. Click the New button:
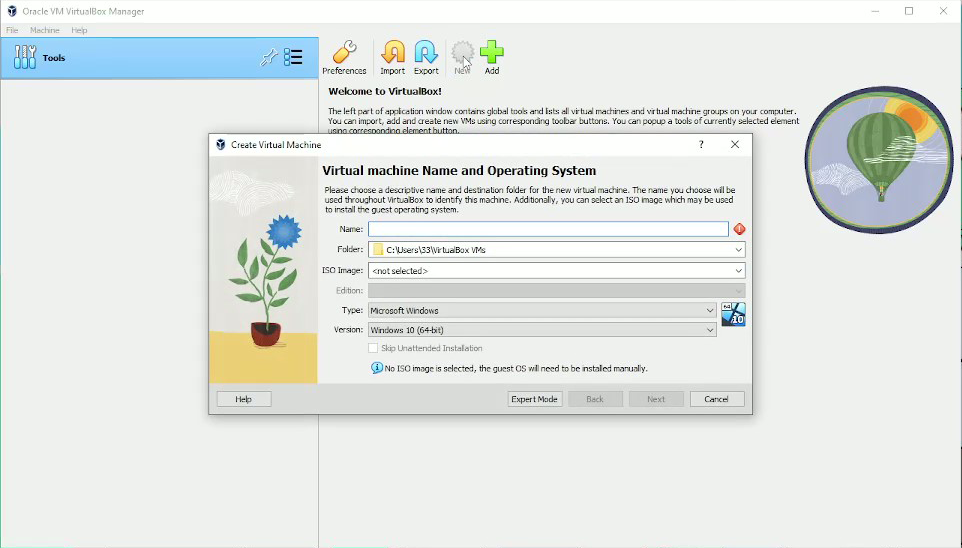
New VM Name and select your downloaded Ubuntu ISO image in the dropdown.
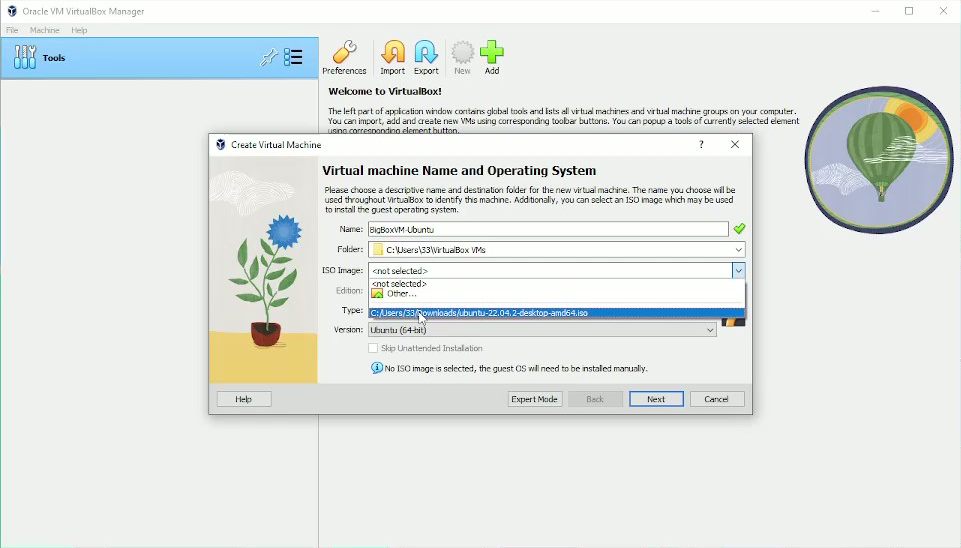
If it doesn't automatically offer your ISO, then click the Other option and navigate to your downloaded ISO and select it.
Once the ISO is selected, tick the Skip Unattended Installation checkbox.
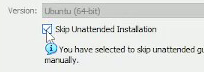
Ticking that Skip checkbox is extremely important! By default, VirtualBox installs known ISOs on "unattended mode", and during installation you don't have to create a user and don't have to configure anything. But a side effect of not creating a user means the sudo command doesn't work without a lot more effort after the installation process (and not covered in this walkthrough). So to ensure the sudo command works for you, be sure to tick the checkbox and skip unattended installation.
Next, select your hardware parameters.
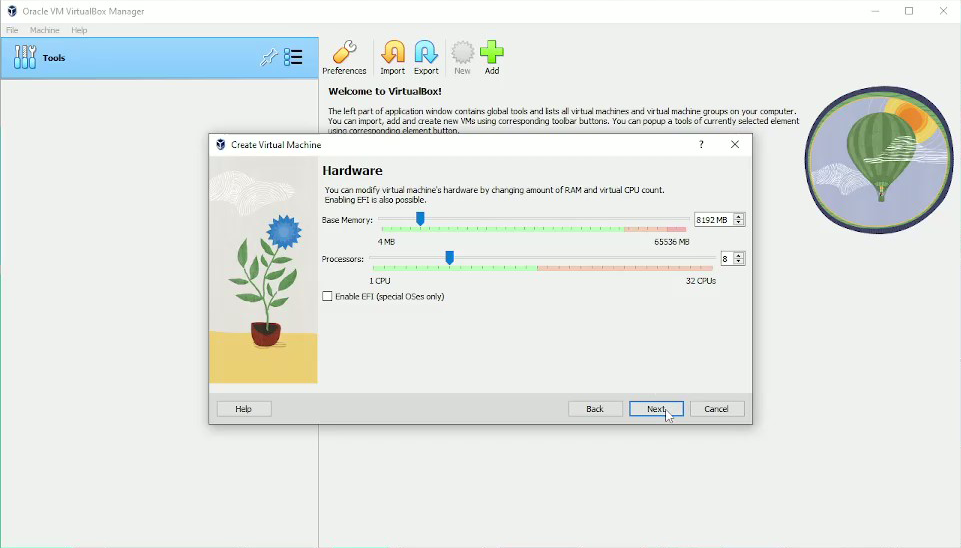
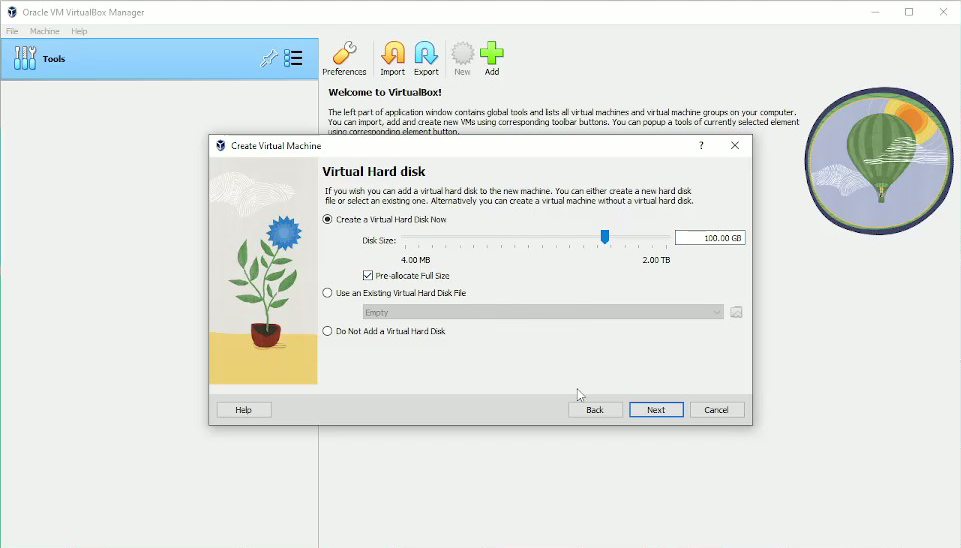
Firstly, your memory and CPU allocation, and then your HDD space. Be sure your entered parameters meet or exceed the minimum system requirements outlined above. Then click Next to view your Create VM Summary page:
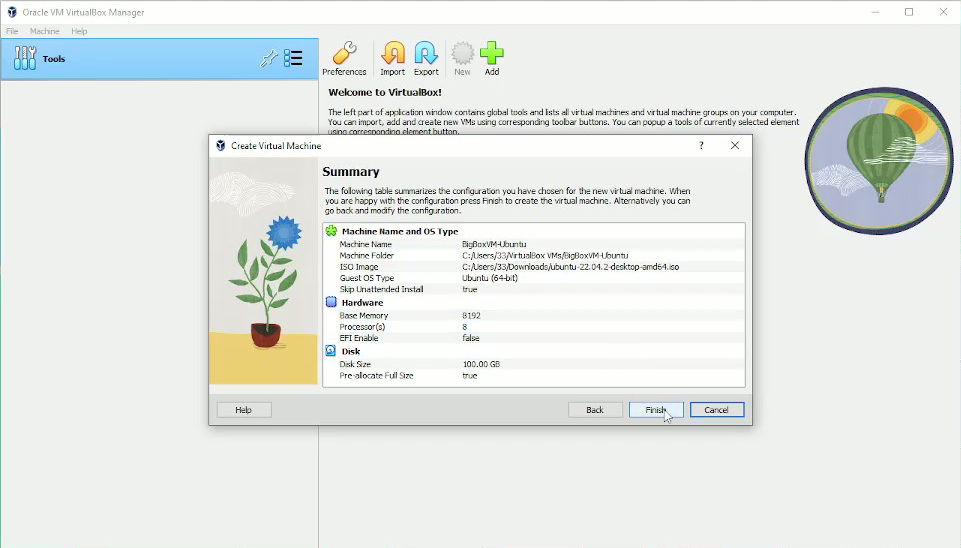
Click Finish and your New VM gets created and appears in the Virtual Box menu.
We are now ready to install Ubuntu on your new VM Instance.
Start up your VM Instance and Install Ubuntu 22
Now to start it for the first time and install Ubuntu.

With your new VM Instance highlighted, click the Start button.
Your new virtual machine boots up and you get presented with the Ubuntu ISO menu.
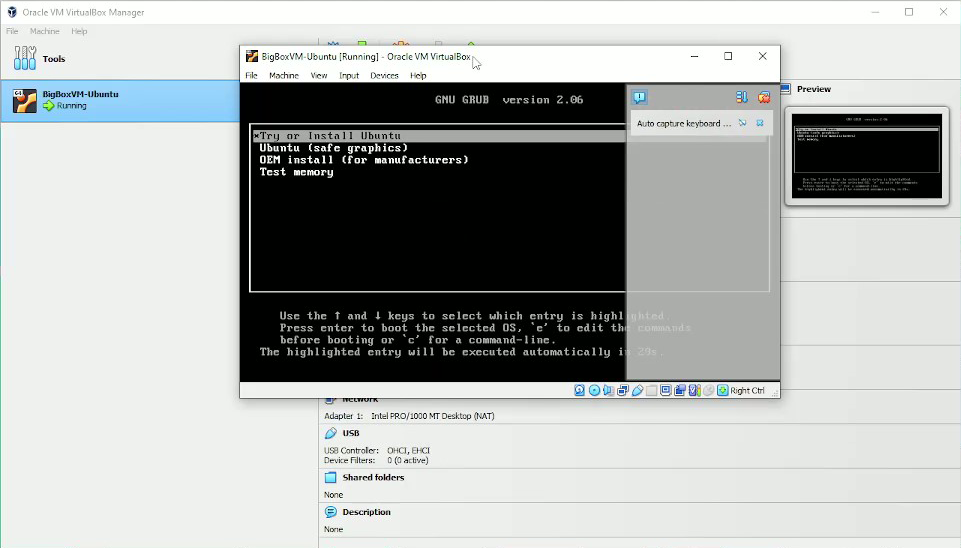
Select the Try or Install Ubuntu option.
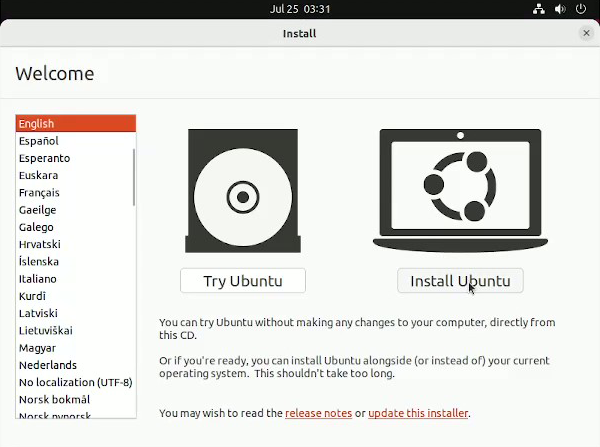
Ubuntu boot up commences and you then get the option to select your preferred language and then click the Install Ubuntu button.

Select your keyboard layout. As I’m in Australia, I select the English (Australian) option. You select what is most appropriate for you.
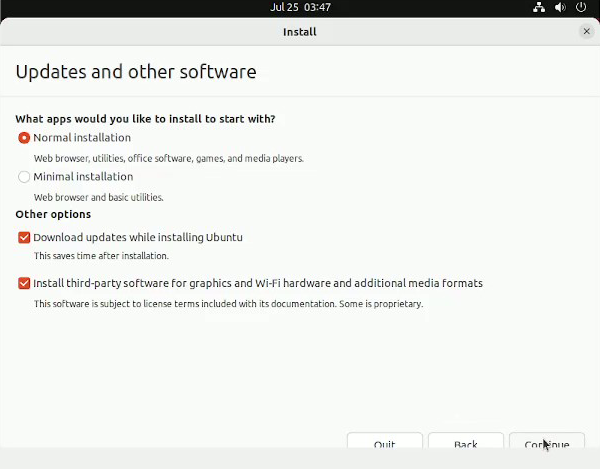
Tick the Install third-party software checkbox and continue.
Ubuntu then looks for a HDD to install to. As it is operating within the VM, it only sees the virtual HDD partition you created when you set the HDD size for the VM, so there's no need to panic or be concerned with the next screen that appears:
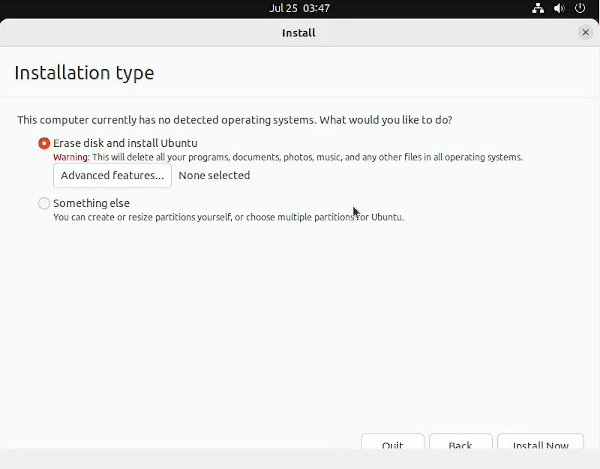
Simply leave the Erase disk and install Ubuntu option preselected and click the Install Now button.
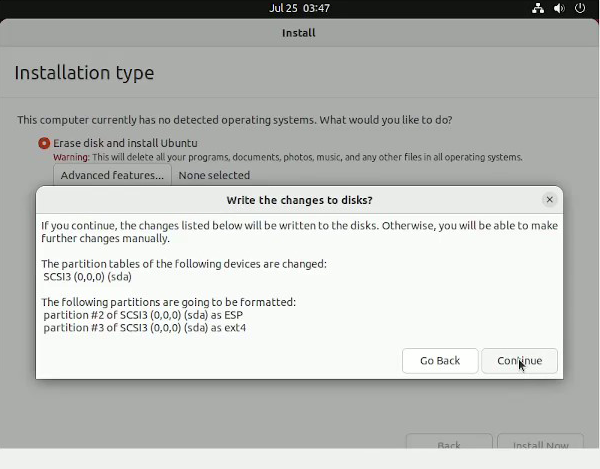
Click the Continue button on the next screen, entitled ''Write the changes to disks?''
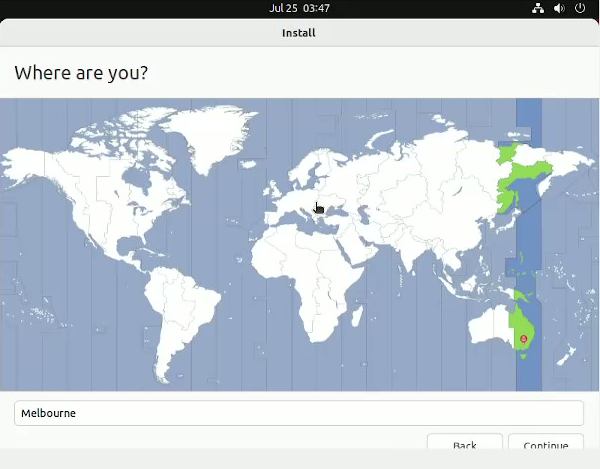
Ubuntu then begins installing, and you get asked to select your location on the globe. Either click your location on the map or select it in the text field.
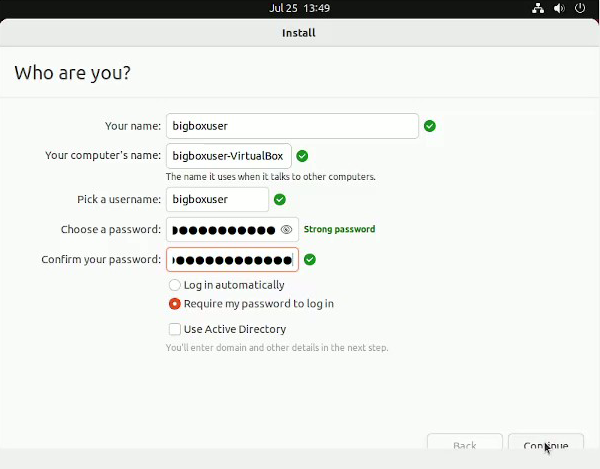
You now enter user details you wish to use for the install, and when you click Continue, the OS installation begins in earnest. Write all these details down somewhere, so you don’t forget them. Depending on your virtual PC parameters and internet speeds, the install process will take a variable amount of time to complete.

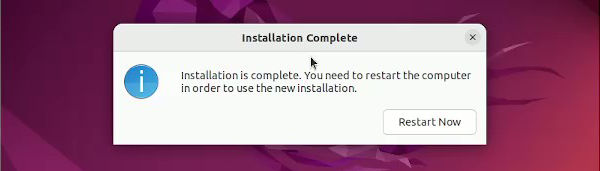
When the Installation is complete, click the Restart Now button. This only reboots the virtual PC instance, not your actual PC, as Ubuntu has no idea it is operating with a virtual environment, which is why, when it boots back up, it pauses for you to remove the installation medium.
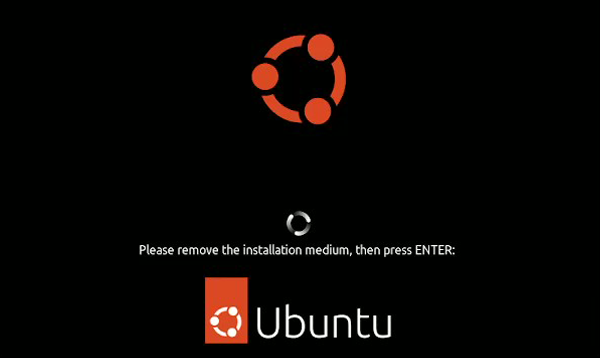
Just click Enter and let it continue.
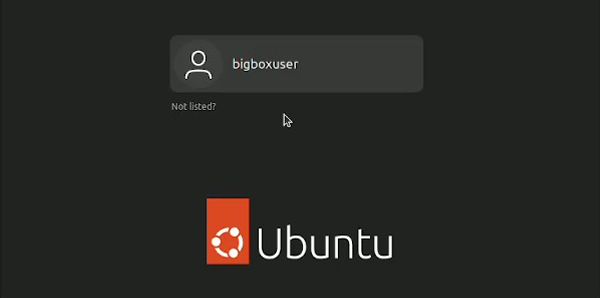
It then boots up to the user login prompt. Click the user box, enter the password you used, and click enter. Your new Ubuntu OS boots up, and you get a few First Time Use screens, which you can click the Skip button.
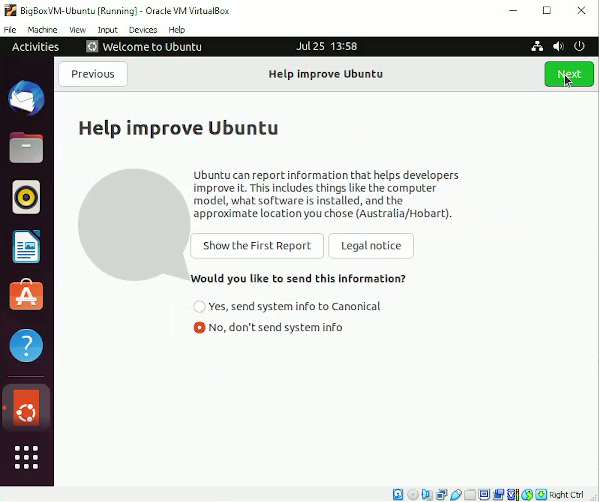
As you are using this PC for crypto, I would suggest changing the Help improve Ubuntu option to No. Continue to click the Skip/Next/Done buttons through until you get to a blank desktop.
On the off chance you want to share stuff between your Windows and Ubuntu environments, you need to allow bidirectional movement between the two OSs.
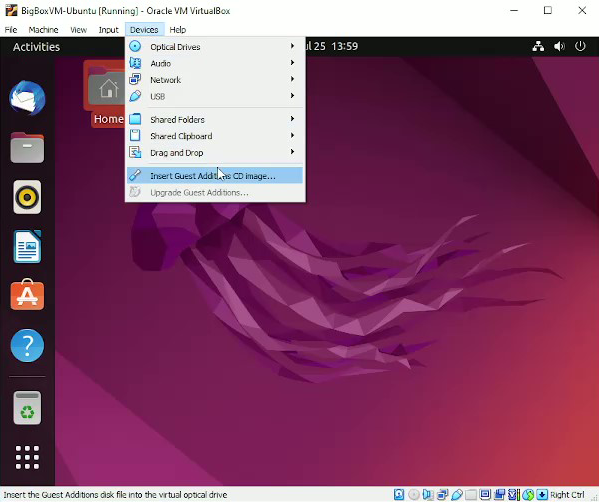
On the Devices menu drop-down, click the Insert Guest Additions CD image option, and you’ll see the phrase Run Software appear near the top left and once it finishes, it has been virtually inserted into the VM.
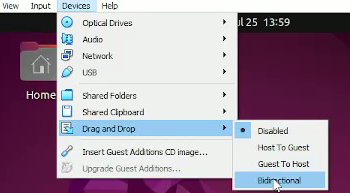
You can now go back into the Devices dropdown menu and in Shared Clipboard and Drag and Drop lines, you should select the Bidirectional option.

You need to reboot the VM for these changes to take effect.
Log back in once the VM boots back up.
Now, Ubuntu installs at a resolution of 800x600 by default, which is small for our current displays. So now we want to give ourselves a bigger screen.
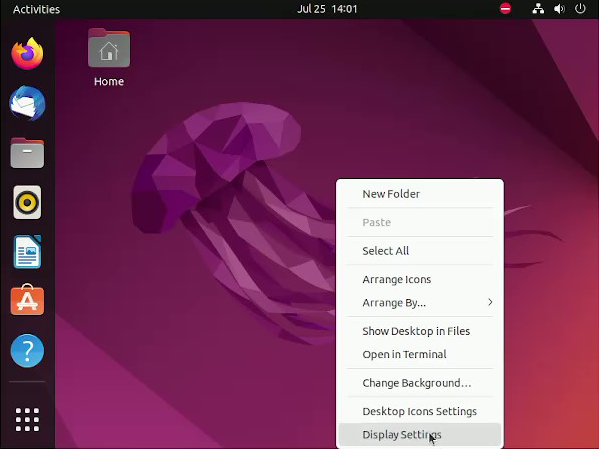
Right click anywhere on the desktop wallpaper and select Display Settings.
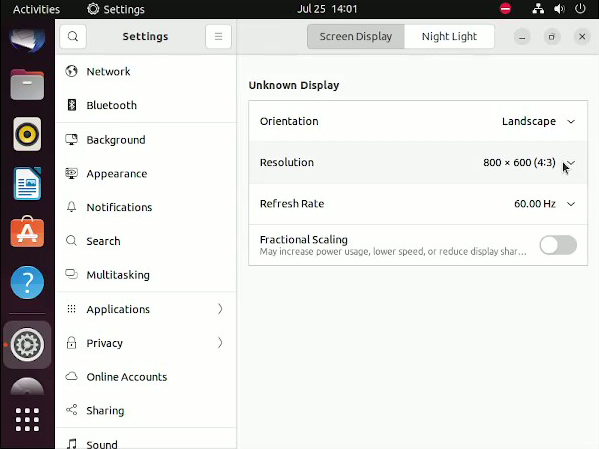
Change your resolution to something more suitable for your monitor.
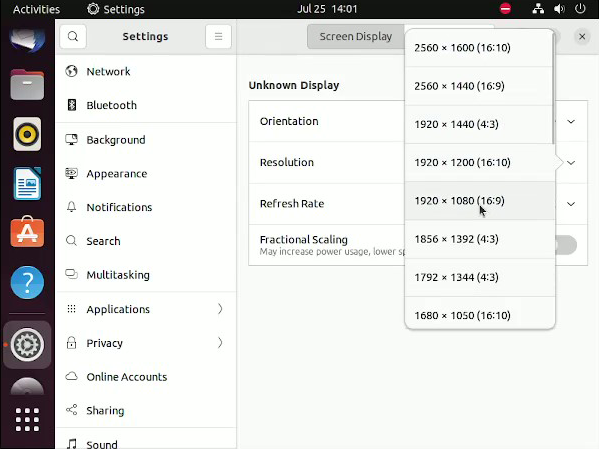
Then click Apply and confirm (Keep) the change. If you selected the wrong resolution, click Revert Settings and try again.
If needed, resize the VM window to ensure all of the virtual screen is visible.
Close the Display Settings window.
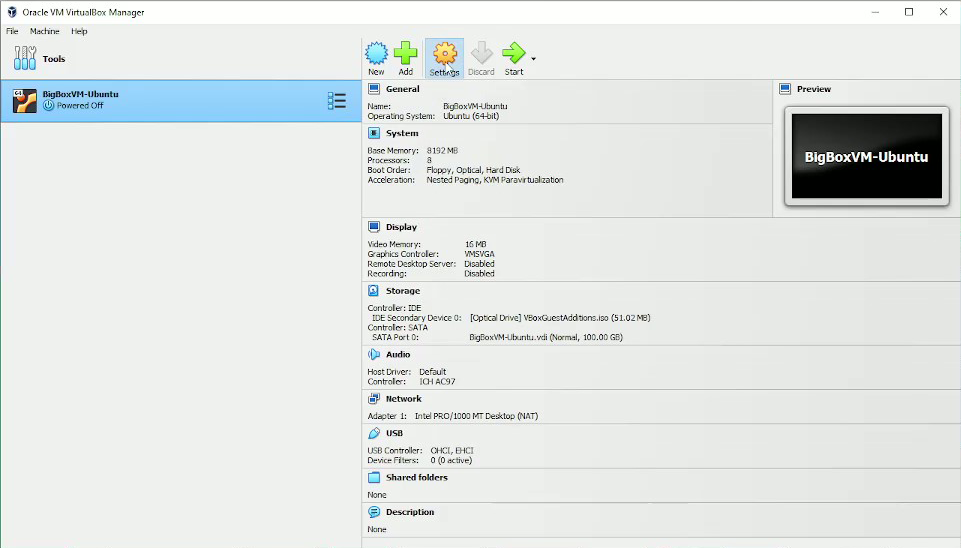
Upon reboot, your Ubuntu VM is ready for use.
At this point, if you only intend to use USB 2.0 sticks, then you can move on to installing Docker.
However, if you intend to use USB 3.0 sticks in your VM, then you also need to make another tweak to the VM Settings.
- Shutdown Ubuntu.
- Once back at the VirtualBox window, go into Settings for the VM instance.

- Change the USB device option to USB 3, then click OK.

- Boot up your Ubuntu VM, now with USB 3 functionality.
Note: To access a USB stick from within the VM environment, users should insert the stick and then select if from the Device - USB dropdown menu.
Each time you startup the VM instance, always give it a few minutes after boot up to allow Ubuntu to check for OS updates. It is recommended you install any waiting OS updates prior to launching Big Box.
Unless an instruction specifically states “Windows”, all further instructions, such as references to the “Start” button, relate to the VM Ubuntu system, not your native Windows environment.
Install Docker
Mac:
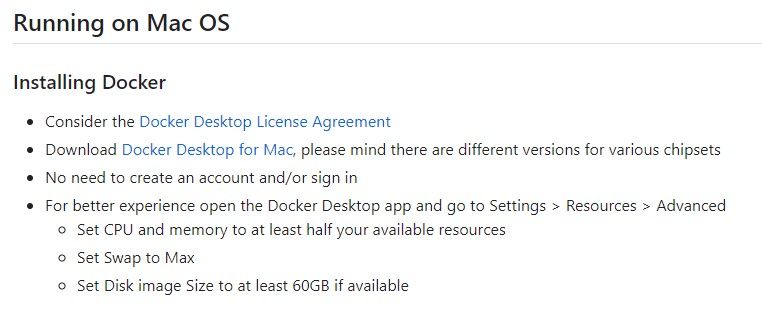
The above is from the README at https://github.com/safexninja/safex-big-box-store-wallet.
Linux (& Windows, via an Ubuntu VM):
The Big Box Wallet GitHub Repository README (link above) outlines two optional methods for installing Docker. Users are welcome to use either method they prefer, but Method 1 is replicated here, with additional details to assist novice users.
Docker Install Method 1: Script
Install using Docker's convenience script
First, launch a terminal window by clicking the Start button.

And then click the Terminal app to launch it.
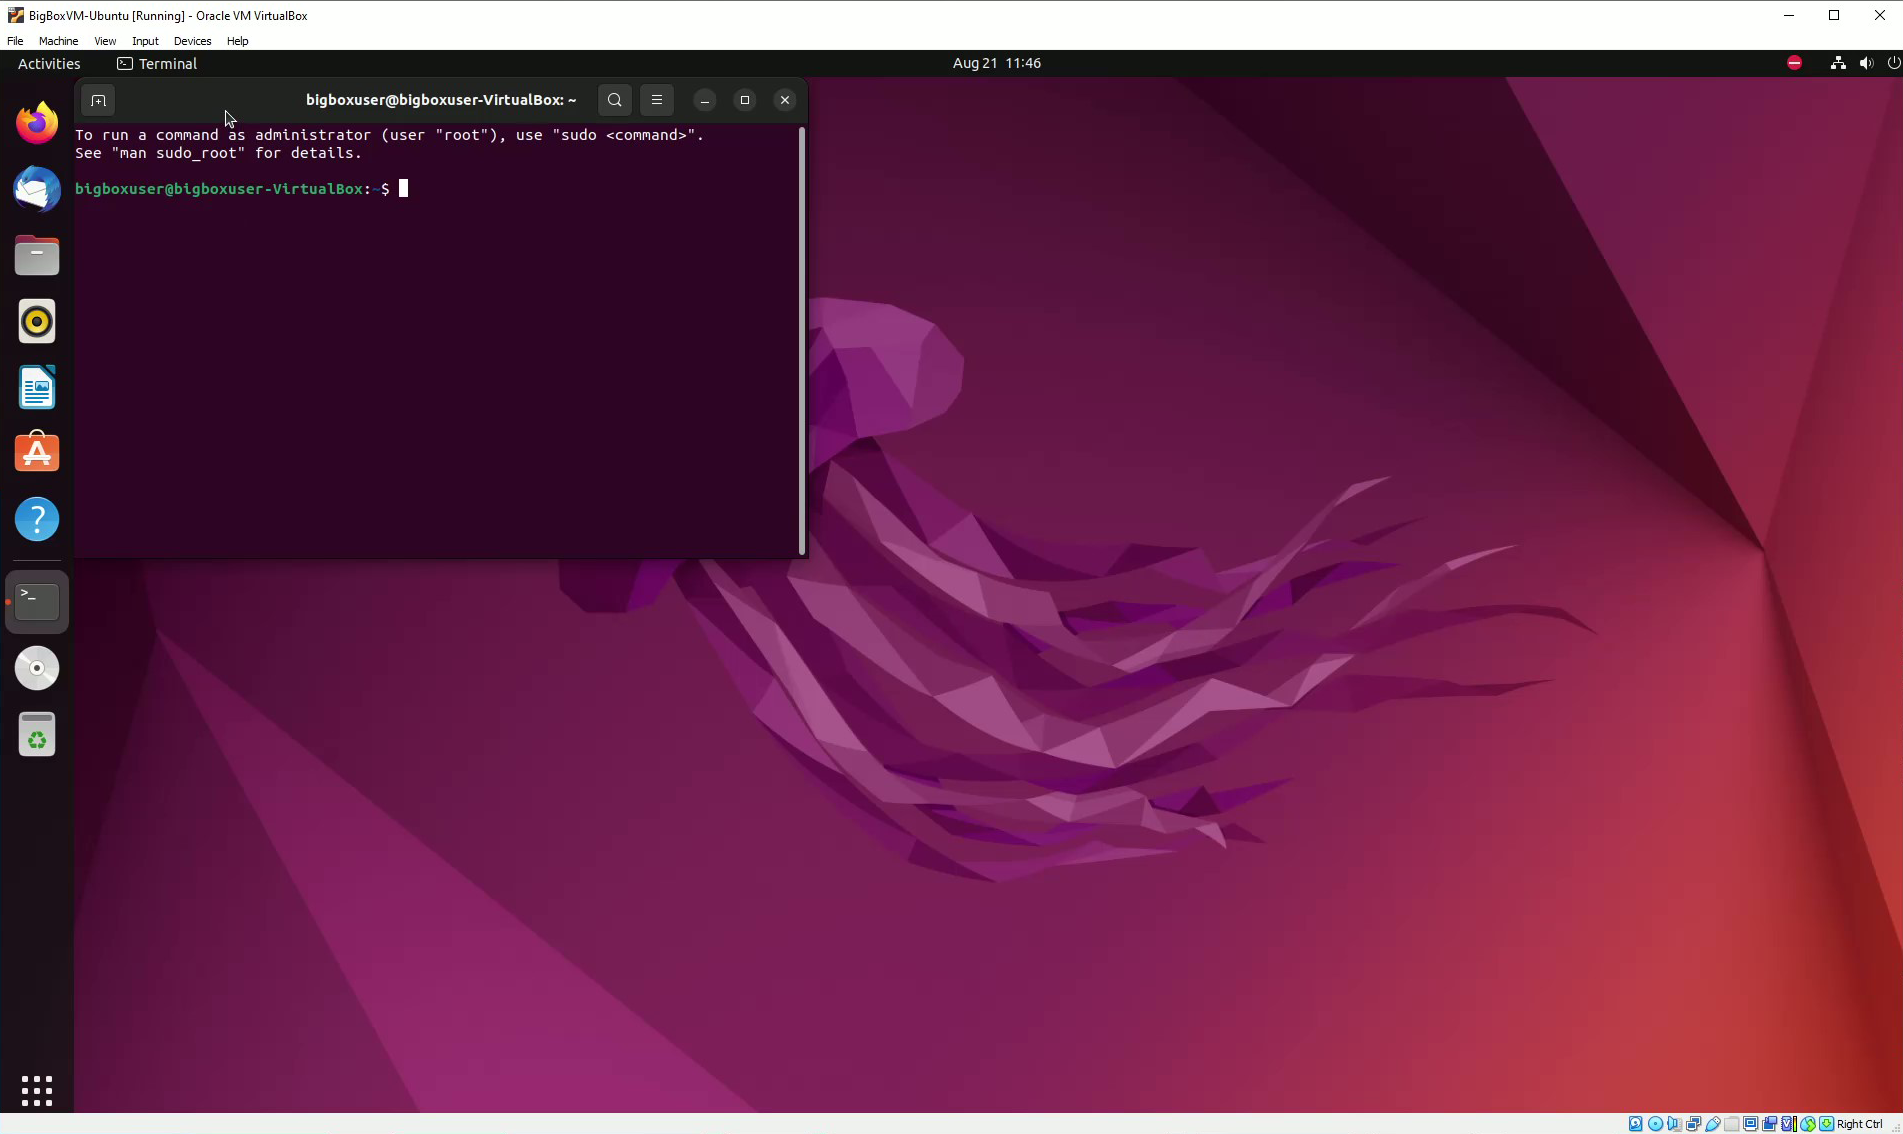
Feel free to resize/reposition the window to make it easy for you to see.
Run the following commands in the terminal window, hitting Enter after each line, and allowing each command to finish processing, which is indicated by returning to a fresh command prompt. We need to use the curl command to get docker, but the command isn’t part of the base install.
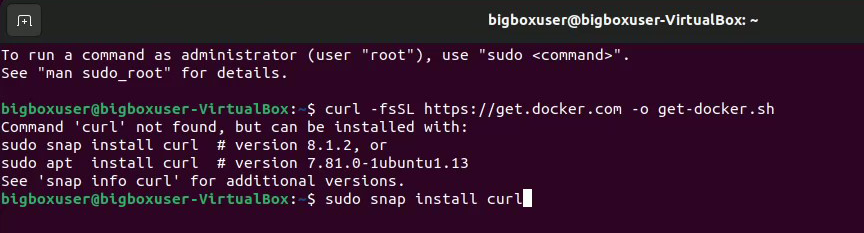
So first we get curl: sudo snap install curl
Each time you use the sudo (superuser) command, it will prompt you to enter your Ubuntu user password, for security purposes.
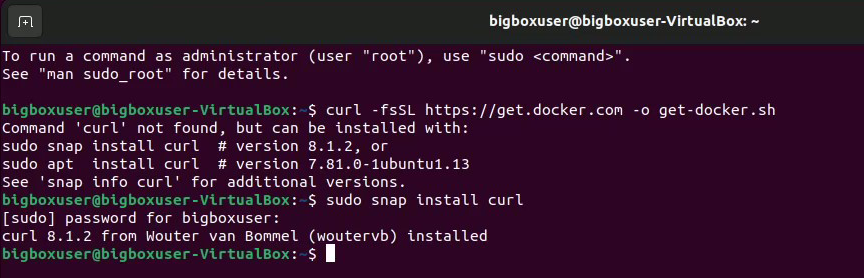
We curl installed, we can now move onto the docker install:
curl -fsSL https://get.docker.com -o get-docker.sh

sudo sh get-docker.sh
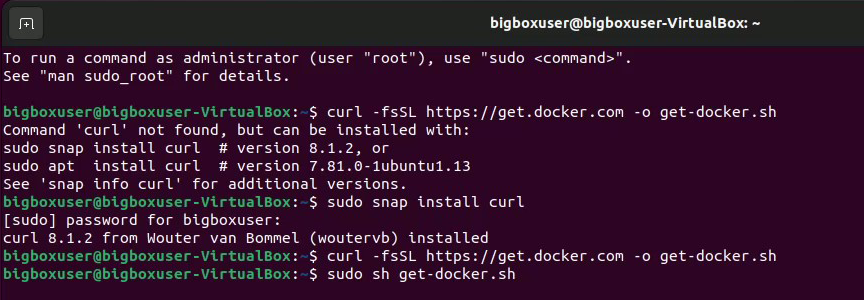
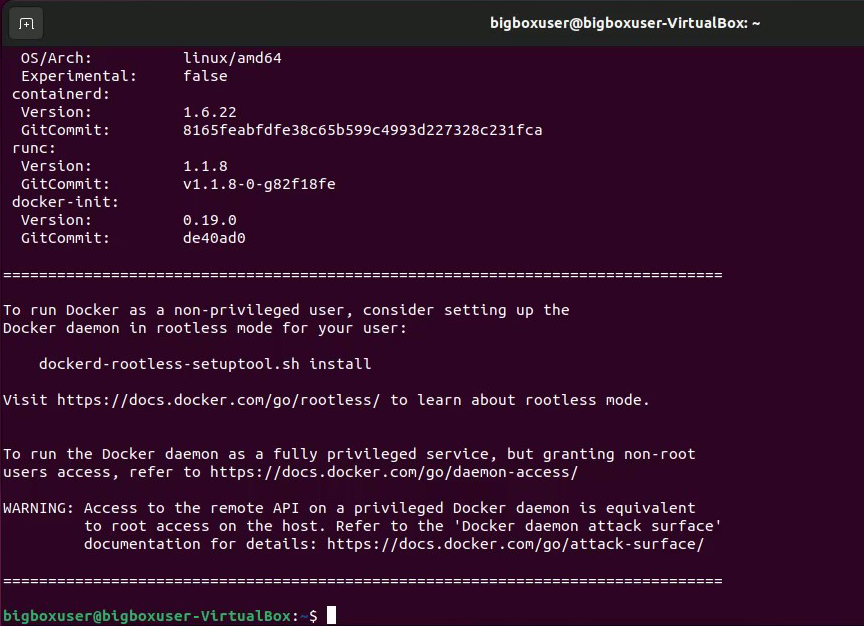
Docker is now installed.
The Big Box Installation Process and First Run
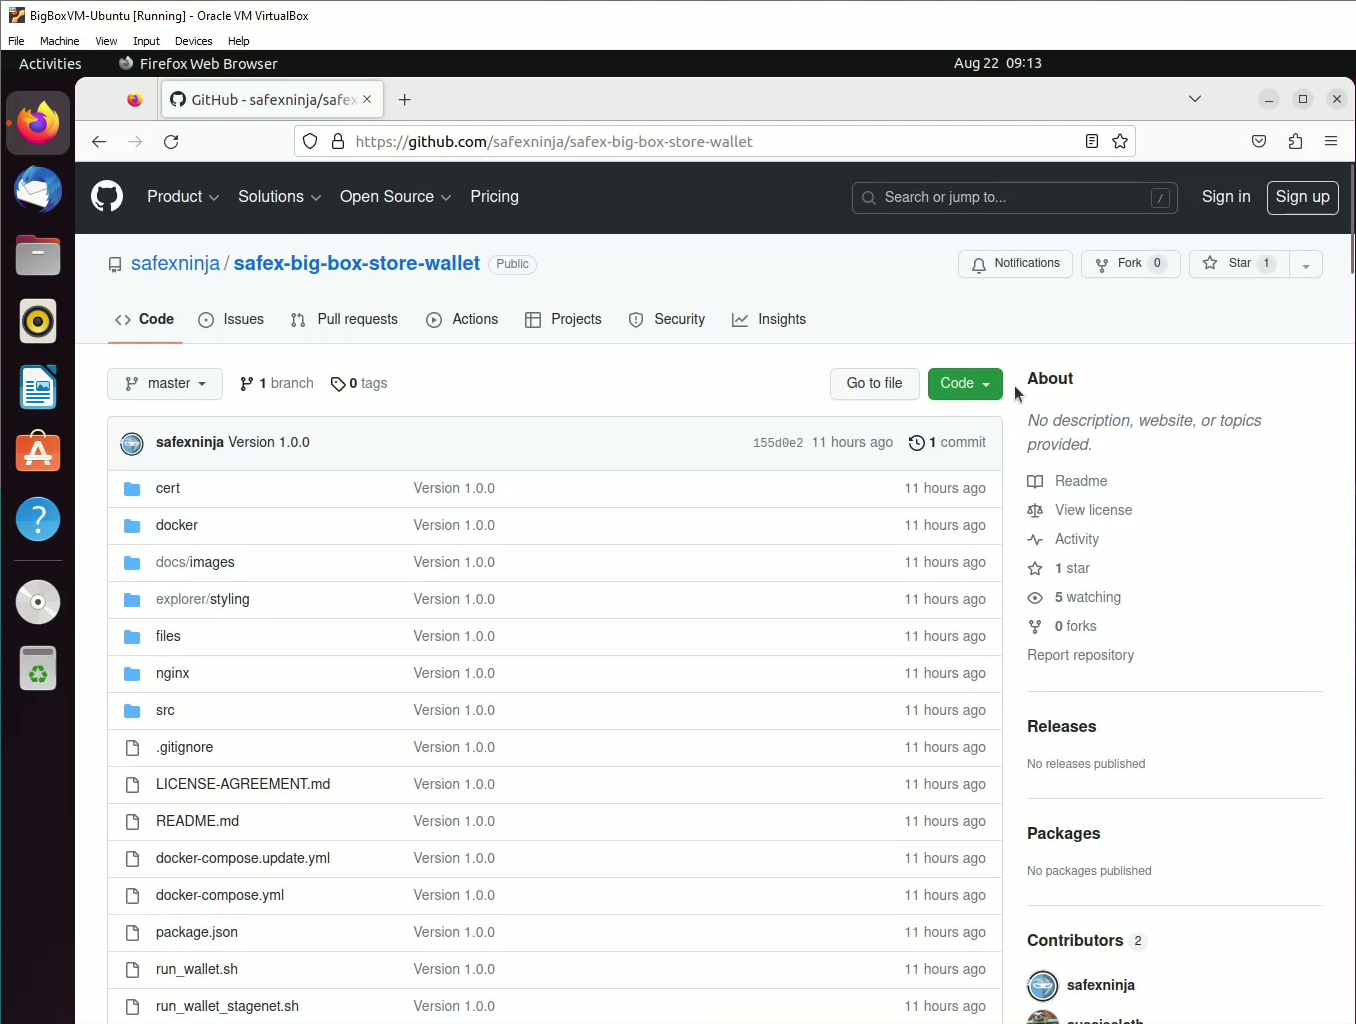
We are now ready to install the Big Box Store Wallet software. To begin, open Firefox (within the VM obviously, not in Windows) and go here.
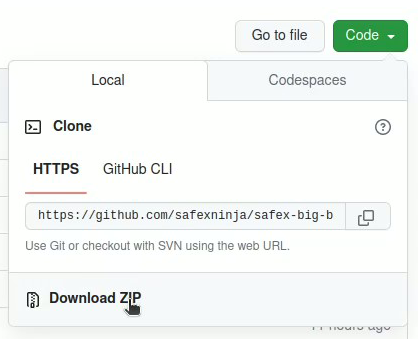
Click on the green Code button and in the dropdown, click on Download ZIP.
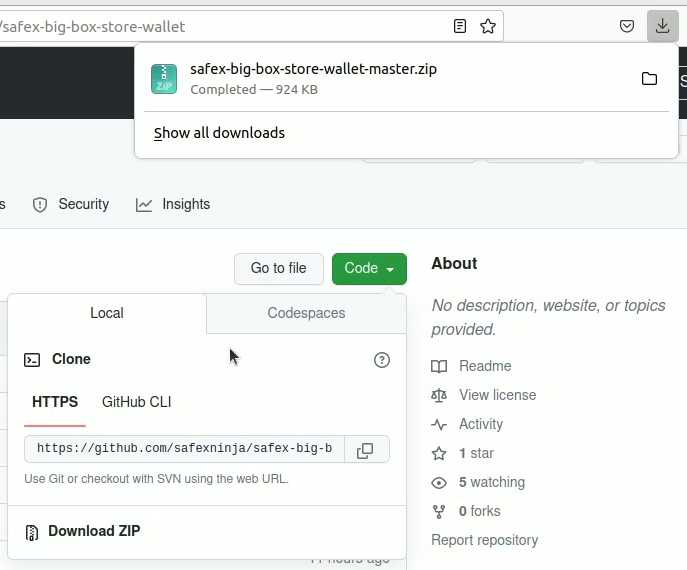
The download will complete in a few seconds.
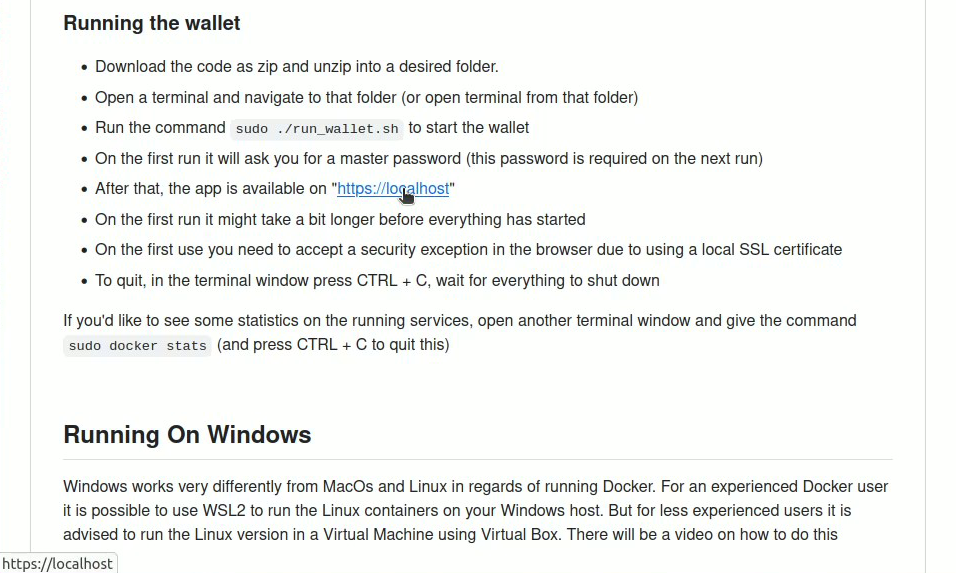
For convenience, scroll down the github page until you get to the Running the Wallet section. We’ll come back to this later.
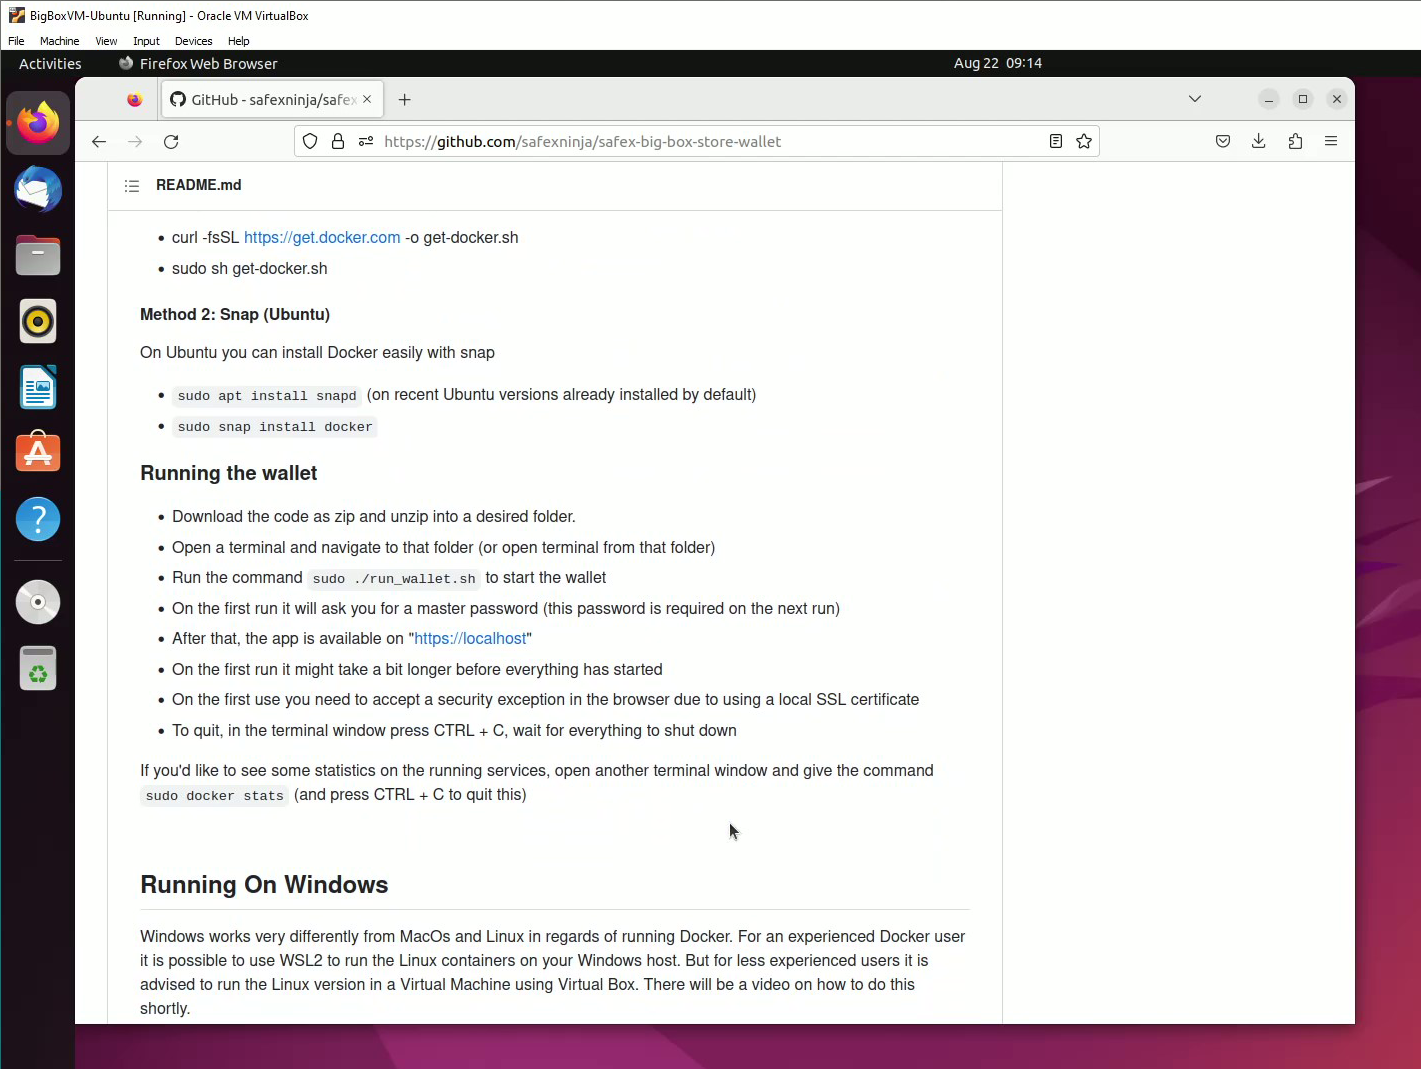
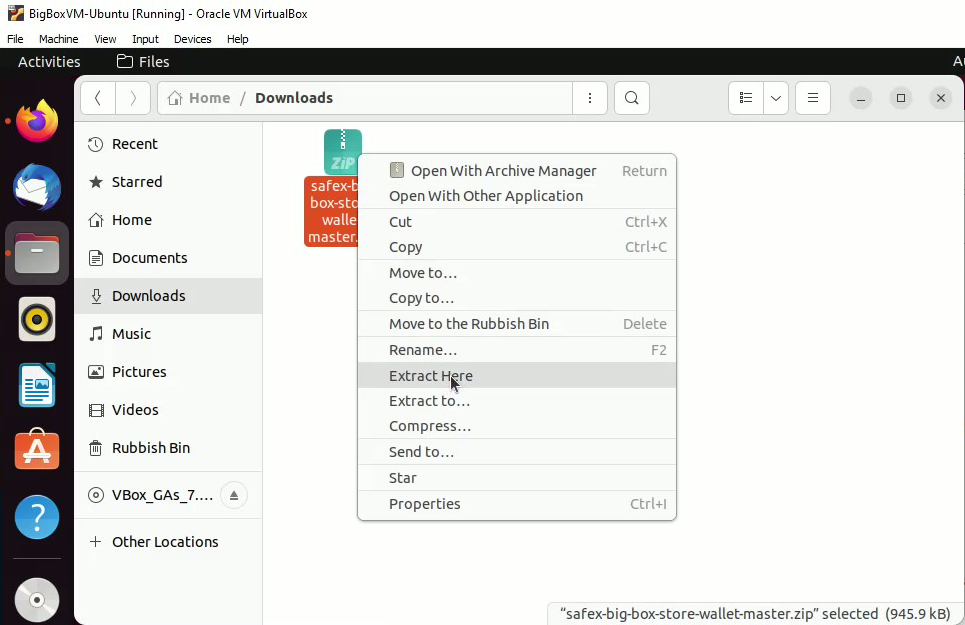
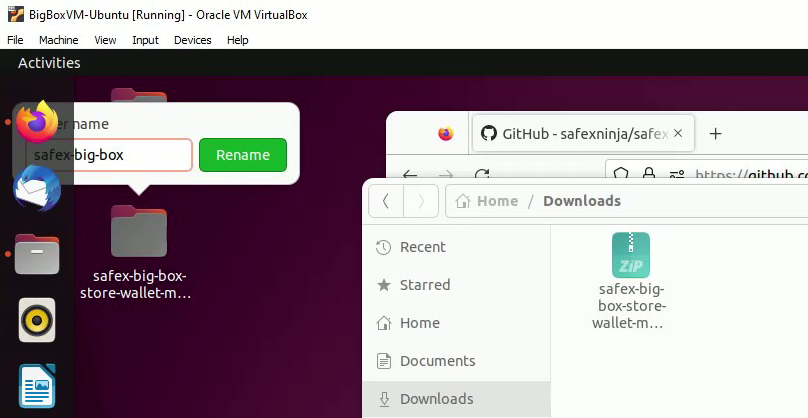
Click on the gray File Explorer button on the left sidebar, then navigate to the Downloads folder. Right-click on the ZIP file and select Extract Here.
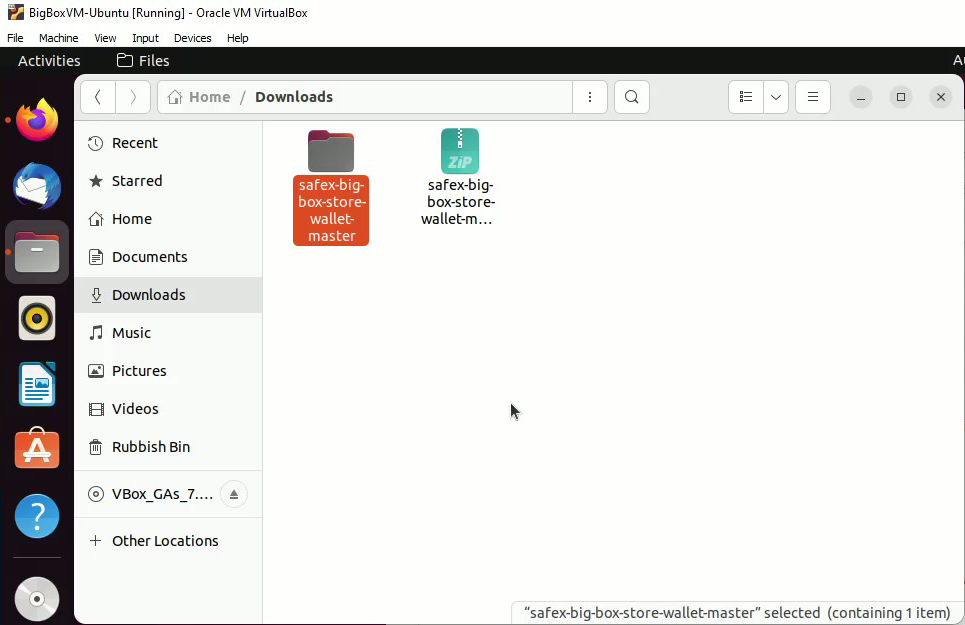
Move the Browser and file explorer windows as need, to allow you to drag the extracted folder to the desktop.
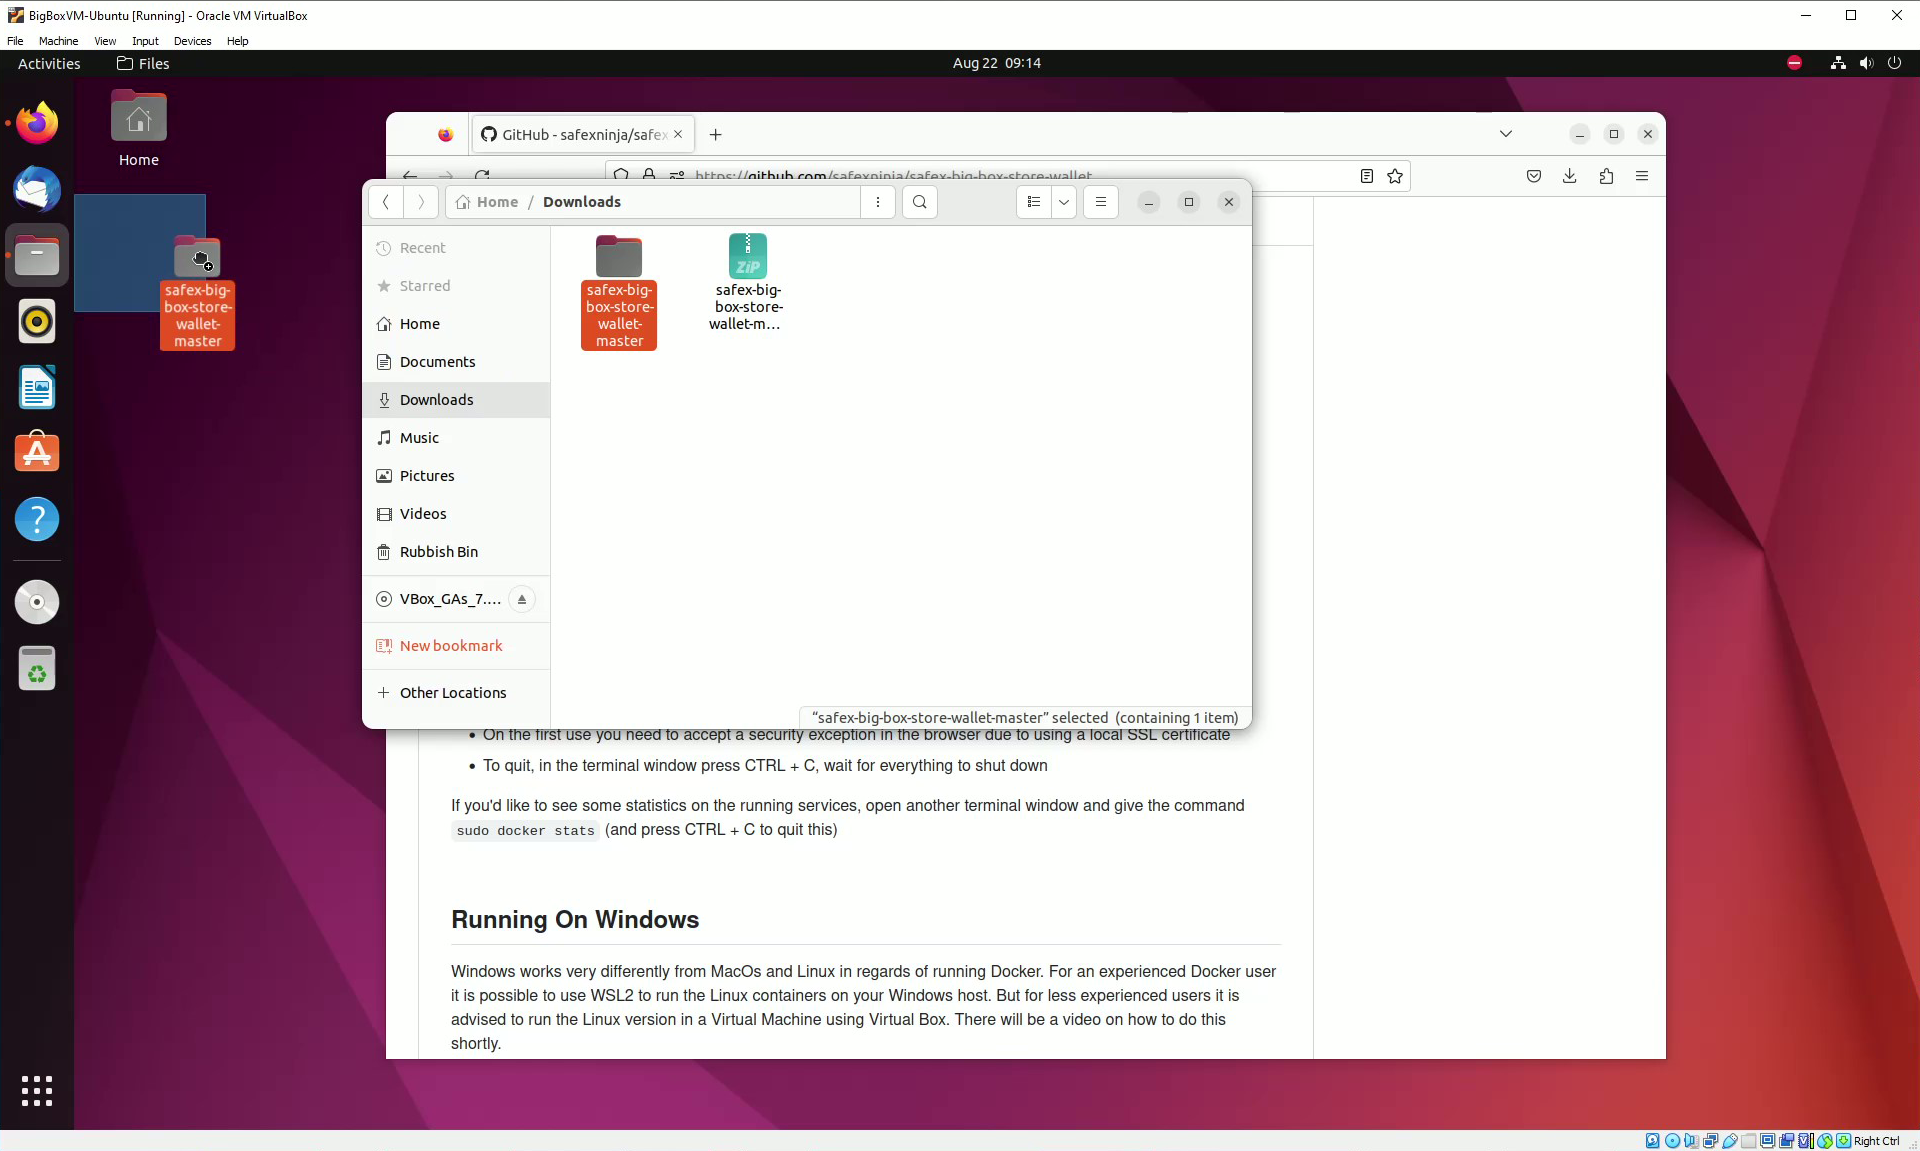
As you need to type in the folder name, consider renaming it to something short. In this example, the folder name is shortened to safex-big-box.
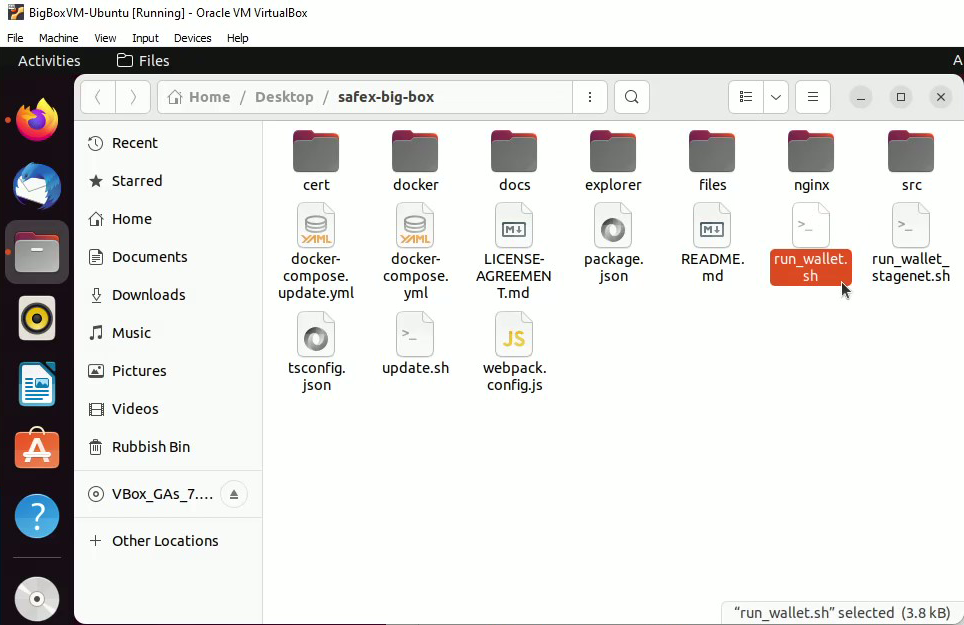
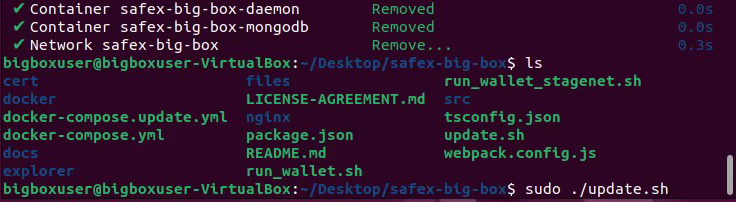
Opening the folder, you will find a handful of files and folders. The two you will use the most are run_wallet.sh and update.sh. You only ever run them via a terminal window, and always use the sudo command to start them. Don’t try double clicking them to run, as it won’t work.
We’ll come back to the update file later. For now we want to get the big box software suite installed and functioning properly.
Once again, open a Terminal window, and resize/reposition it to suit your viewing preferences.
Now, navigate to the newly downloaded safex-big-box folder you moved and renamed to the desktop. If you simply followed the example, you would type the following commands:
cd Desktop
(files and folder names are case-sensitive, so you need to use the capital “D” in Desktop)
cd safex-big-box
To check you’re in the correct folder, you could also type the ls command to display the folder contents.
An alternative method to opening the terminal window to the correct path is to open the folder you need in the desktop environment, and then within that folder window, right-click the run file and select Open in Terminal.
You are now ready to launch the big box wallet backend:
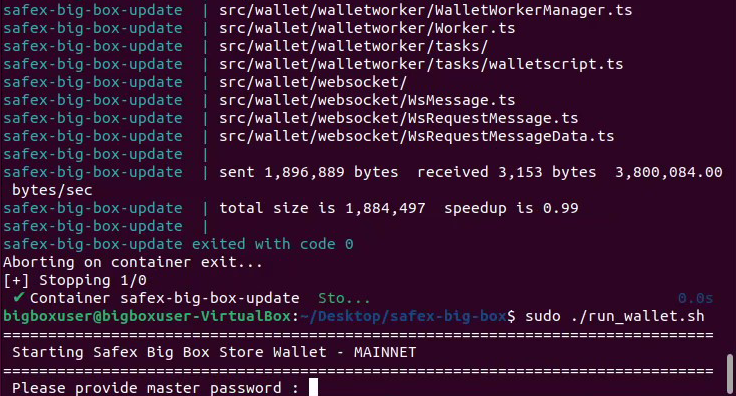
sudo ./run_wallet.sh
…and enter your Ubuntu user password, as you need to do every time you use the sudo command. Do not attempt to run the file without the sudo command, as it will fail to operate properly.

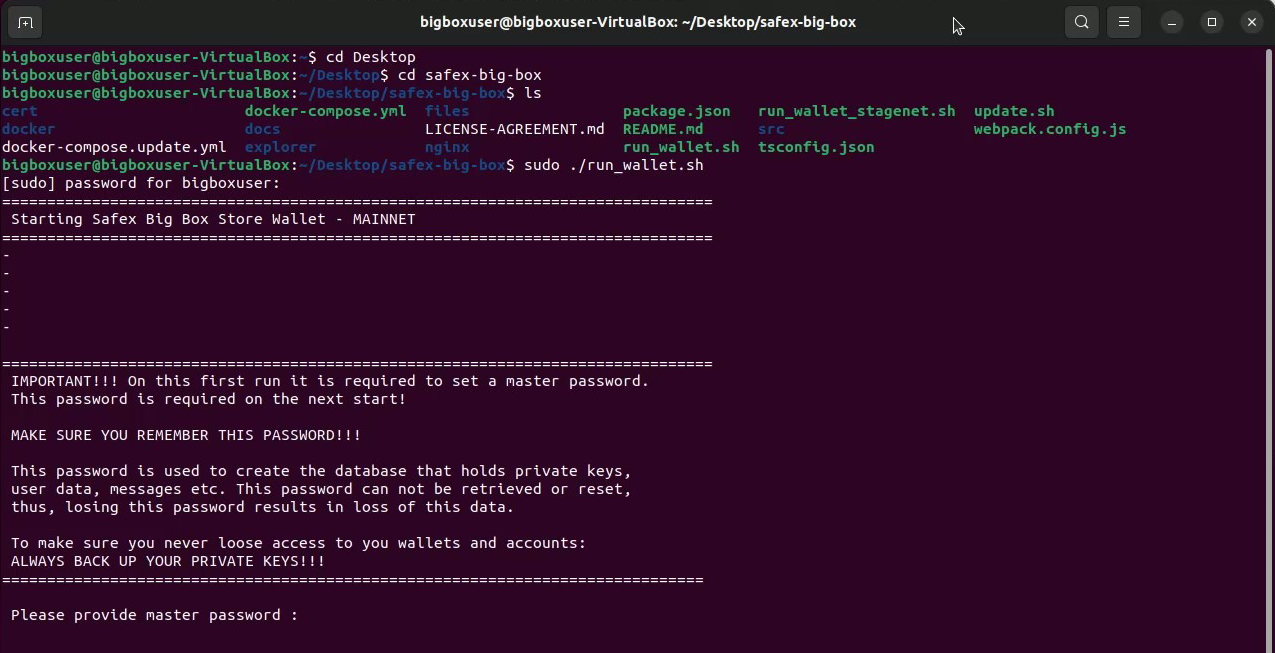
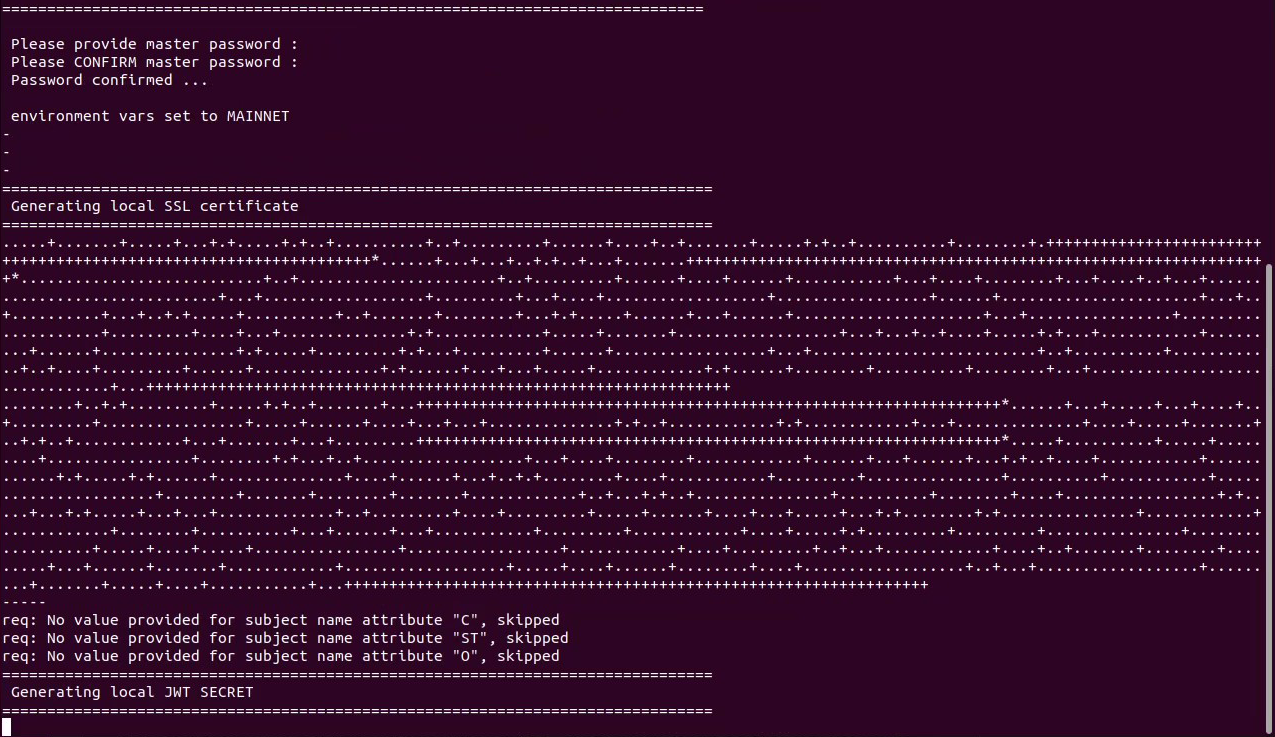
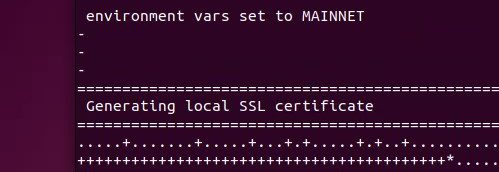
As this is the first time running the command, you need to provide a master password, which you will enter every time you launch the big box wallet backend. Take note of the warning in the terminal window, and write down your master password and store somewhere safe with your other big box wallet frontend username/s and password/s.

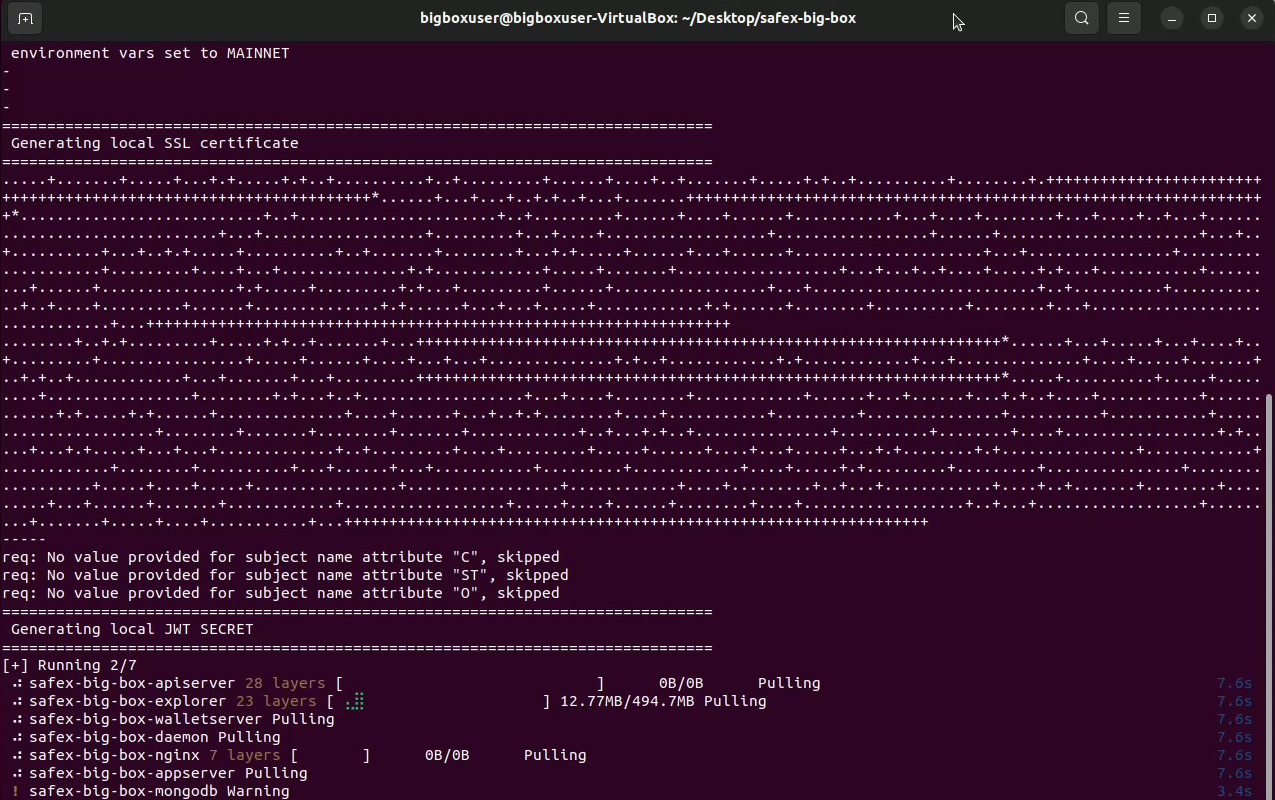
After confirming the master password, a local SSL certificate is generated, a local JWT SECRET is generated.
And the various software components of the backend begin to get downloaded (pulled).
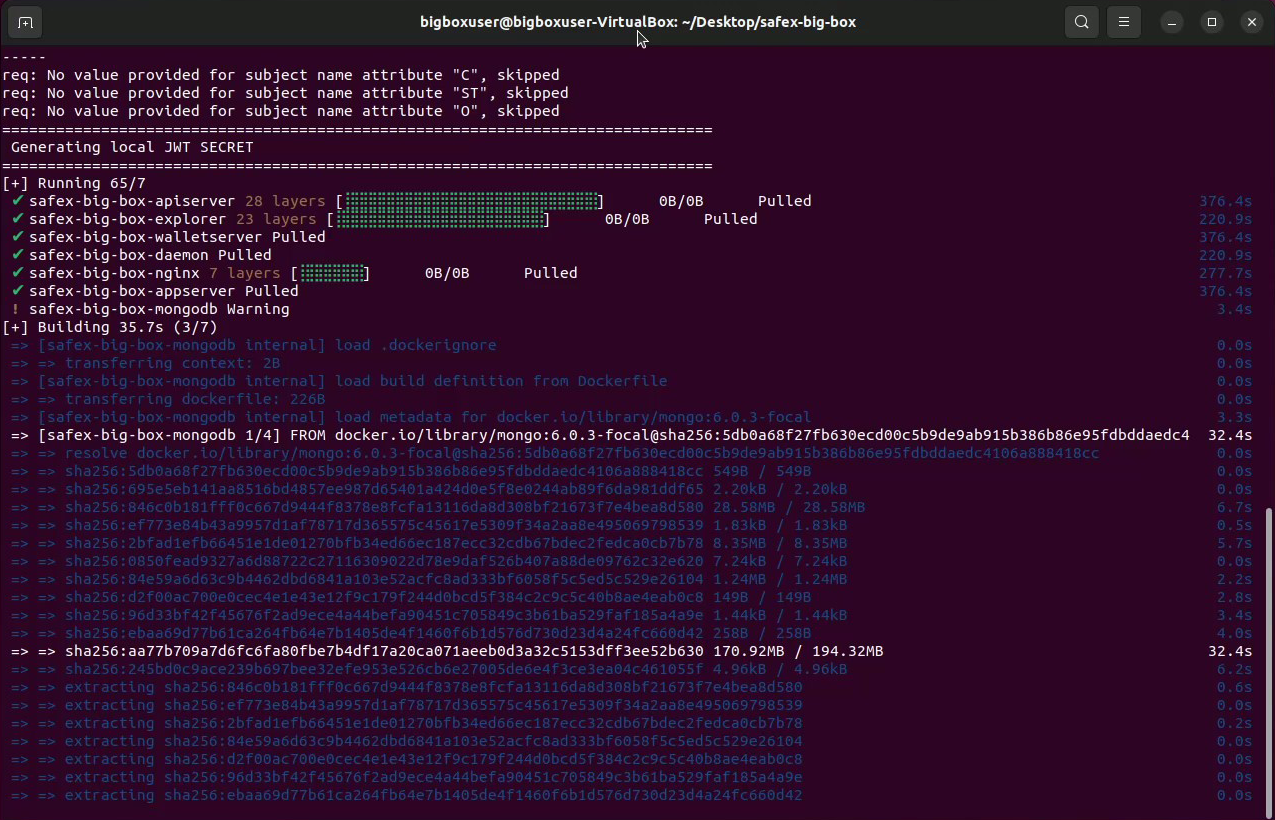
Once downloaded, the software components (discussed in Article 101) get installed. Once the Safex Daemon launches, it starts syncing the blockchain. (A recent software update gives users the option to download a copy of the blockchain from globalsafex.com, or allow it to sync from the genesis block, which is considered the more secure, but much slower, method.)
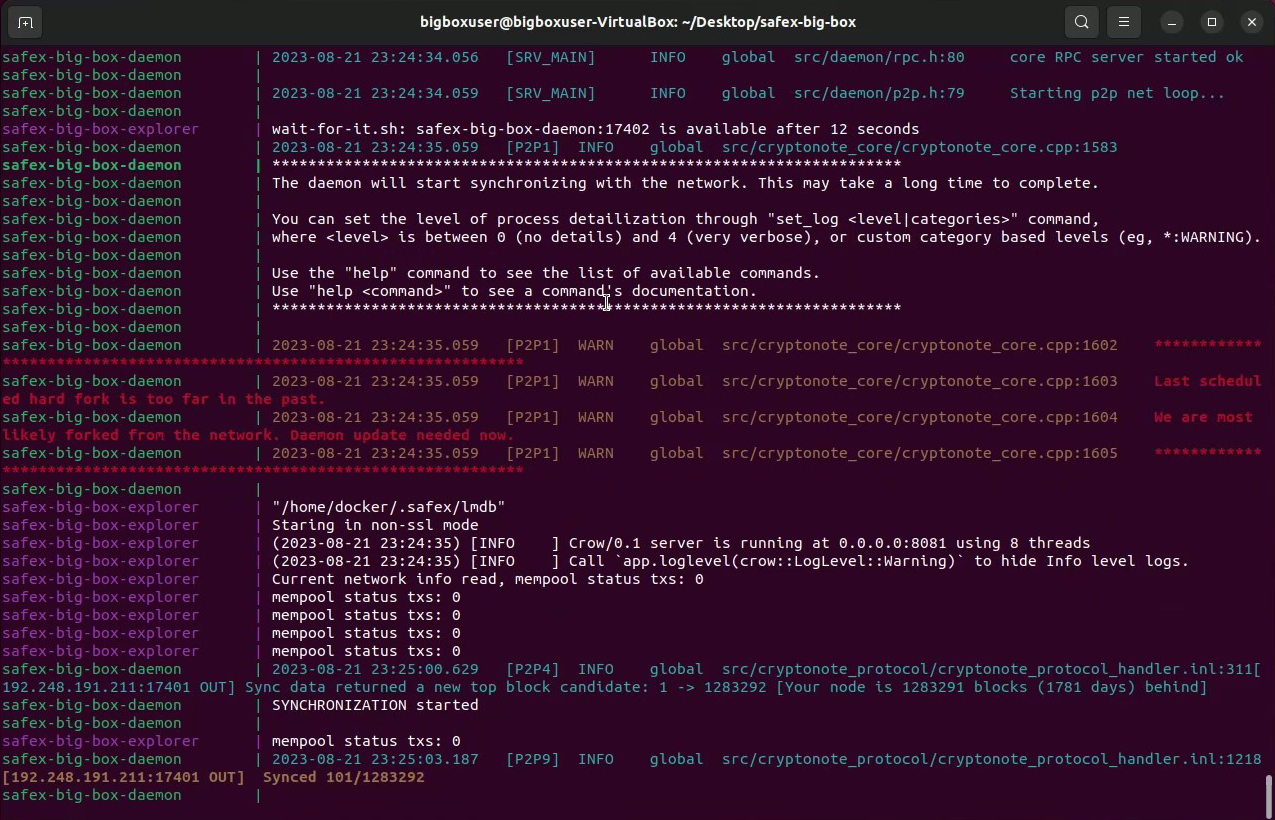
The other backend components will complete their initial install and also launch, and once you see the SafexBigBoxStore ASCII graphic, everything is up and running.
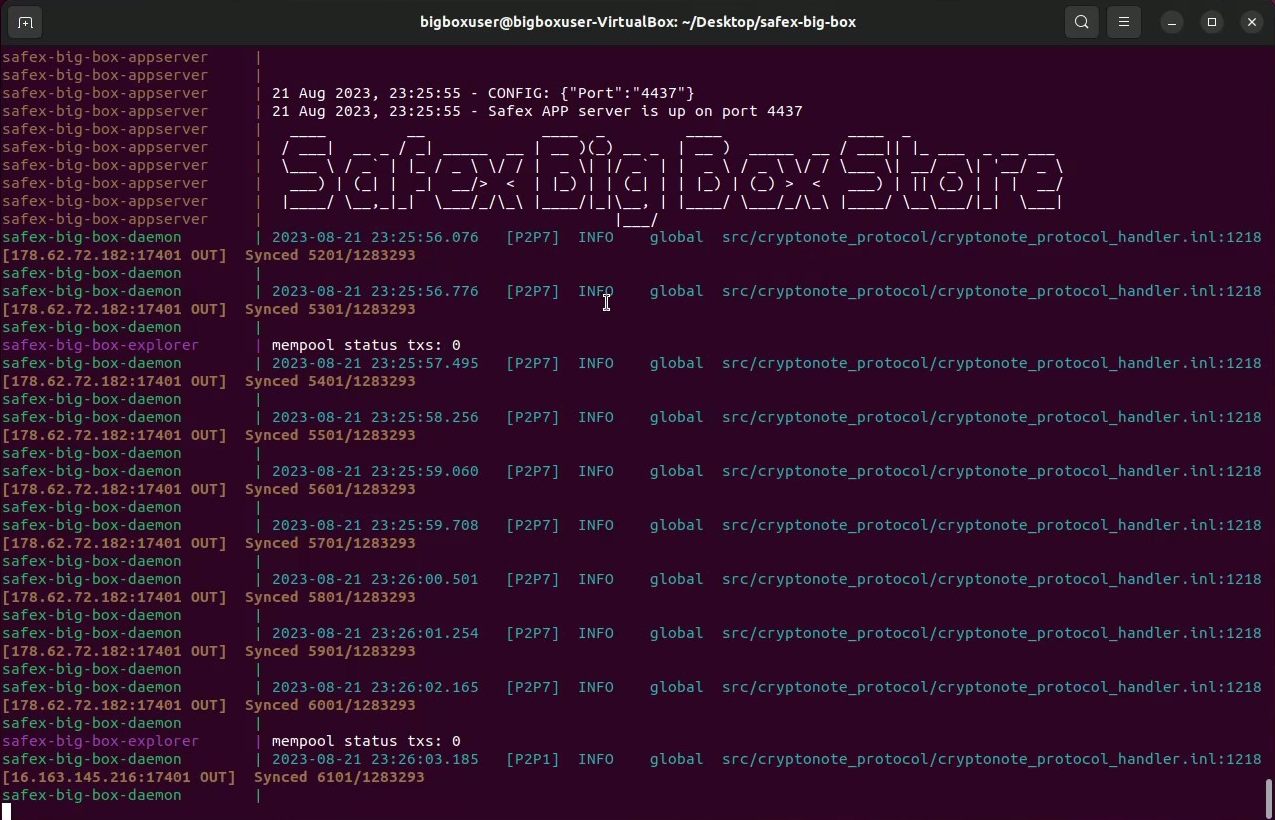
However, because this is the first time running it, syncing the blockchain will take some time, most likely several hours, but depending on your VM instance parameters (number of cores and RAM allocation), internet speed and geographic location, it could take up to a day or more.
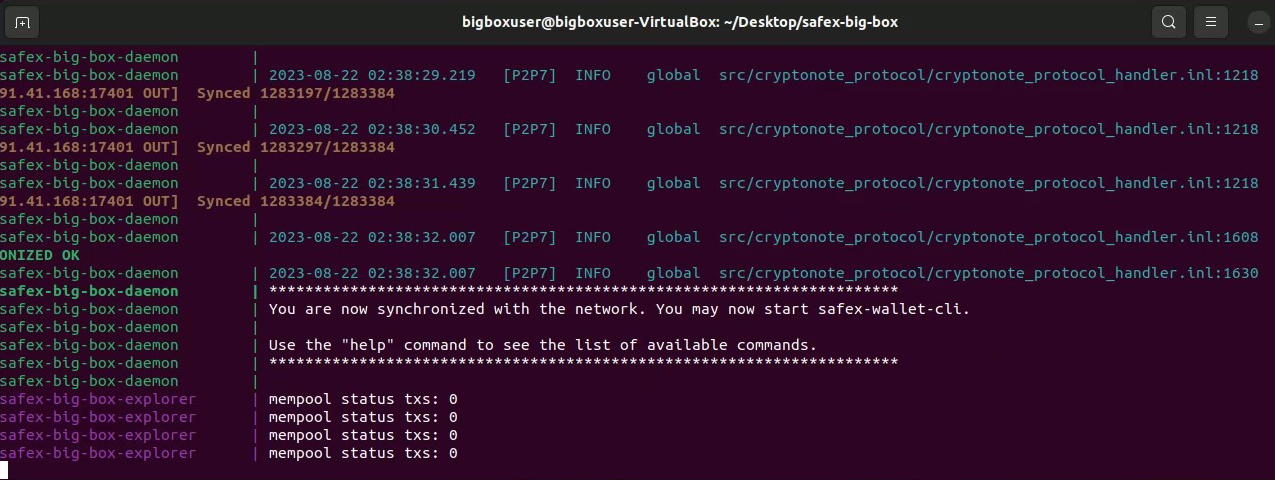
If you walk away from your PC at this point and return later to see heaps of mempool status entries and no more syncing updates, you have probably completed syncing. You can probably scroll up within the terminal window to see the last sync update from the Daemon. Then compare the block number with the Safex Block Explorer (https://explore.safex.org)
Note for Advanced Linux Users:
If you already have a copy of the Safex blockchain (data.mdb) on another device, such as PC running a node, then (with the node stopped) you could copy the db and stop the initial sync process by gracefully stopping the big box backend (CTRL^C), make the necessary permission changes to the big box files/folders, and replace the newly created blockchain db file with your recently synced copy from your node. Then, launch the backend again and it will quickly be synced to the top block.
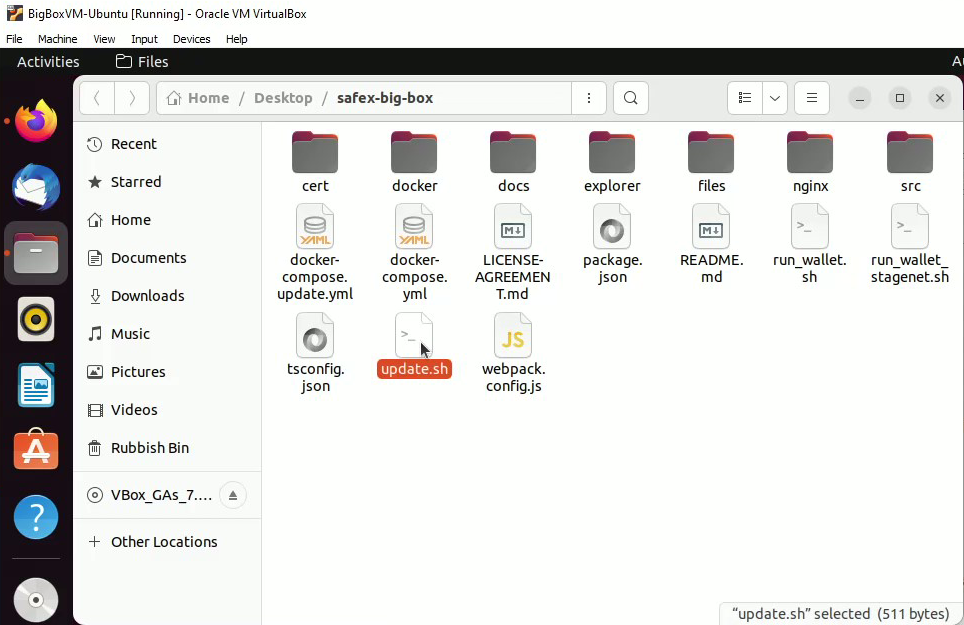
Future Big Box Store Wallet Updates
You only ever have to download the ZIP once for Big Box, as updates are handled by running a script - update.sh - that comes as part of the package.
To update, you first have to stop the backend, which is done with the Ctrl^C command in the terminal window.
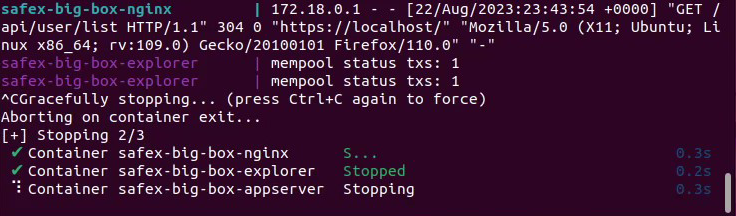
Wait until the process stopping process completes, and you are back at a command prompt.

You then run the update command:
sudo ./update.sh
…and the update kicks off, by grabbing the latest files from the GitHub repo.
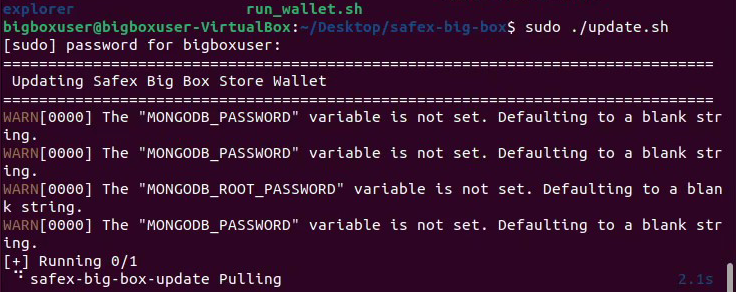
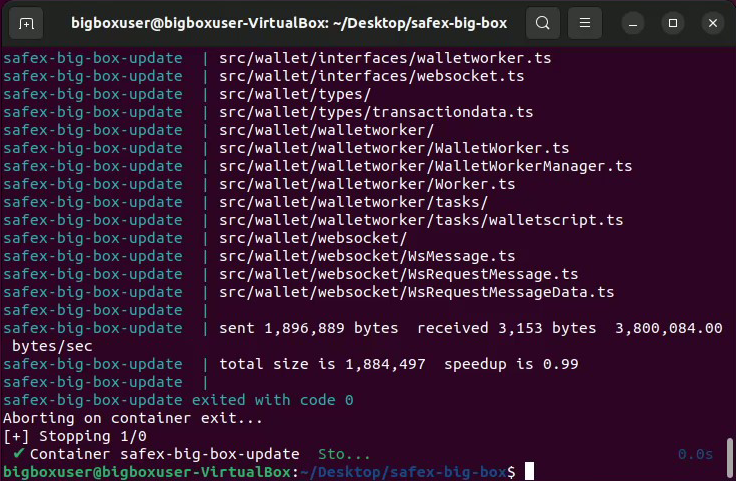
When the update is finished, it will return to a command prompt, and you can restart the software…
As a quick example, here are before and after pics of a typo that was corrected with the update:
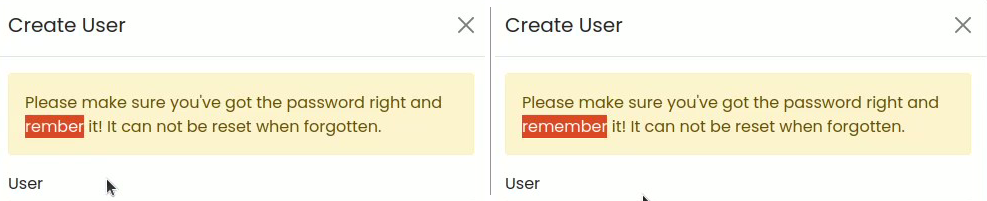
To check if there have been any updates to the Bog Box software, simply go to the Github repo and check when the last commit was pushed.

Frontend: Accessing Big Box
The Big Box Store is functional with whatever browser the user prefers to use.
Note: Mac users may find that Safari blocks certain connections with the wallet, if any problems occur while trying to create or sync a wallet, it is advised to use Firefox or Chrome.
Users are strongly advised to NOT launch the frontend until the initial blockchain sync is completed.
If you left everything alone while the installation and blockchain sync took place, your browser window should still be opened on the Running the Wallet section of the README for the GitHub repo. With the backend happily running, click on the https://localhost link (or type it in manually) within the Ubuntu VM.
You will get a warning:
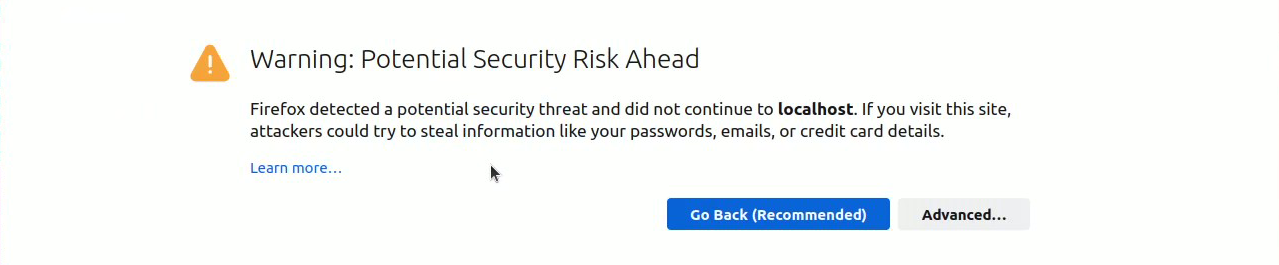
Remember how a local SSL certificate was generated during the initial install? Well, the browser doesn’t consider that normal, so throws the above warning.
But the warning can be ignored and the browser told to accept the risk and continue…

Click the Advanced button.
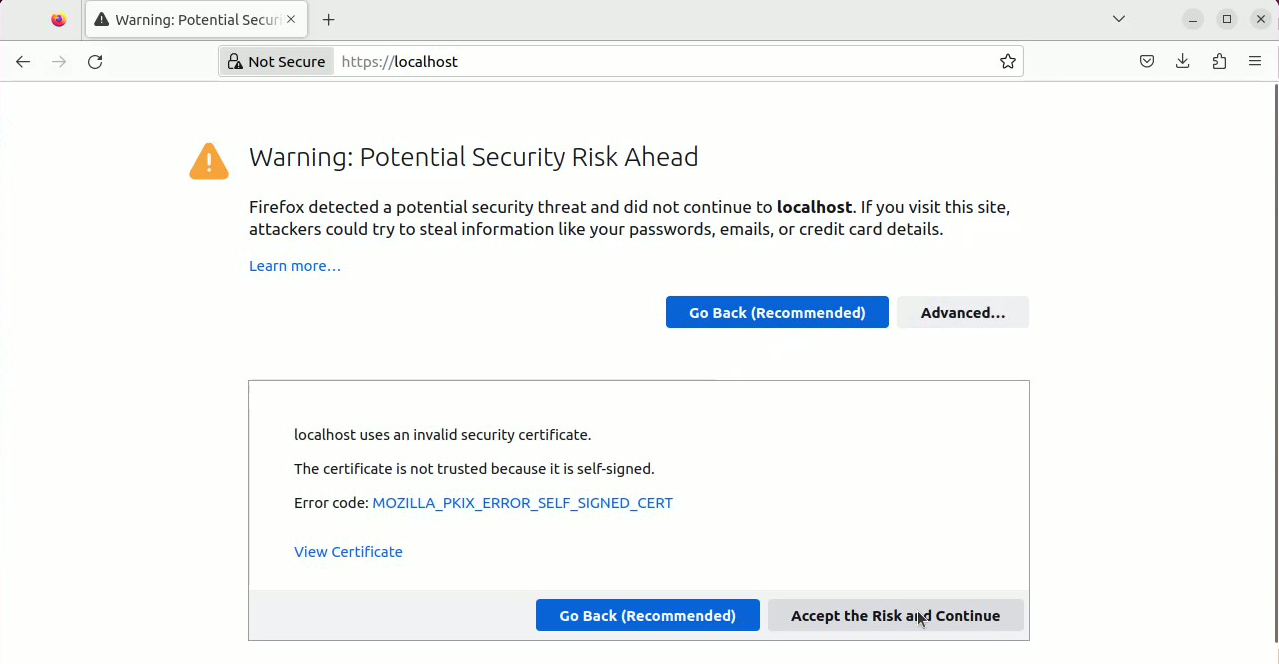
Click the Accept the Risk and Continue button.
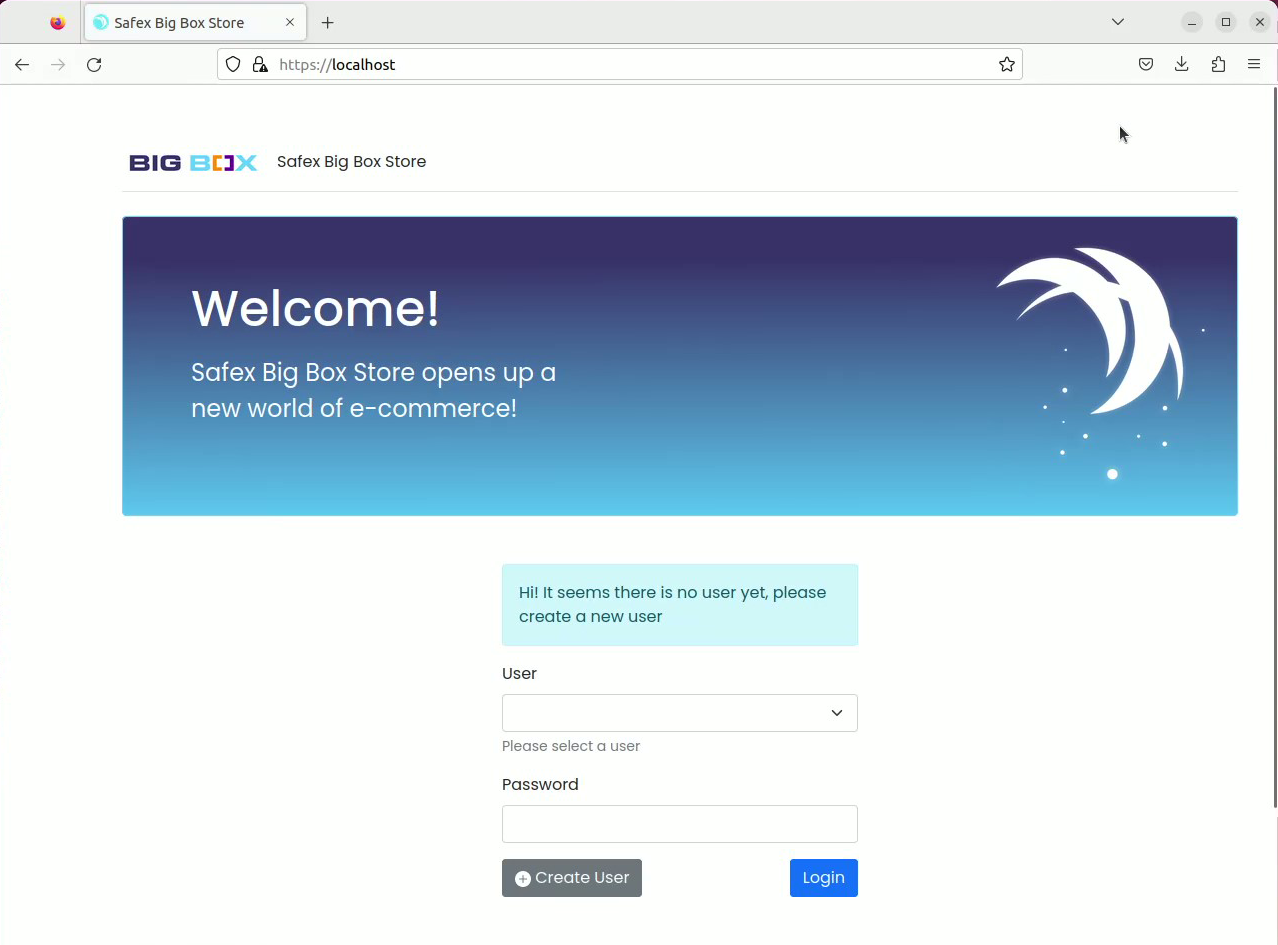
Success! You can now move onto the next section, and create your first Big Box Wallet user login.
Note: If the webpage is accessed while the backend is still starting up, users will get a Loader Screen:
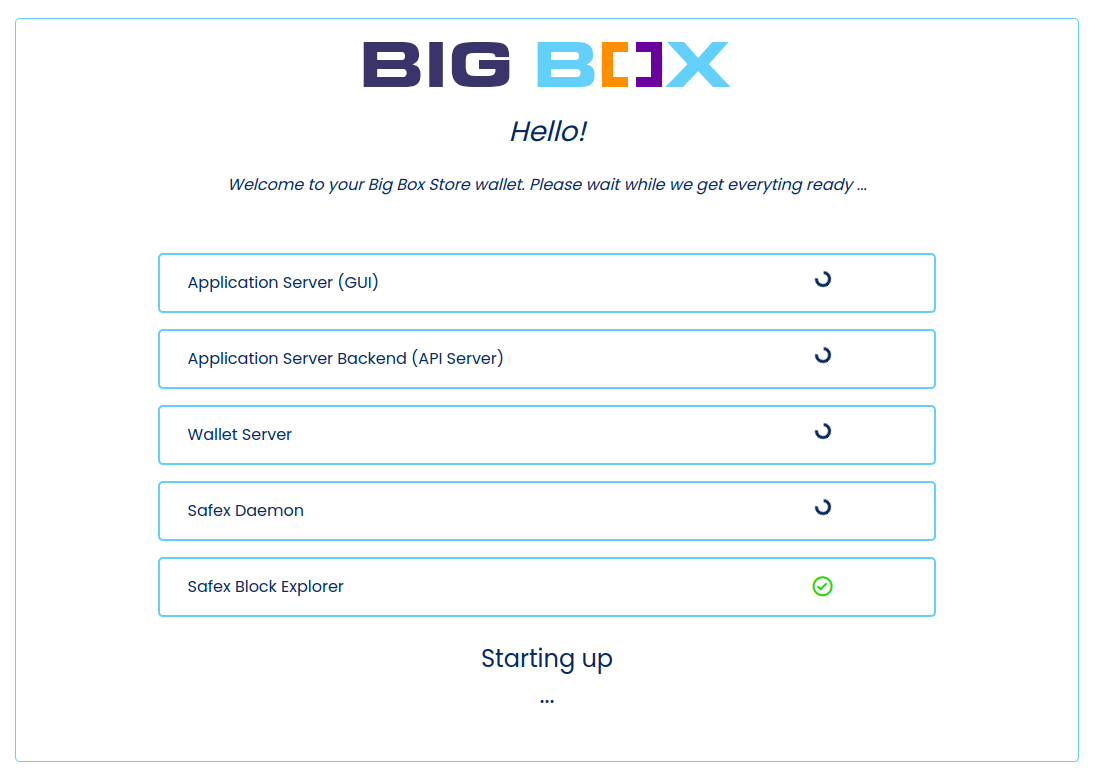
Once all components of the backend are up and running, users will automatically get presented with the Big Box Welcome screen.
Create a Big Box User Login
IMPORTANT!!
Your Big Box user login is what gives you access to your wallets - treat it with the same degree of secrecy and caution as you would any other crypto wallet password.
DO NOT LET THE PC/BROWSER SAVE YOUR BIG BOX USER PASSWORD FOR YOU, as then anyone else accessing the PC will have automatic access to all Safex Wallets restored or created against the Big Box user.
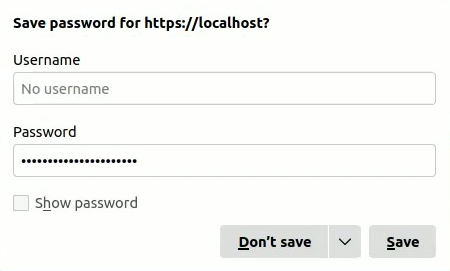
Click the Don’t save button.
This user information is stored locally, and the password chosen here also needs to be remembered. In this way different members of the same household could have their own unique Big Box logins on the same PC.
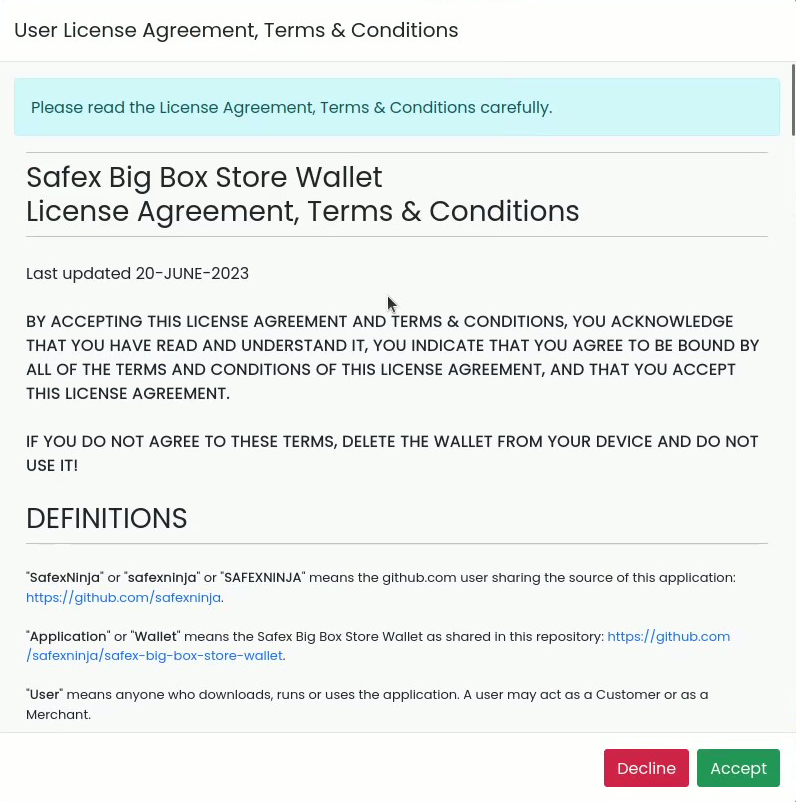
When users create a Big Box user profile, they are presented with a License Agreement page, which they must acknowledge and Accept, by clicking the green Accept button.
Additionally, having different Big Box users can also be used for additional security measures: create one user called “Staker” that you use for managing your big Safex bags and staking wallets (without connecting to stores) and create another user called “Shopper” that you use for connecting to stores for buying and selling. You could restore different wallet addresses in each user, as needed.
What happens upon successful Big Box user login:
- The market you have last visited will be loaded into the market tab.
- In the background, for all open purchases (not in a Closed state) the Store Fronts are scanned for any new messages. The messages are fetch and stored locally (encrypted), and the message are deleted from the Store Front
- For a seller, all the Store Fronts to which you have an active registration, are scanned for new messages.
- If there are any new messages for Purchases or Orders, it will be visible in the menu and with a “new” label in purchase and order pages.
- The fetching of messages is repeated every minute when the wallet is left open.
Big Box Settings Page
The first page of the wallet you should visit is the Setting page, which allows you to preset your default Country (auto-populates in the Country filter on the Market page) and your default Shipping Address (auto-populates in the Purchase section for any displayed product).
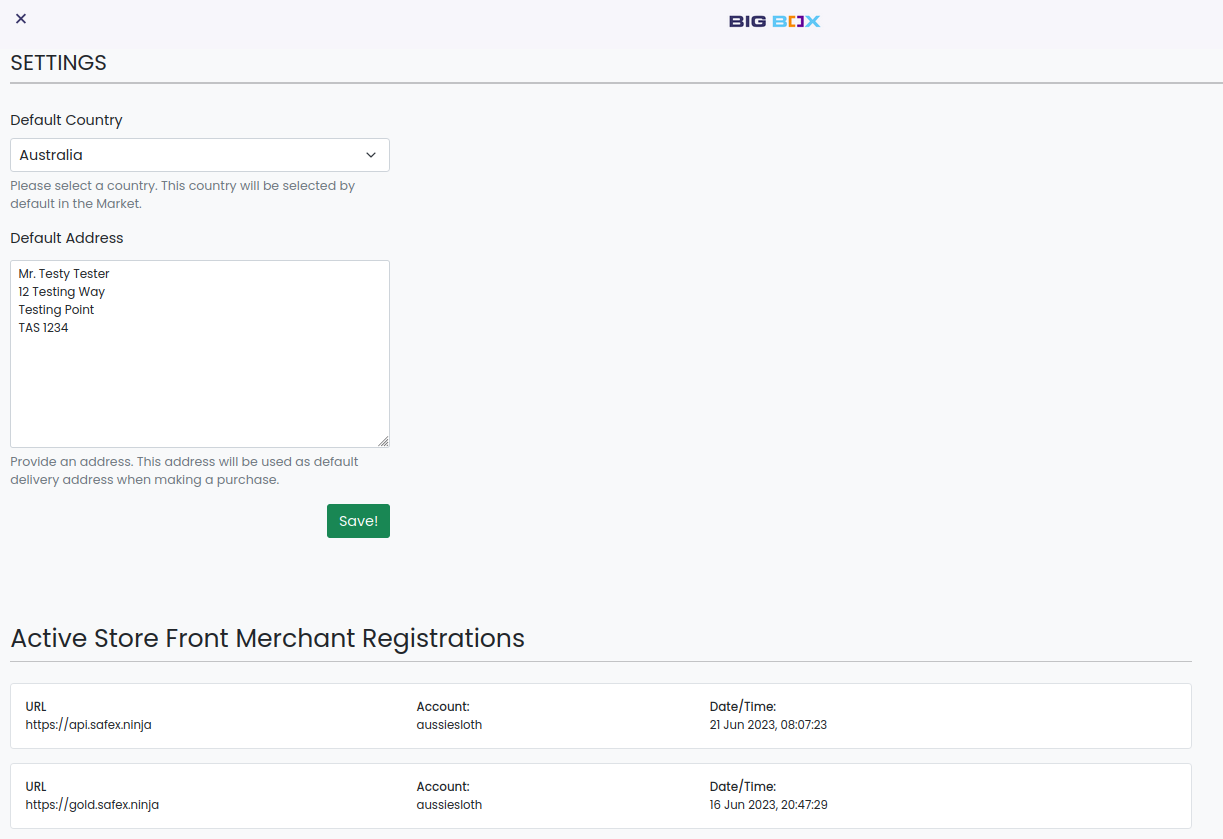
Note: All screen captures of the Big Box Store used in this article are of the testing “Stagenet” version. All addresses, coin balances and offers are fake and are for testing purposes only. The api.safex.ninja URL is a demonstration shop used for testing and cannot be accessed on the mainnet live version to buy real products.
If you become a Merchant selling goods on Big Box, all active Store Front Merchant Account Registrations also get displayed here.
Final Thoughts
That concludes the installation and setup of the Safex Big Box Store Wallet. Not every Windows environment is going to be the same, and users may get presented with issues that have not been covered in this article. If this occurs, users are asked to add screenshots and relevant information on the Safex Forum Big Box post, and efforts will be made to add such issues to this article in the future.
You are now ready to Create or Restore a Safex Wallet and can now move onto the next article in the series, Big Box 103: Core Safex Wallet Functions Walkthrough, which takes you through Creating and Restoring Safex Wallets, Token Staking and other core functions of the Safex Blockchain using the Big Box ecosystem.