Plug and Play Safex Cash Cryptocurrency Mining
You will learn how to assemble the components, install the operating system, and start mining Safex Cash cryptocurrency.

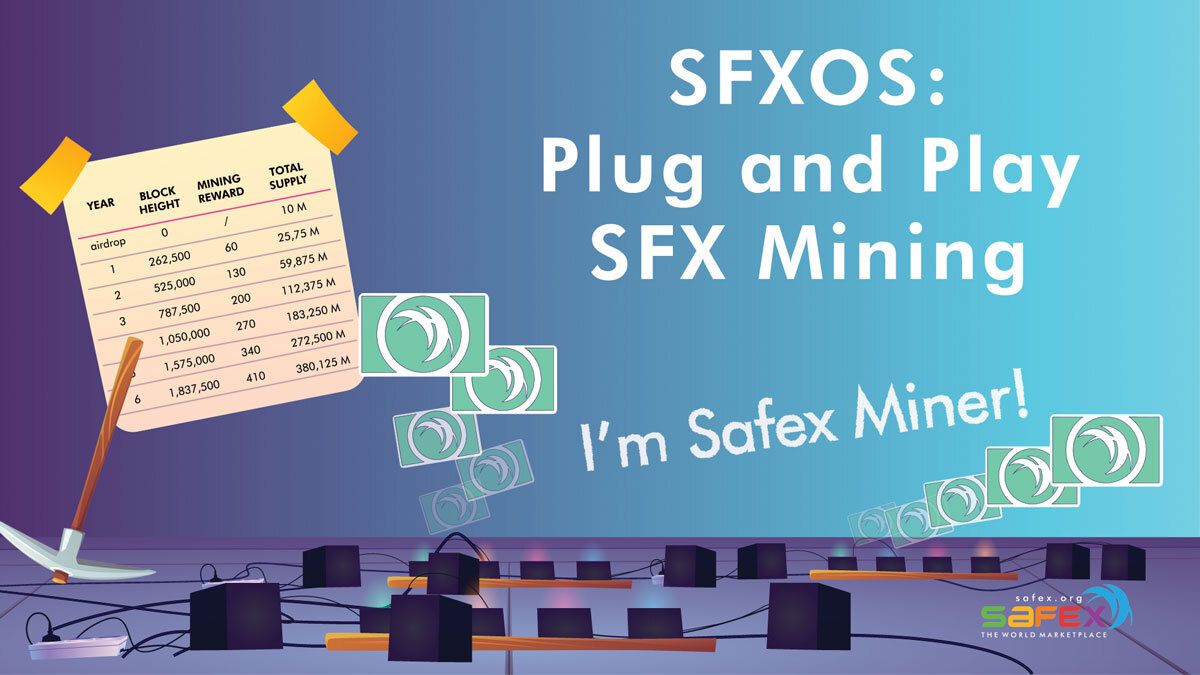
SFXOS | Plug and Play Safex Cash Mining Operating System
You will learn how to assemble the components, install the operating system, and start mining Safex Cash cryptocurrency.
last updated: August 16, 2021
Getting involved in mining cryptocurrency has never been more accessible than it is now. Specifically the Safex Cash mining algorithm enables you to mine using computer parts that are available at well known retailers for instance: Microcenter, Best Buy, and Amazon.
The following text will walk you through the process of which pieces fit together to create an optimized mining rig that has the strongest ratio of cost and hashing power. We will focus on the mining rig and software installation; configuring the software and enabling the accumulation of Safex Cash.
Order of Operations
A. Obtain, Assemble, and Plug in the components
B. Install the Safex Cash Operating System (sfxos)
C. Configure your mining rig
Obtain, Assemble, and Plug in the components
A. Obtaining the Components
The first step to start mining Safex Cash is to obtain the parts that will compose the mining rig.
The parts that you will need are as follows: CPU, Motherboard, RAM, Power Supply,
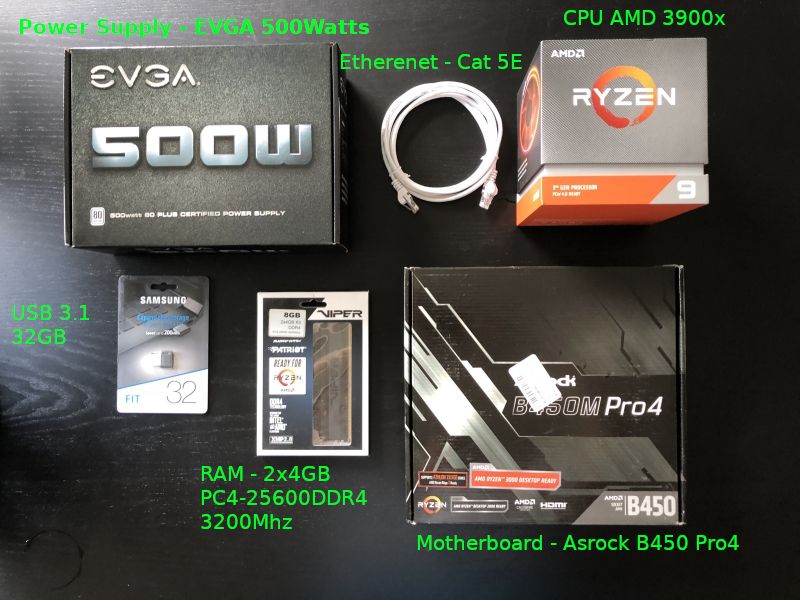
- CPU | AMD Ryzen 9 3900x - $400.00 - $500.00
- Motherboard | Asrock B450 Pro4 - $70.00 - $90.00
- RAM | Patriot 2x4GB PC4-25600DDR4 3200Mhz - $45.00 - $60.00
- Power Supply | EVGA 500 Watt Silver Rated - $40.00 - $60.00
- Samsung 32GB USB 3.1 - $10.00
- Ethernet Cable - $5.00
The total should range from $570.00 to a max of around $725.00
This cost depends on from where you are buying the parts, though if purchased on popular retailers in USA these are the price ranges we have found over the past couple of months.
You will also need a router where you can connect your mining rig to the internet directly through the ethernet cable. We recommend using a Cat5E variant of the cable.
All of these components can be found on Amazon.com or at Microcenter, and varying manufacturers are available providing similar components that will also work; however, the CPU component selected is the most optimized for mining power per dollar spent.
The free safex cash cryptocurrency mining application SFXOS used in this tutorial can be downloaded here: http://safex.org/static/sfxos_2_0.img
Click this link to download safex blockchain mining operating system
B. Assembling the Components
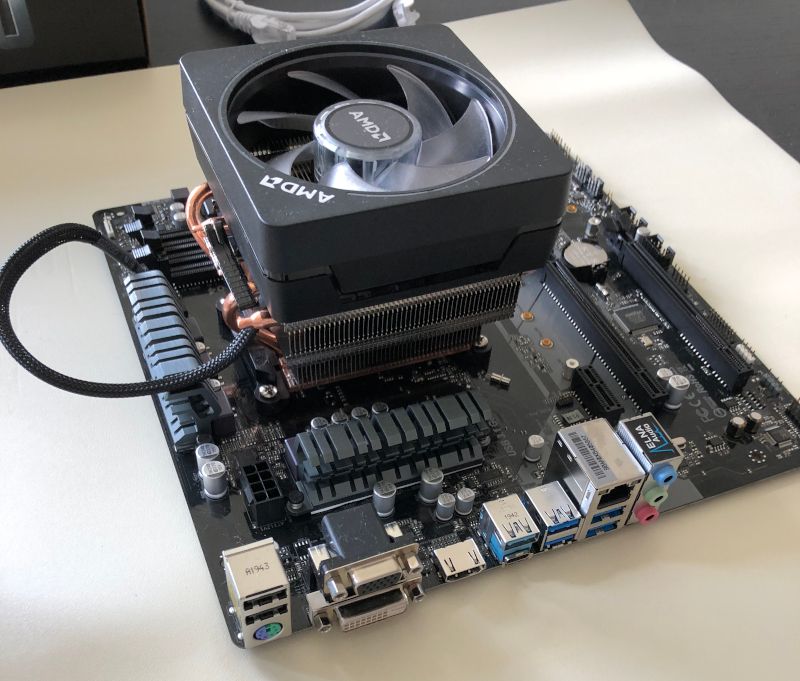
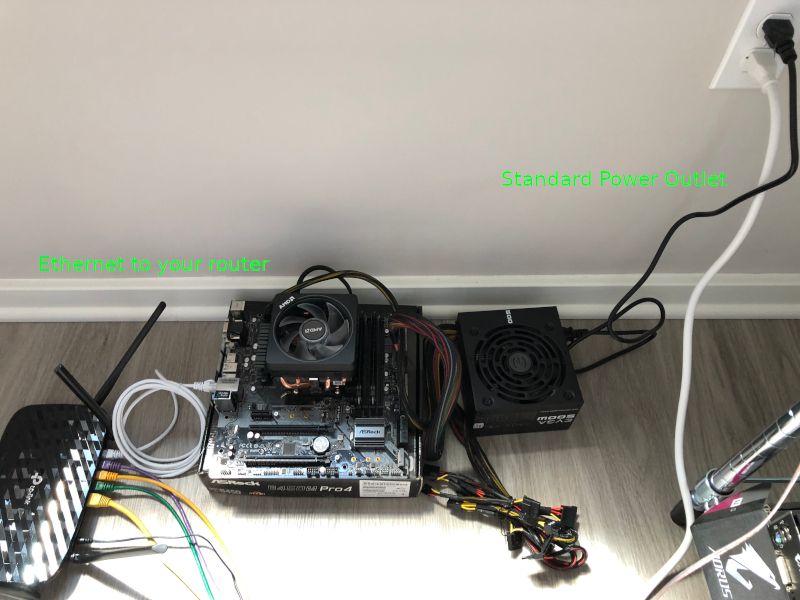
First we start with unpacking the motherboard, followed by the CPU, then the RAM, and finally the power supply. Once we finish assembly of the motherboard by inserting the CPU and RAM and mounting the Heat Sink onto the CPU, we can then plug in the power components from the power supply. We complete the assembling steps by plugging the machine into our router and to the power outlet.
Now let's unpack the motherboard, make sure you do not place it on any statically charged surface (this might break the motherboard and you'll need to send it back for a replacement, be careful about static electricity):
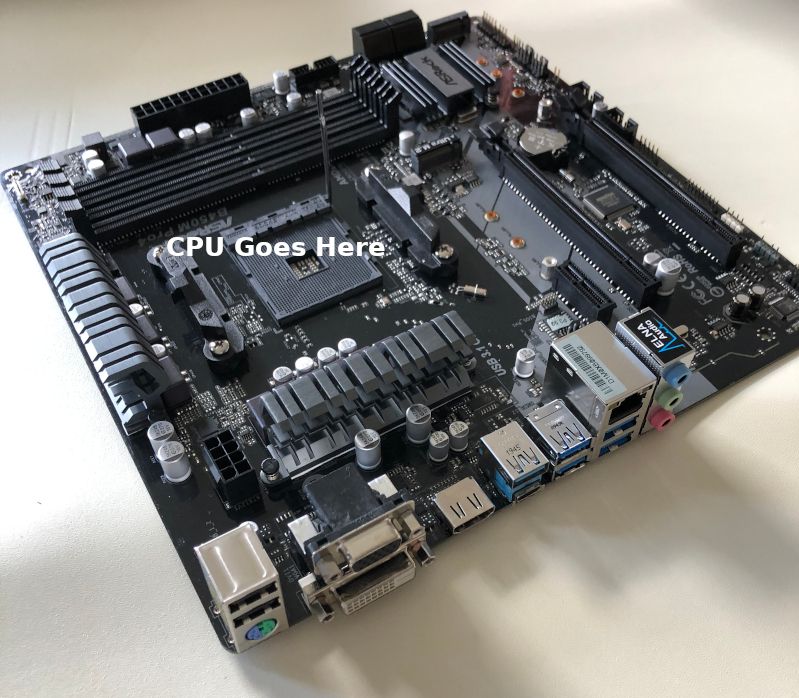
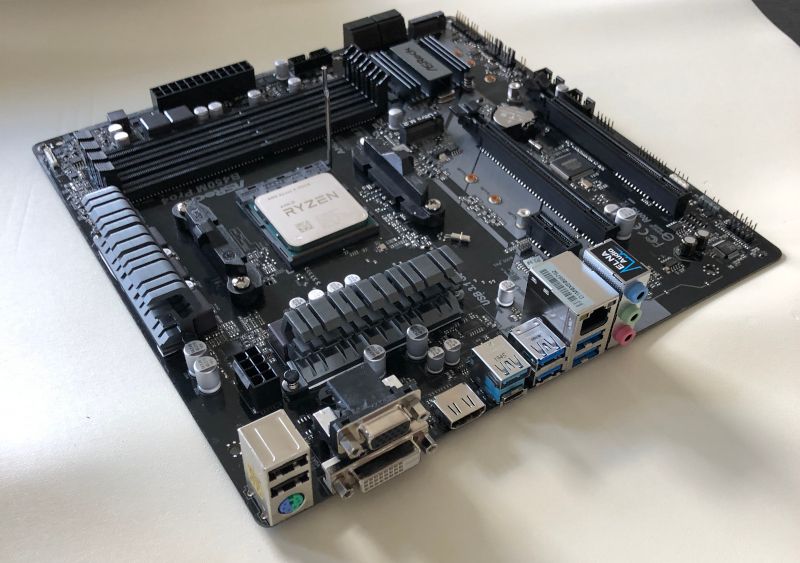
Next unpack the CPU (orange cube box) and insert it onto the motherboard. To insert the CPU you must lift the metal rod on the mount, once the CPU is inserted press the metal rod back down to secure the CPU in place:
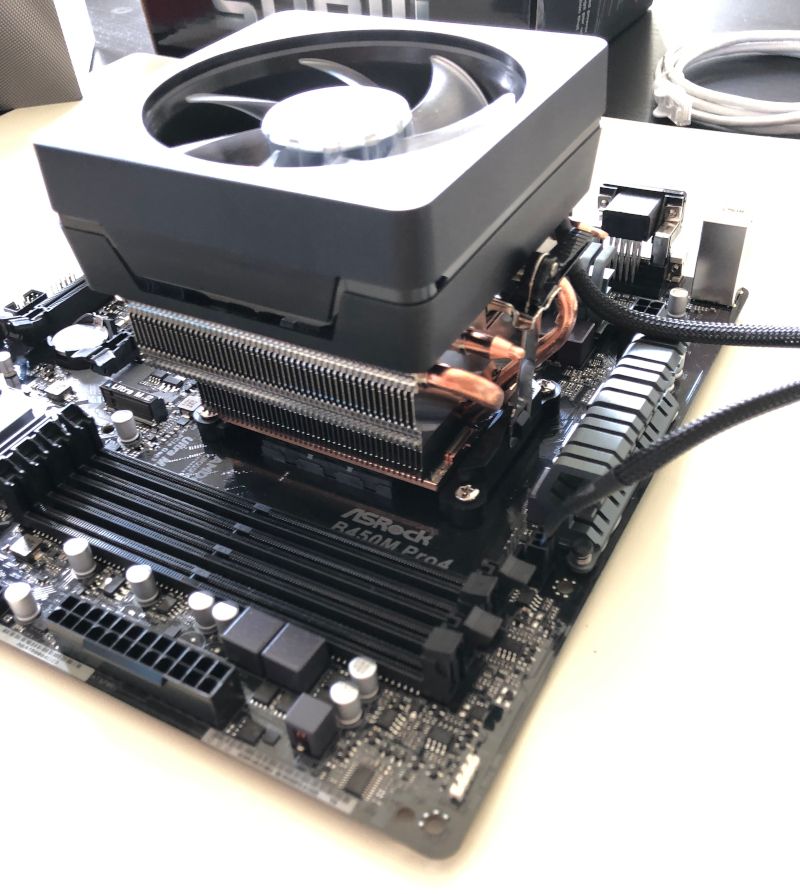
Mount the CPU cooler ontop of the CPU (Make sure that there is thermal paste on the Cooler, it should come already applied to the bottom of the cooler, otherwise you must apply thermal paste to the cpu before securing the cooler), the best technique is to first hook the metal latch that is without the lever, and after that is attached, it is easier to use the lever to wiggle the second latch to the second notch and push the lever until the cooler is securely attached to the CPU:
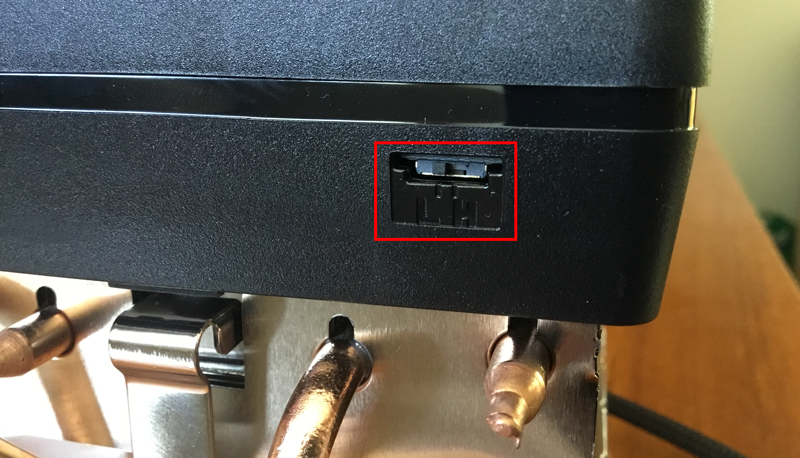
Be sure to plug in the 4 Pin CPU cooler fan cable:
On the stock CPU cooler fan, locate the tiny speed switch and move it to HIGH (it is set to LOW by default, out of the box). Under 100% load (mining with 24 threads), the cpu will be much happier with the fan on High.
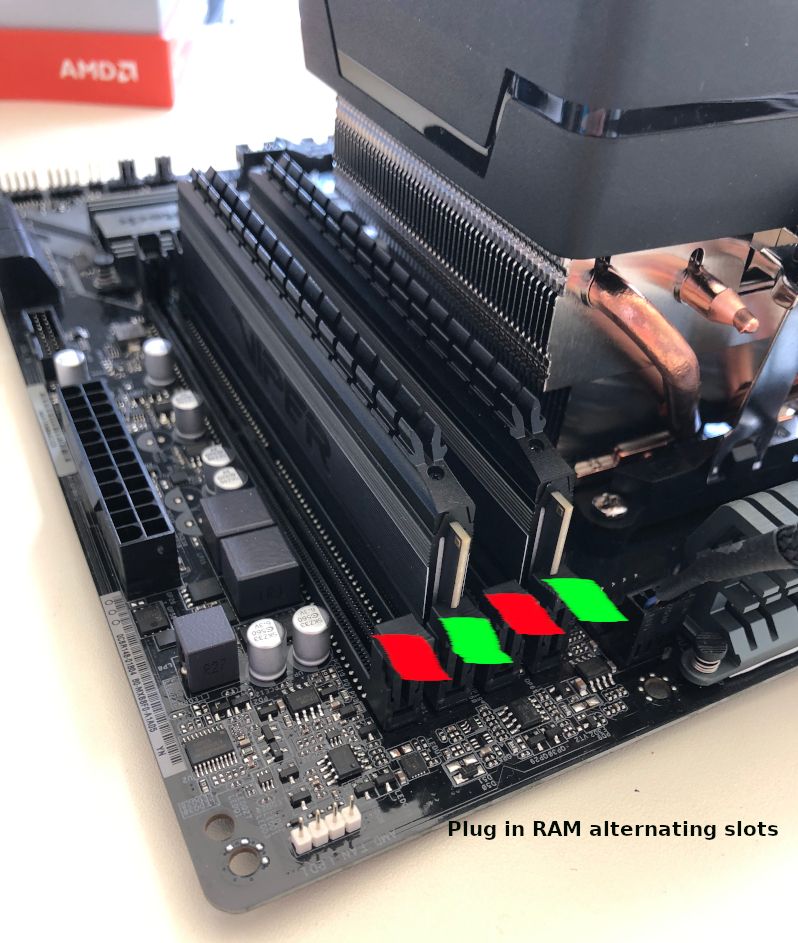
Insert RAM modules, alternating between rows as shown (plug into green slots):
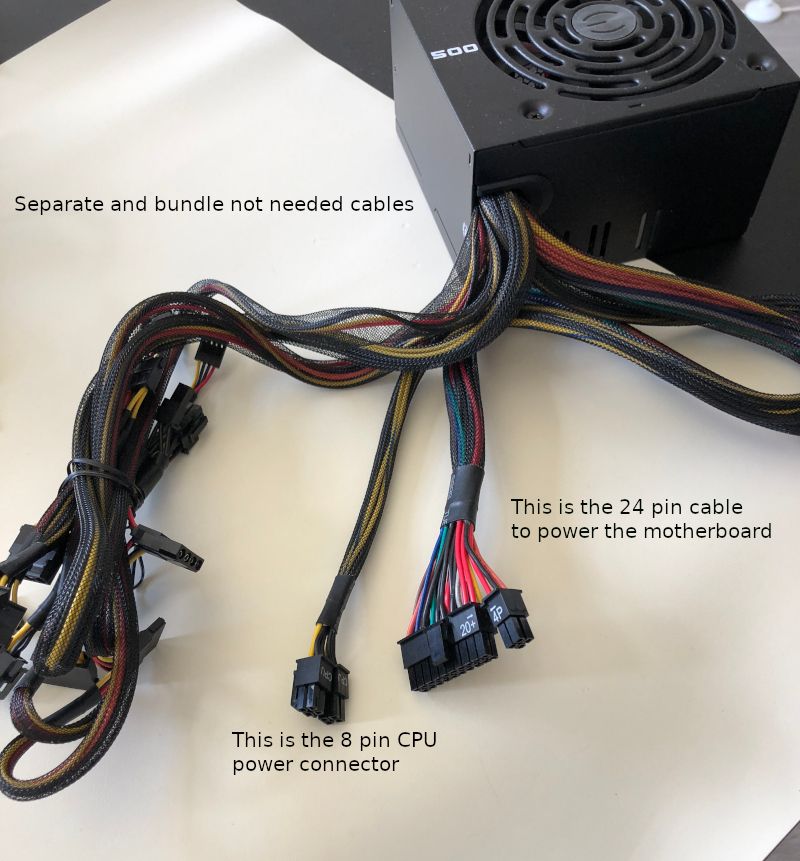
Final work regarding the motherboard is connecting the power cables to the power supply:
These are the power connectors we need from the power supply: 24 Pin motherboard connector, and the 8 Pin CPU connector, the other cables can be bundled up aside:
The two power connectors next are the 24 Pin, and 8 Pin connectors, in case you forgot notice the CPU cooler fan connector:
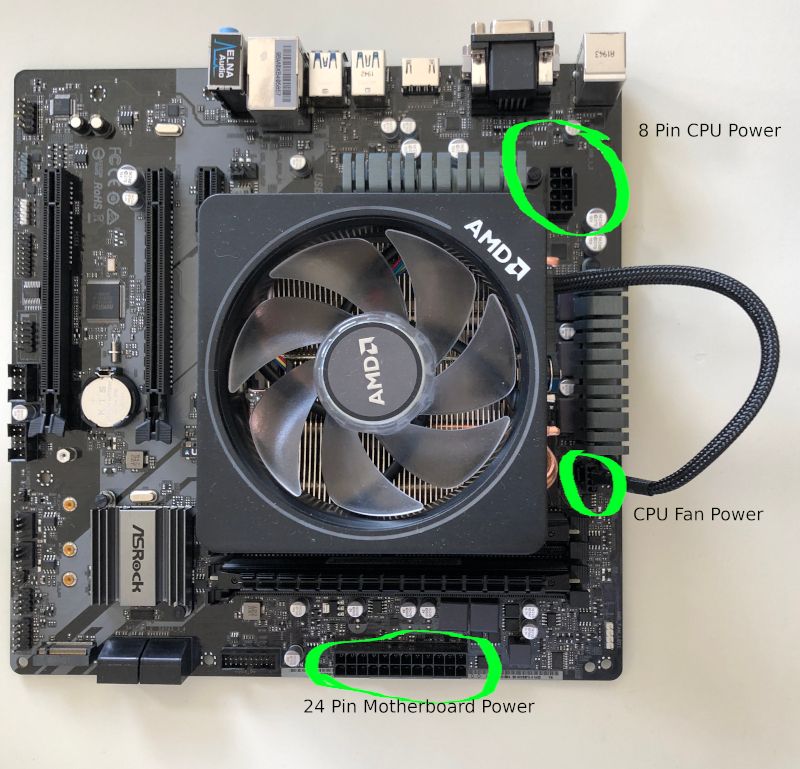
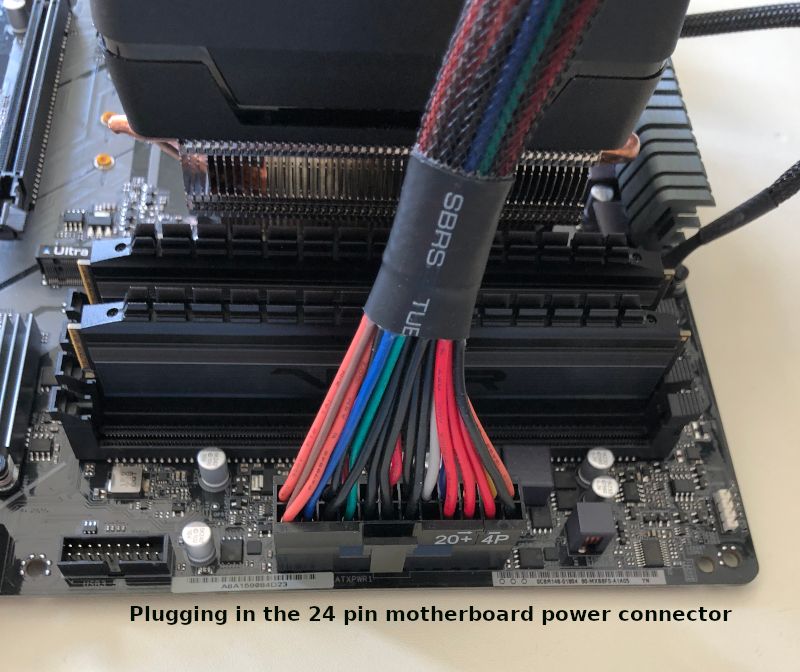
24 Pin motherboard power connector:
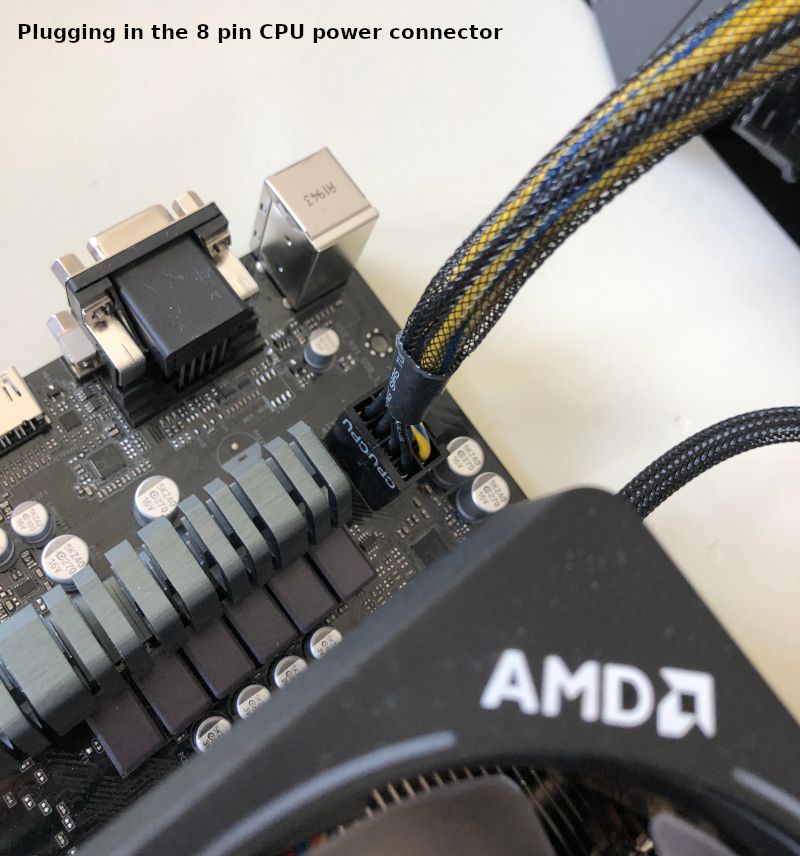
8 Pin CPU power connector:
Now we can connect the rig to the power and the router via the ethernet cable in preparation for the next steps:
C. Installing and Configuring the Safex Cash Mining Operating System
Now that our mining rig is all assembled, one last step is to get the sfxos specialized mining software installed onto our USB drive and then configure our wallet address to receive the fruits of our labor.
To accomplish this we will need to make use of three pieces of software:
- SFXOS: download the mining software itself: 4.3 GB
- Balena Etcher: the software that copies the operating system to the USB drive (this works for linux, mac, and windows).
- Angry IP Scanner: software that will allow us to discover our mining rig and configure it in the web browser.
The first step is downloading SFXOS: http://safex.org/static/sfxos_2_0.img
For that you can click this download link and it will begin downloading the safex cash mining operating system image.
Note: This file is 4.3 GB in size and could take a few minutes and up to an hour to download.
The SFXOS image is a simple ubuntu server that is configured with safex cash mining software, and an internal web server that receives a configuration file where you can set your address and the rig will mine SFX to the configured address on an infinite loop.
Once you have finished downloading the SFXOS you will need a software to imprint the operating system onto your USB drive.
So for that we can download a free software: Balena Etcher
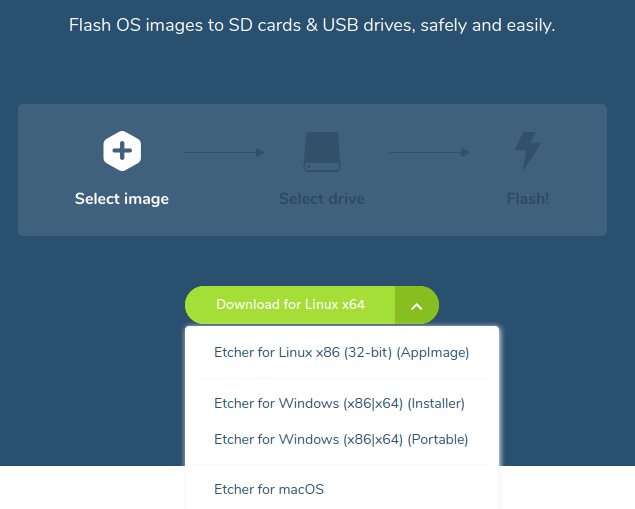
You can download the the one for your operating system here: https://www.balena.io/etcher/
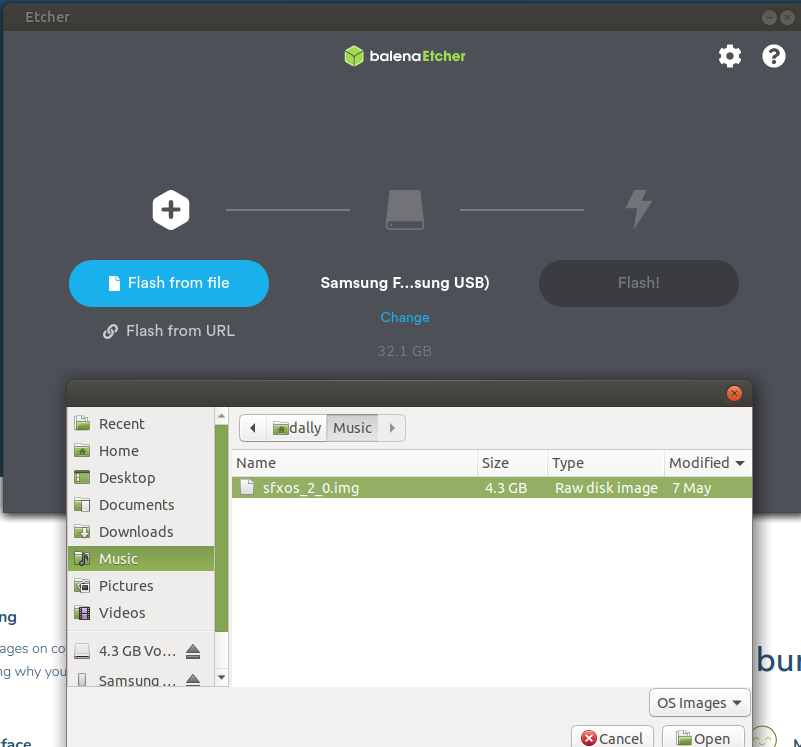
Once we have Belena Etcher installed, and the SFXOS downloaded we can begin loading up our USB drive with SFXOS.
Plug in your USB drive to your computer (not the mining rig yet).:
Open Balena Etcher and select the SFXOS .img file:
Ensure you selected the proper USB drive: This will wipe the drive clean and install SFXOS WARNING MAKE SURE!
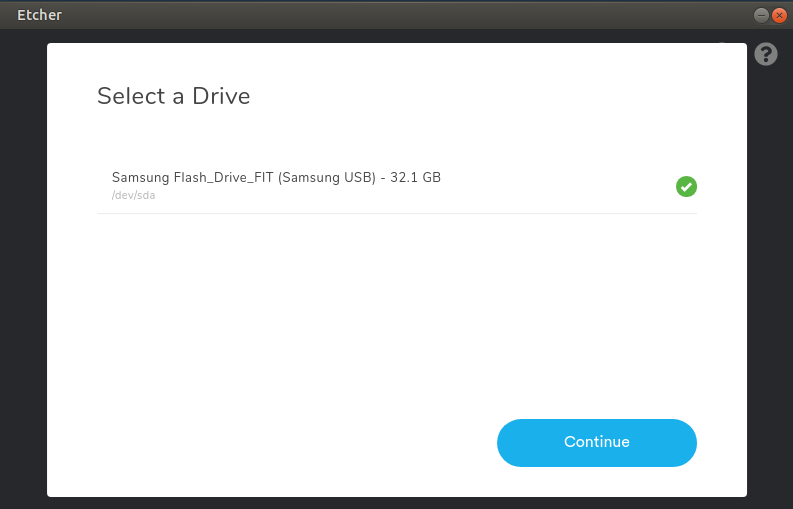
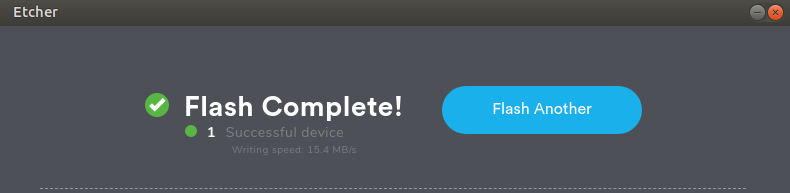
Check that all is consistent and hit Flash!
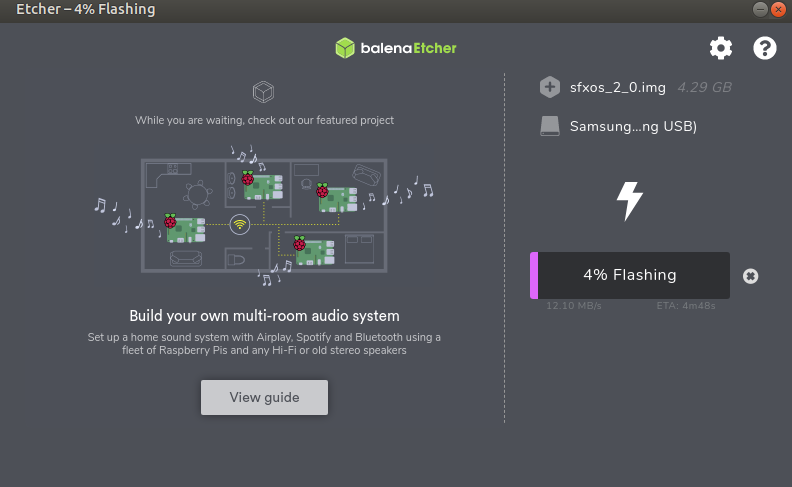
Once it is done and there it indicates no errors then, we can plug it into our mining rig and power it up.
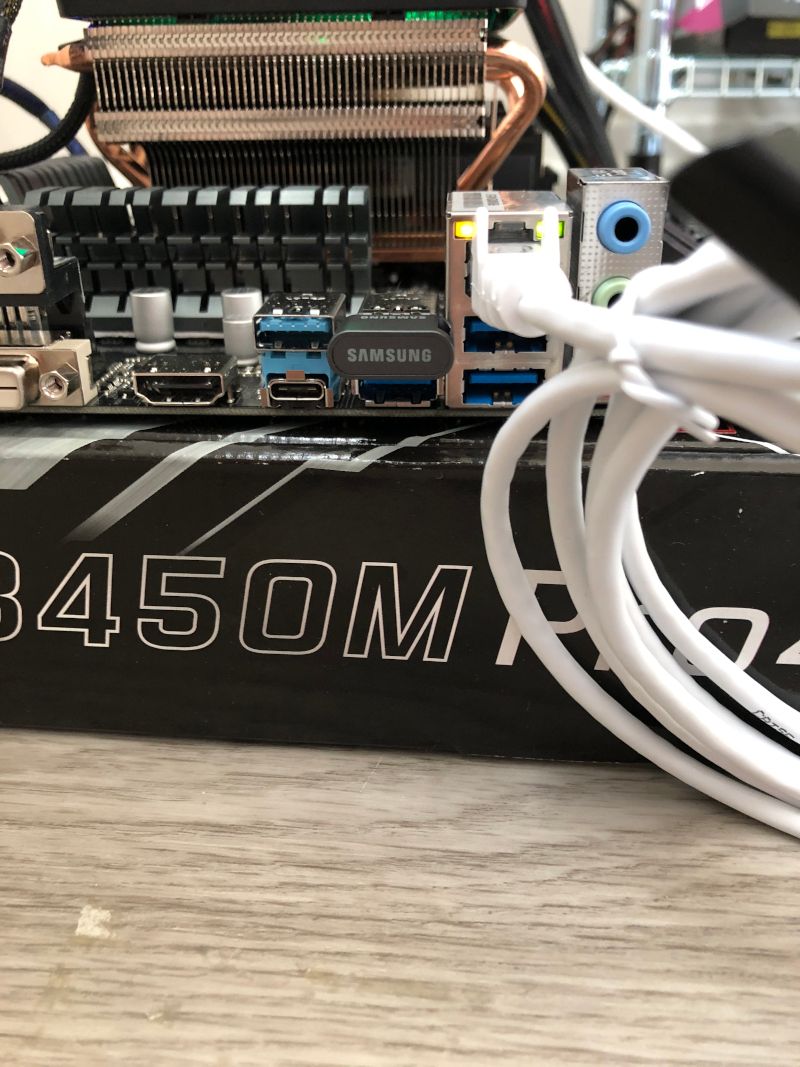
Now that we have SFXOS loaded up on our USB drive we can go to our mining rig, plug in the USB drive and turn the rig on.
Be sure to plug it into one of the blue USB ports.
Next we need to power up the mining rig.
We can do this by using a screw driver of any kind to complete the circuit on the power button connectors on the motherboard:
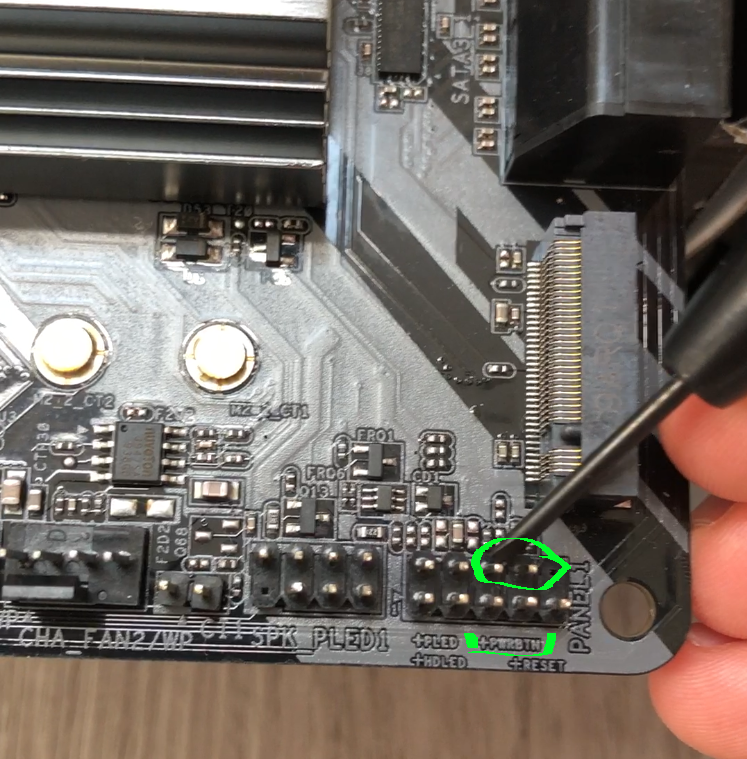
The two pins corresponding to +PWRBTN you can see in the green circle the two pins on the B450 Pro4 that when combined with a metal will power up the rig. This is a similar technique on most motherboards you may find.
Here is a video of how to accomplish the power up with a screw driver.
The alternative is to use a power connector (ATX power connector) where you can plug in a power button on those two pins and click a button. I used a power button I took off of an old computer case. That video demo is found below:
Now that we have our mining rig powered up and plugged into the router we can configure it to start mining to our own address.
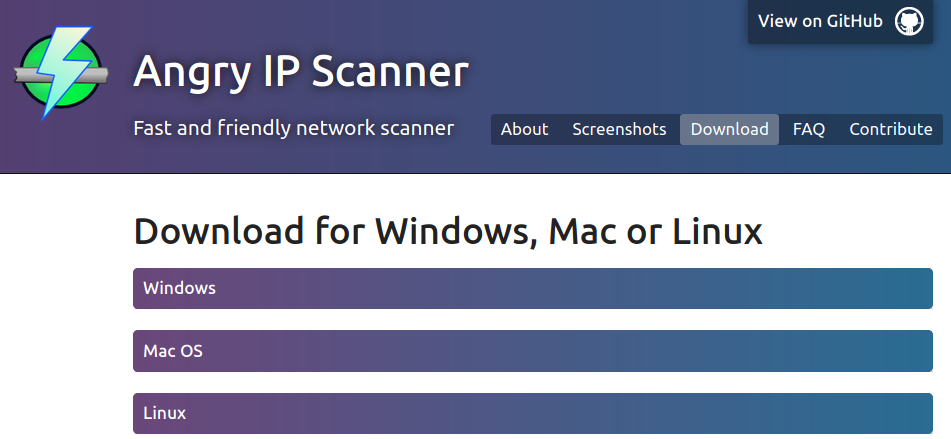
At this time we need to download and install the IP Scanner: https://angryip.org/download
Despite the funny name this software is free and open source and will help us find our mining rig on the network so we do not have to plug in any monitor or keyboard to configure the mining rig.
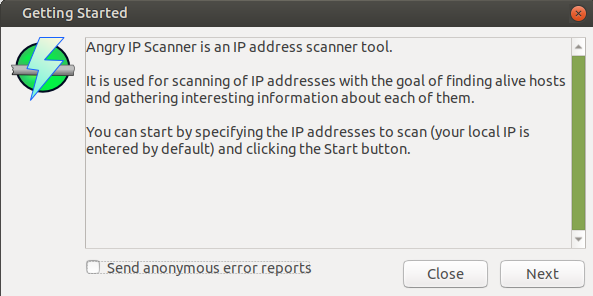
Once we have the IP Scanner installed
We can untick the sending of reports, close/read through the tips dialog box, and start looking for our mining rig.
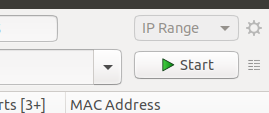
And now simply hit the Start button
It will finish with a sign like this one:
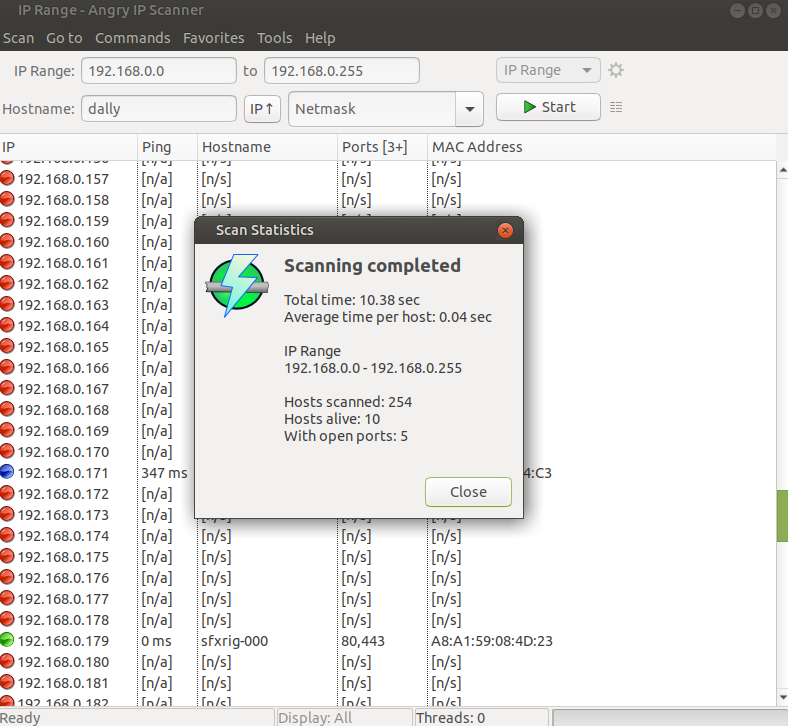
You can hit the Ping column to sort to show ontop the active machines on the network:
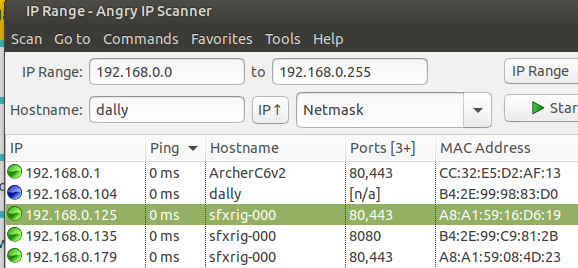
We want to look for the IP address where Hostname is sfxrig-000
In this screenshot you can see that we have sfxrig-000 for 3 different rigs since there are three operating on this network.
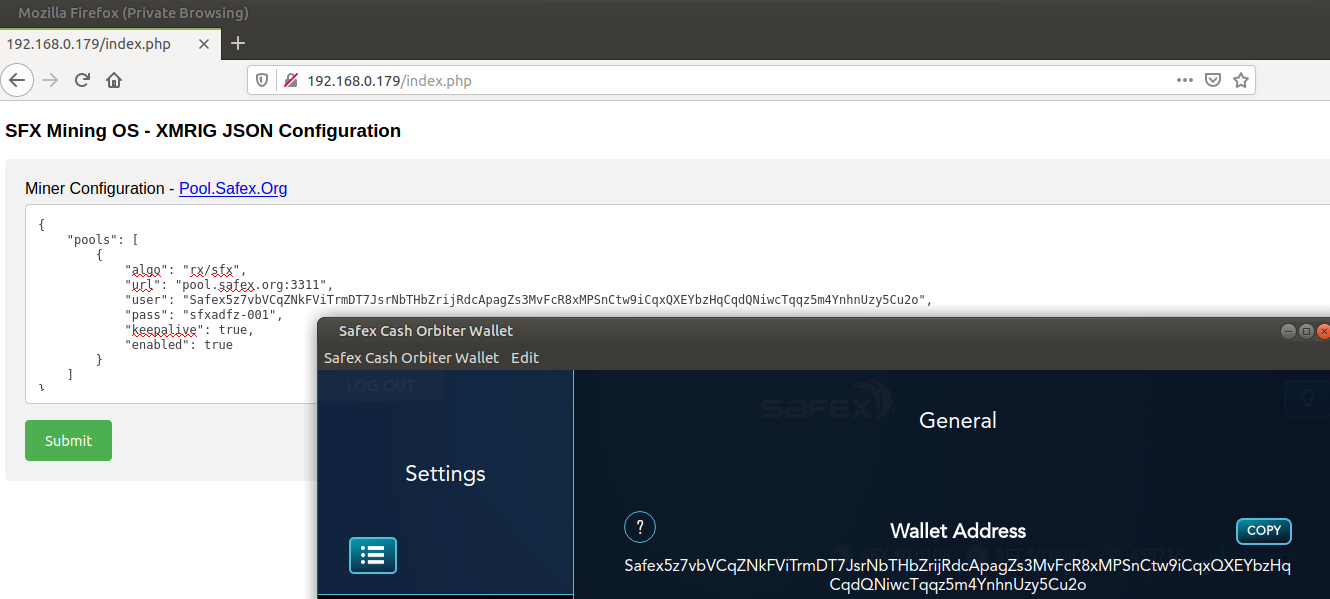
We will open the internet browser: Firefox/Chrome which ever you prefer and type in the IP address in the address field like navigating to a website:
In this case it is 192.168.0.179
A Login prompt will show up.
The default password to access the configuration is sfxrig

Once we are inside we replace the "user": "Safex5..."
We replace the value where it is written "Safex5..." with our own address found in our wallet:
Then we hit submit and our SFX mining rig is reconfigured to start mining to our wallet.
To confirm this we can go to https://pool.safex.org/#worker_stats
We can paste in our wallet address and look up the performance of our safex cash miners:
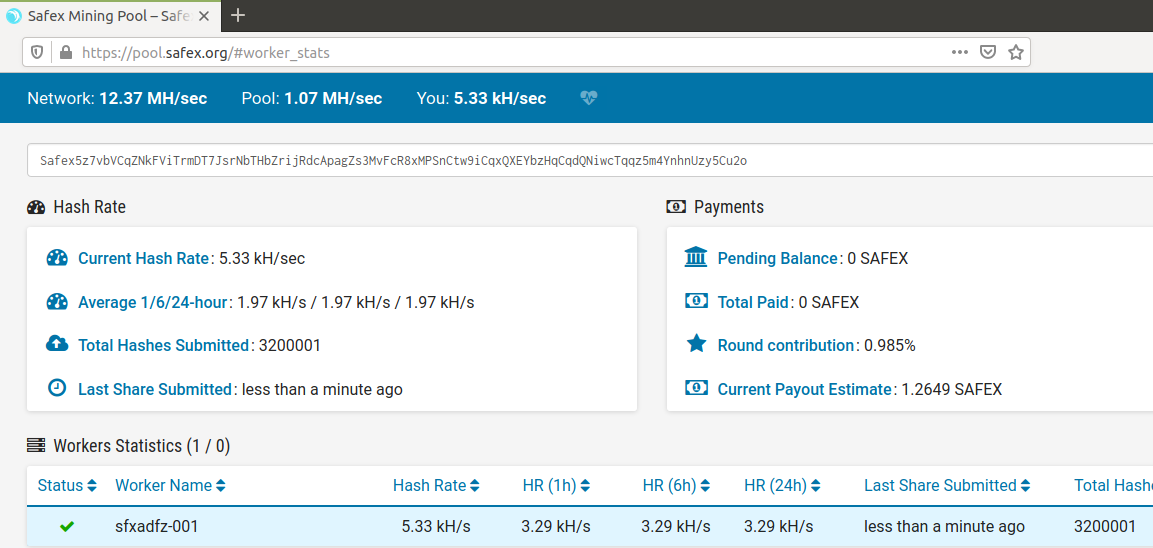
After an hour of mining the statistics caught up with reality and this is a view of the performance one hour later:
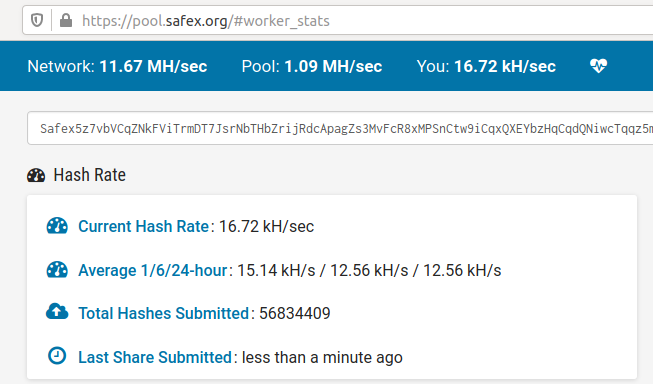
The typical mining rate should be between 11.5kH/s (11,500 hashes per second) - 13.0 kH/s
Phew! We made it! Now it should run stable collecting Safex Cash cryptocurrency directly to your wallet on a regular basis!
You can drop a line for support on the Safex forum: https://safe.exchange/t/sfxos-safex-cash-mining-operating-system-support/7010