Mining SFX Using xmrig on a Linux
Learn how to mine Safex Cash using xmrig on a Linux.

To start mining (Safex Cash) SFX and supporting the network on your home PC, you need to meet some minimum requirements. If your computer was made after 2011, then it should be able to mine SFX in some capacity. Newer AMD Ryzen CPUs (eg. 3900X) are more efficient, which means they generate higher hashrates for the amount of power they use, and thus will give better returns.
What you need:
- Dual-core CPU with at least 2Mb of L3 cache
- At least 2.5Gb of free RAM
- Windows 7 (64-bit) or above
For those curious, the FAQ on the RandomX Github page gives a more detailed set of requirements - link.
1. Preparing for Installation
Begin by creating a new xmrig folder in whatever location you prefer.
Download the latest version of xmrig from here and save it to the xmrig folder you created earlier.
For those who desire peace of mind in the veracity of the downloaded file, you can also compare the checksum of your downloaded archive file to the corresponding checksum provided on the xmrig release page. If you aren’t familiar with the process, please read this.
2. Installation and Setup
1) Navigate to your xmrig folder.
2) Right click on the downloaded archive file and select extract here. This will create a new folder for the specific release version you downloaded, and if you navigate into the new extracted folder, you’ll discover a handful of files.
3) Two of those files are important:
- xmrig (Application)
- config (JSON file)
4. Prepare the xmrig application file
1) Right click on the xmrig file and click on Properties.
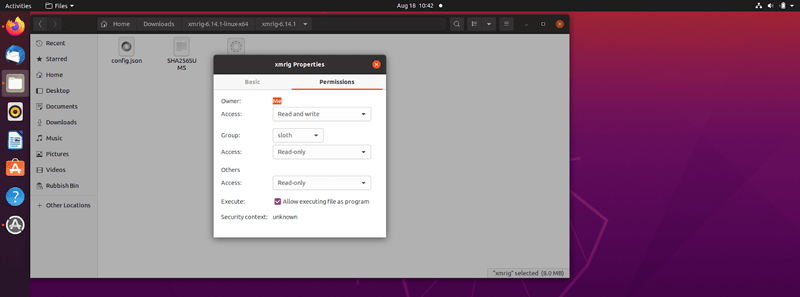
2) Ensure the Execute checkbox is tick in Permissions.
3) Modify the config.json file
4) Right click on the config file and click on edit. Scroll down until you find the “pools” section.
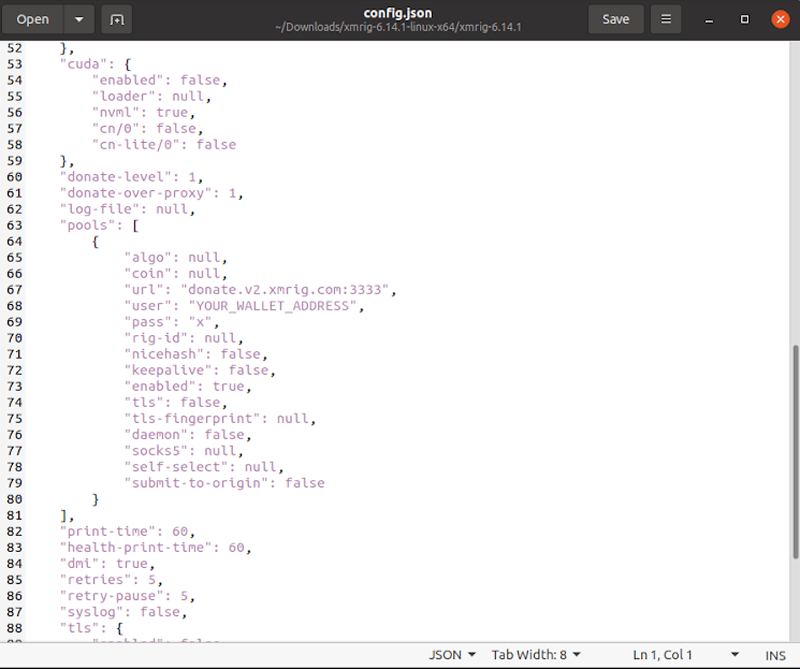
Using your preferred mining pool, make the configuration changes as recommended by the pool. For this example, we will use Safex.org pool, which is run by the Safex Foundation, and has a 0% pool fee.
5) Makes changes to the nominated config lines:
"algo": "rx/sfx",
"url": "pool.safex.org:3311",
"user": "Safex5zWHPNQSpWkxtwA5gFvkb7waYfj2LRJWLHo6jSkXpzJ5WUfgBfJWwz7VFQG1oGsYBefCpP13UrfnpZQuM1zN69wZn7Ekbf32",
[The above should be your own safex address!]
"pass": "name_of_rig",
[replace ''name_of_rig'' with whatever name you’d like to identify your rig by]
“keepalive”: true,
6) Save your modified config by clicking the Save button.
7) Always reboot after making any such configuration changes.
4. Start Mining
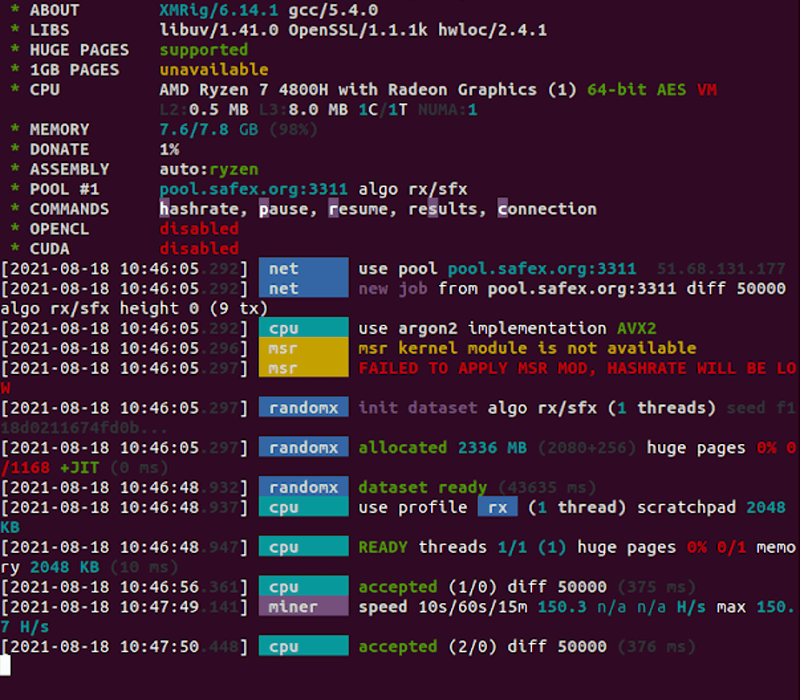
Open a Terminal window and navigate to the xmrig folder. Type: ''sudo ./xmrig'' to launch the miner.
After some initialization steps, you should start to see new job from pool.safex.org lines appear, accepted lines, and within a minute or two, your hashrate speed should display.
You can now simply leave this mining in the background, although if you use the PC for other CPU intensive purposes, you may want to stop mining at those times, simply to allow your normal PC use to be optimal.
If you leave xmrig running while using other programs, you’ll likely see a drop in hashrate whilst those other programs are being used.
Note: this Ubuntu instructional was completed using a Virtual Machine (VM) instance on the author’s laptop. Being a VM instance, the swapfile and Huge Pages were NOT configured, as VM instances don't have access to the full CPU and RAM capacity of the local machine, and you can see that difference in the hashrate achieved for this example, versus the hashrate for the laptop itself under normal circumstances.
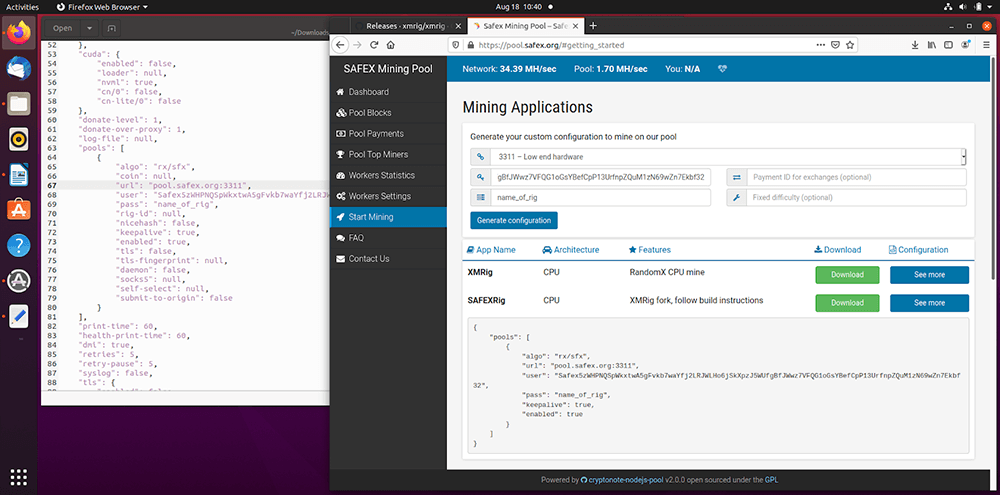
Configuring Mining Pool Payouts
Now that you’re successfully mining, you’ll want to be able to check-in on your mining progress from time to time, and set the value for when the pool pays your accrued SFX into your wallet address.
If you used the safex.org pool in your config.json settings, then head over to Safex Pool. Otherwise, go to the website of whichever pool you used.
The Dashboard appears with a pile of statistics. Feel free to check things out at your leisure. For now, you want to check your personal mining statistics, and also configure your payout amount.
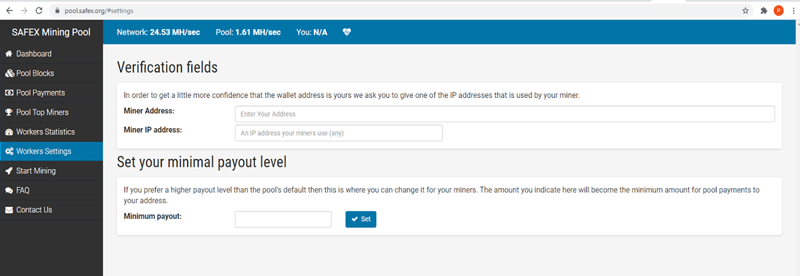
To see your current statistics, click on Worker Statistics in the left column, and then paste your safex wallet address into the field where it says Enter your address, then click the Lookup button. (See previous image, above)
Here, you see all your personal mining information. If you’re mining with multiple devices, and gave each device a unique pass name in their respective config files, then they’ll each be listed separately in the Workers Statistics section.
The default payout figure for the safex.org pool is set at 15. If you’re only mining with a low-end PC, then that may be a suitable payout figure. What you don't want to do, is leave the payout figure too low and end uo with hundreds (or potentially thousands) of tiny payouts in your wallet, as this will subsequently lead to higher transaction fees when you go to spend your SFX in the future.
Transaction fees are higher when you need to include multiple small outputs, as the kb data is higher. In such instances, if using the mined SFX for a high value Marketplace Purchase, you may first need to amalgamate the small payout outputs back into your wallet as larger outputs via a simple Send SFX transaction first.
Once you’ve been mining for 24 hours, you’ll have an idea of what your current daily mining returns are. This value fluctuates as the total mining hashrate fluctuates on the network.
To change your payout figure, click on Worker Settings in the left column.
Further reading about Safex Mining Pools can be found here. Find more information about mining here.